Thursday, October 29, 2020

Sweet Potato Gnocchi with Broccoli Rabe and Garlic Sage Butter Sauce

Sweet Potato Gnocchi is about to happen in your life. Get ready.

Sweet Potato Gnocchi in a bowl with a fork

This recipe was originally published back in 2016 and it always makes a delicious return to our lives every fall. This is the the gnocchi for people who think they can’t make gnocchi. Simple, comforting, and just so, so good.


I started a dinner club a few years ago (gah! seriously feels like yesterday 👵🏼) and for this dinner club, every month, 6 friends + my happy self get together for a night of wine, appetizers, and amazing homemade food. We’re talking the type of food that we all maybe wouldn’t normally make for our families or for our regular weeknight selves, but that can be fully embraced and appreciated when we are with our foodie friends.

Example: gnocchi.

About a year ago, I learned the basics of making gnocchi at a blog related event, and I came home and said: listen up, dinner club -> we need to make gnocchi together.

I am not exaggerating when I say that our gnocchi night is STILL the talk of our dinner club. It will never ever be topped, unless it’s topped by another gnocchi night. There were platters upon platters of that pillowy potato gnocchi, and simmering pots of tangy bolognese and creamy marsala mushroom and zippy pesto sauces that still live right at the surface of our food dreams. It was a girls’ night gnocchi event that bordered on otherworldly.

So. Today’s post is exciting for three reasons:

  1. Comforting, wintery, love-yourself-GNOCCHI.
  2. Superfood vegetables tasting ahhmazing (hello sweet potato and broccoli rabe).
  3. Weeknight ease.

Do you believe me? Look here. 👇🏼

Sweet Potato Gnocchi in a pan

Trust: This Is Going To Be EASY

As with most recipes that I make, I like them to be NOT OVERWHELMING.

With the fancy gnocchi night, I boiled, dried, rested, cooled, and riced the potatoes before mixing. That was a different time.

This time we are literally just baking in the microwave. Okay? Can you get on board with me here? Just bake that little sweet potater in your micro for speed and ease, mix it with the ricotta, Parm, and flour, and form into cute little sweet potato gnocchi. Boil them till they float, and voila. Gnocchi.

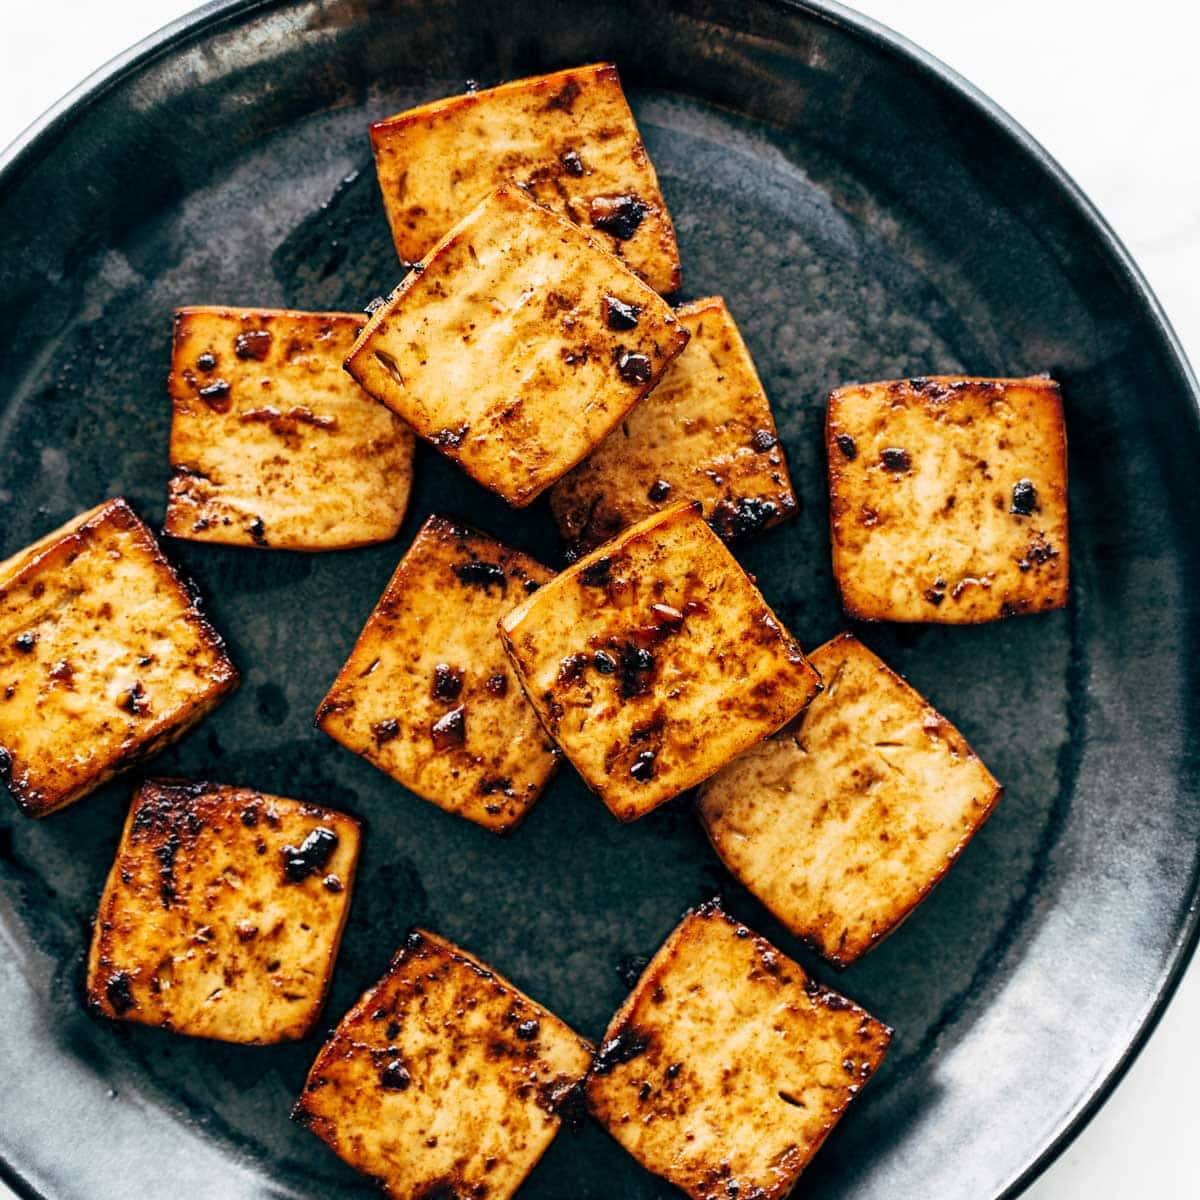
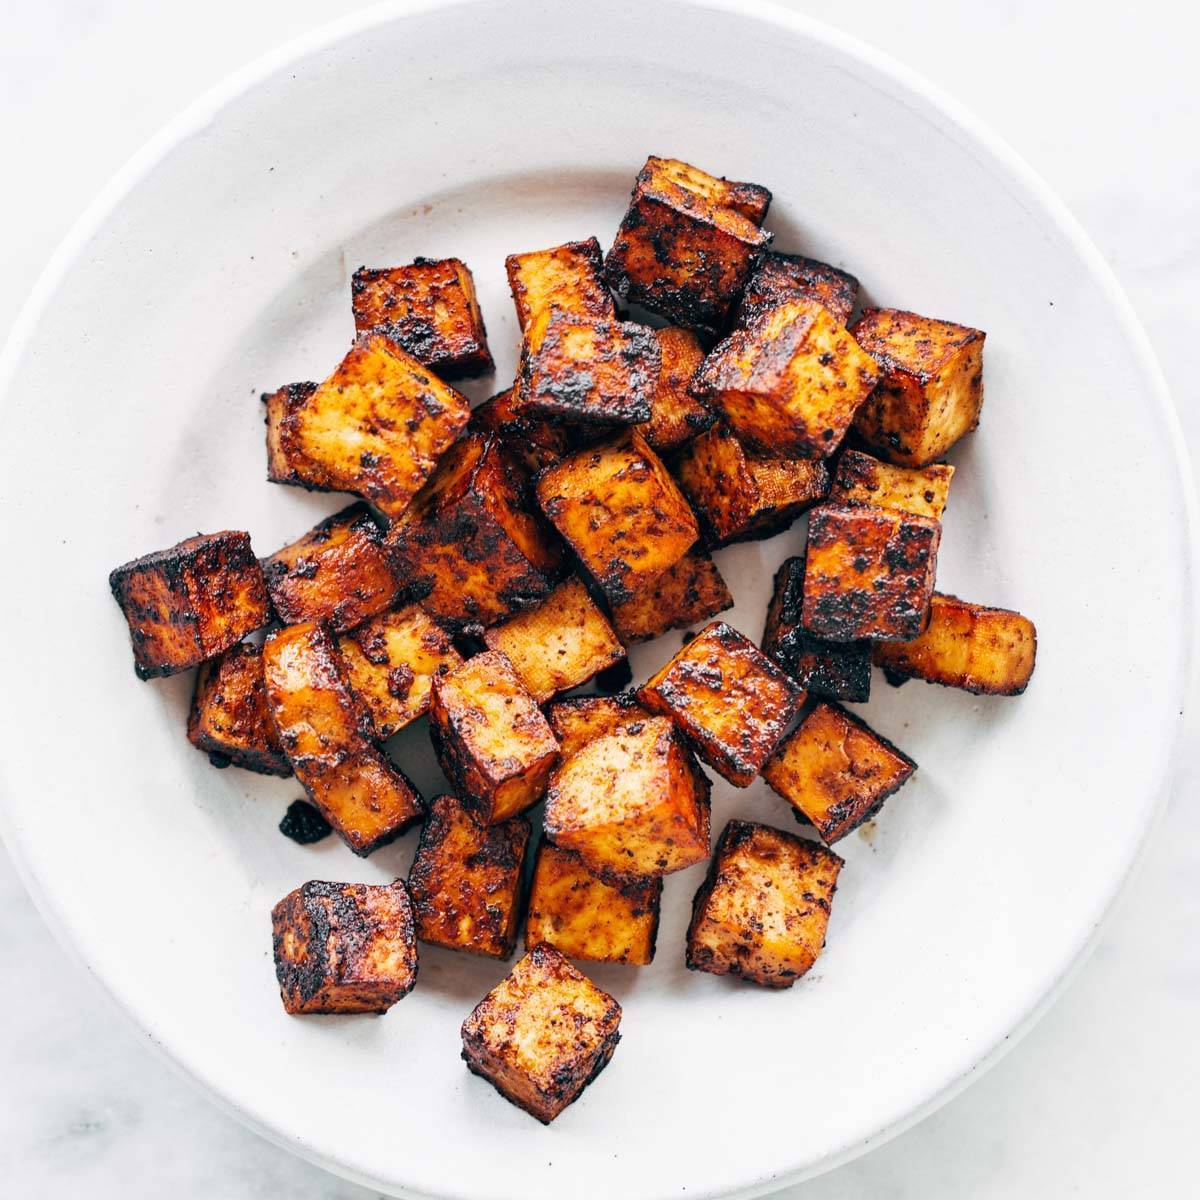
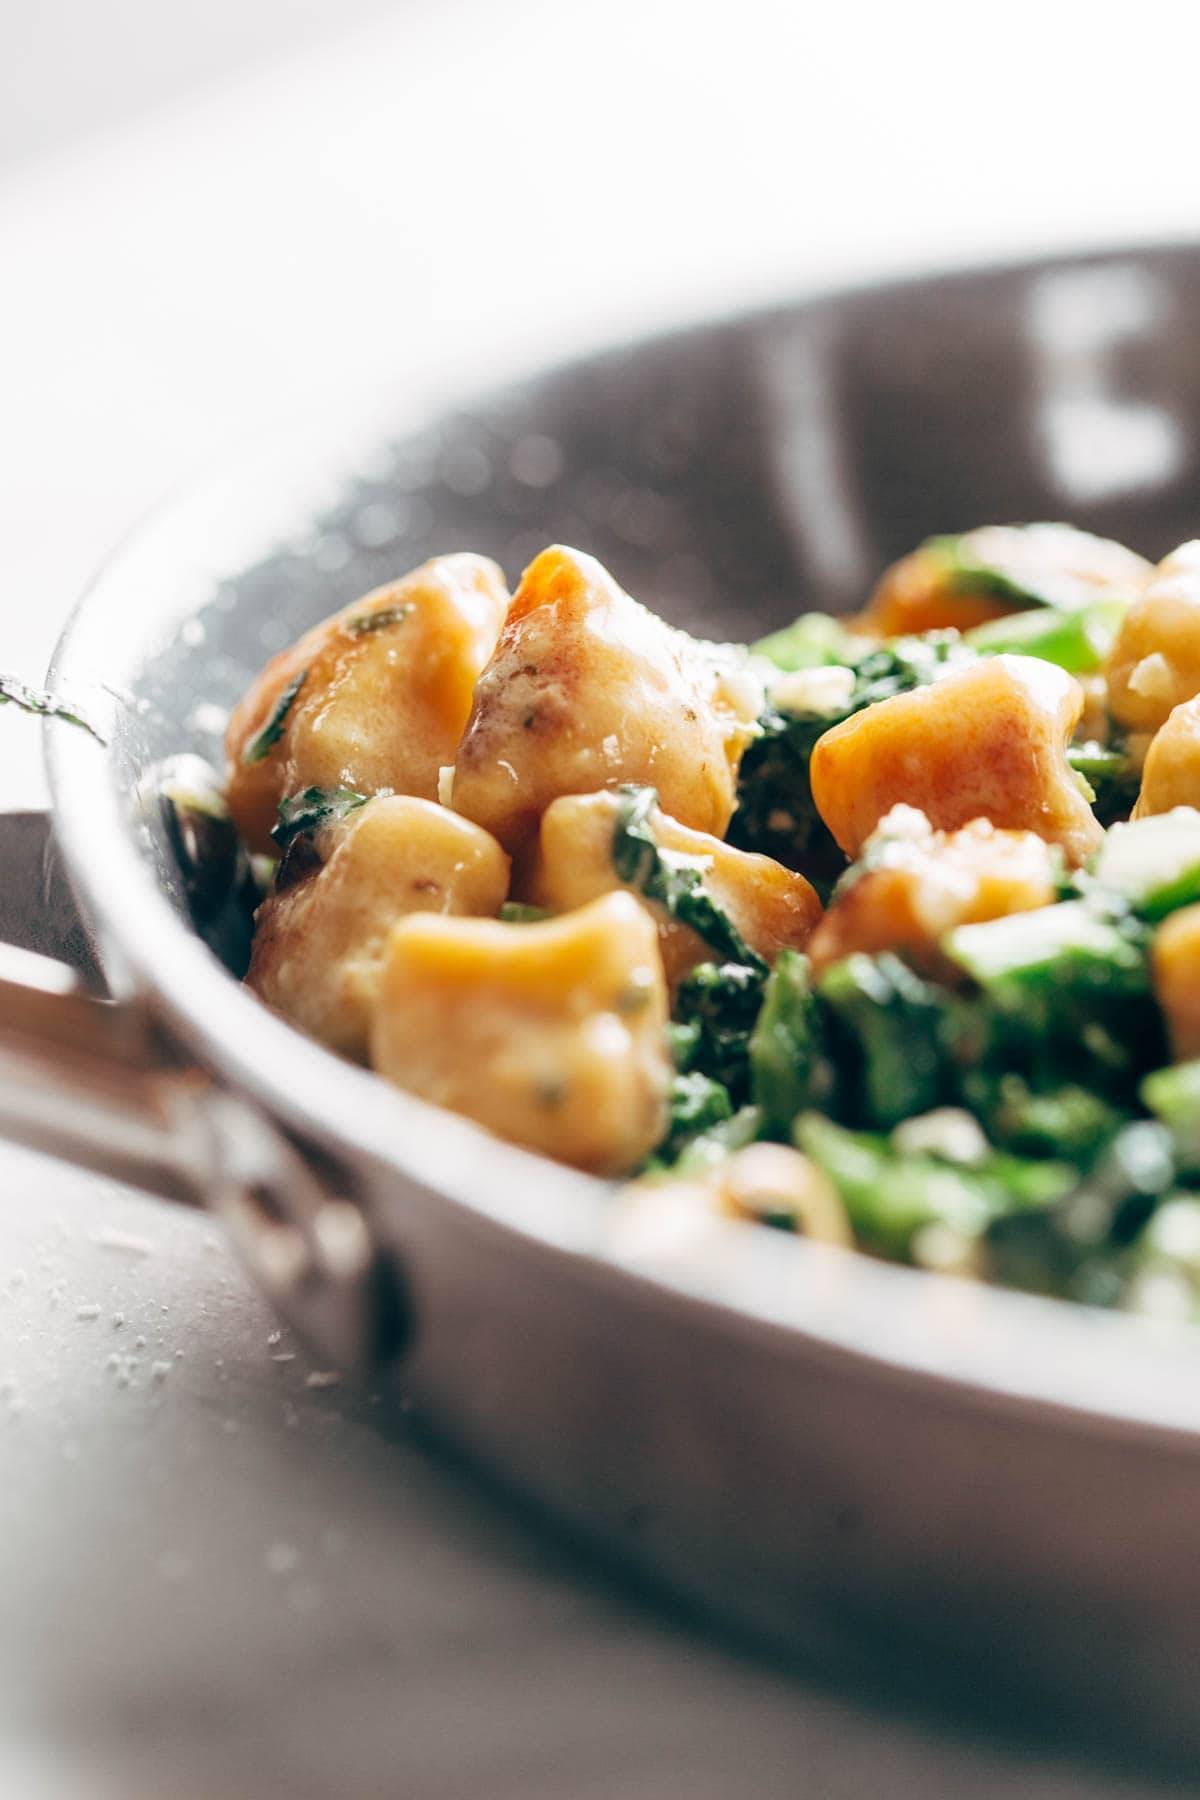
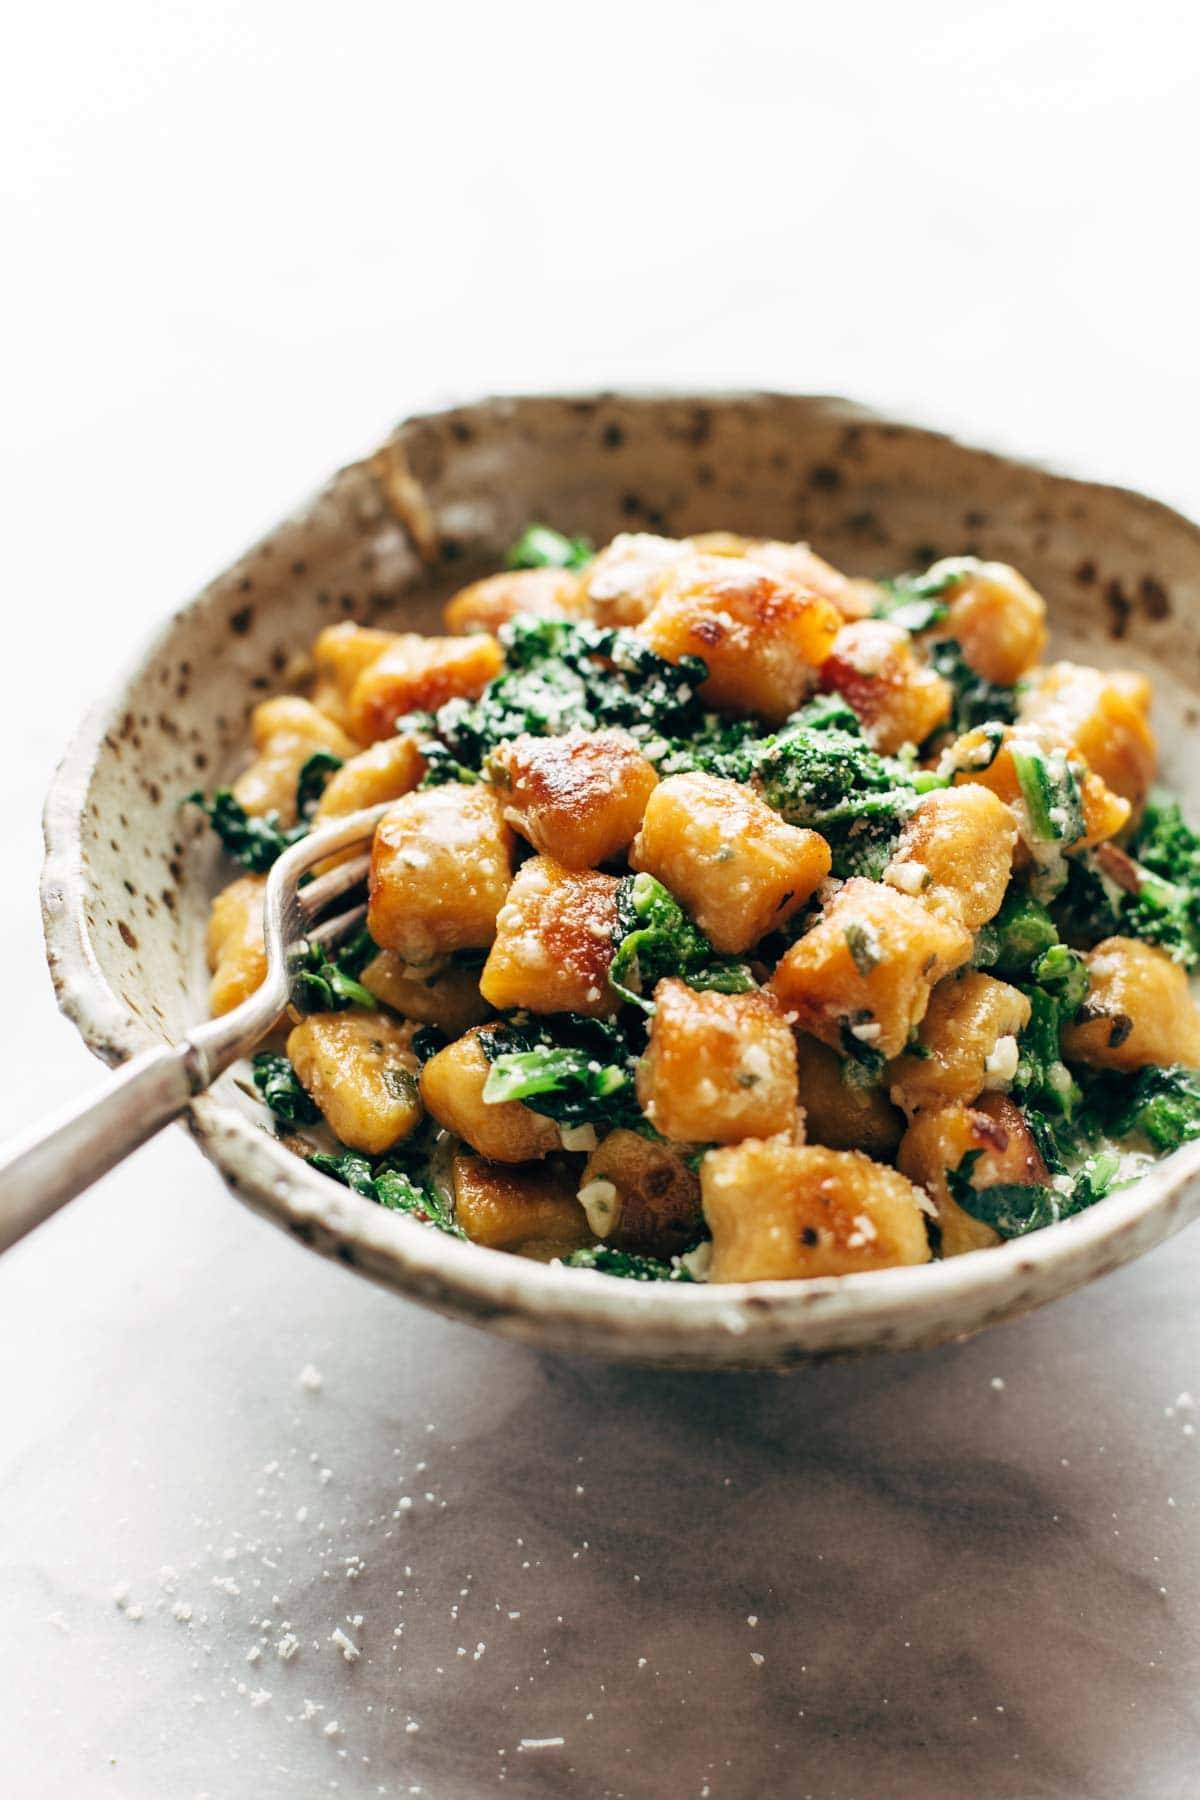
These gnocchi are sturdy enough to stand up to the sage-garlic-butter-pan-frying situation that follows, which is exactly what I wanted them to be: golden and crispy on the outside, and soft and loverly on the inside.

Sweet Potato Gnocchi
Broccoli Rabe for Sweet Potato Gnocchi

A Little Nutritional Boost

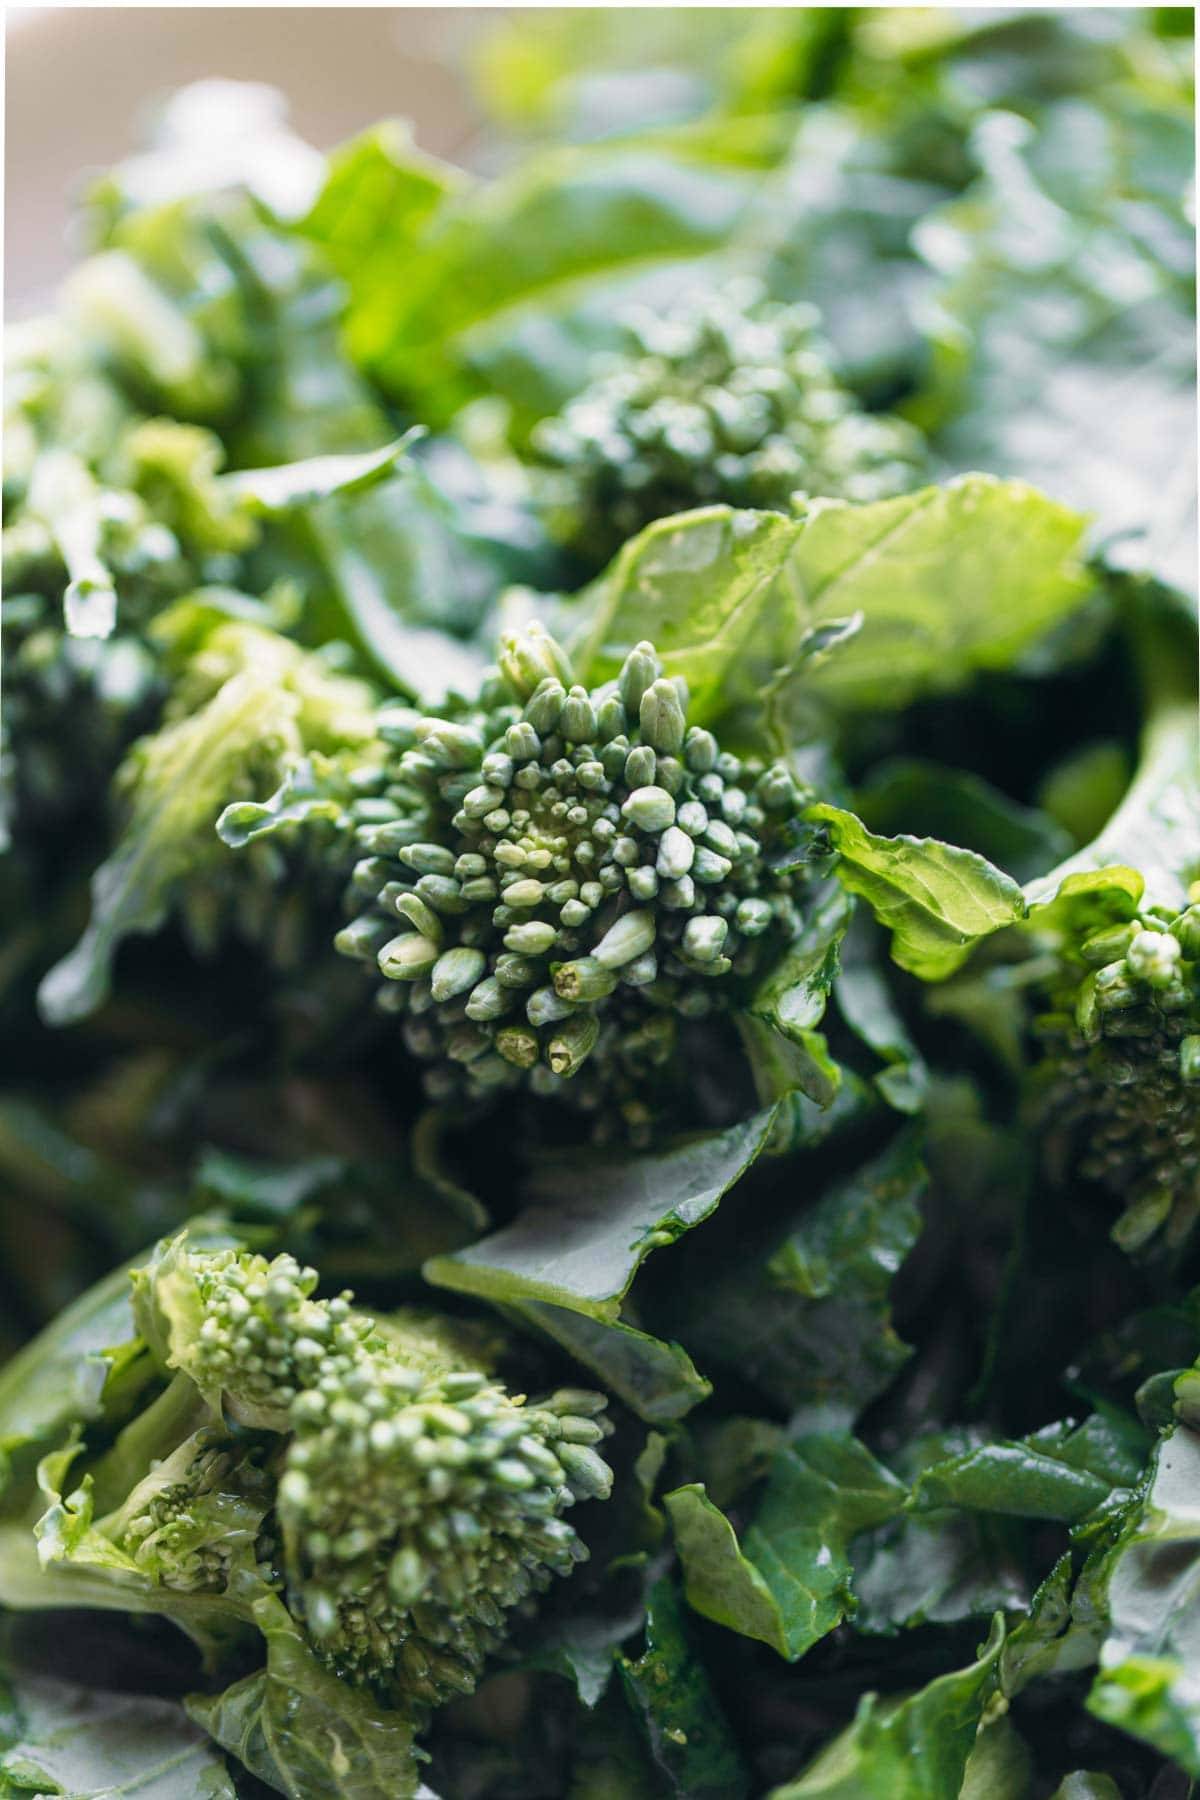
To avoid getting overly sweet (and to throw some powerhouse nutrition in the mix), we are serving this up with broccoli rabe – blanched to tender-crisp perfection before getting tossed in to the magic of that saute pan.

In addition to being a SUPER HEALTHY power ingredient, I loved using broccoli rabe with this because it was kind of like a textural cross between broccoli and spinach. You have the leaves of the broccoli rabe which cook super nicely similar to spinach, and you have the beautiful, barely-crunchy florets that are small enough not to overwhelm the dish.

Besides, the colors.

You NEED those bold colors working together in your recipe life.

If you don’t have easy access to broccoli rabe, another green veg will do here, like spinach or kale. Just throw it right on in that pan. Or, skip the veg and just enjoy that gnocchi perfection.

Sweet Potato Gnocchi in a bowl with a fork

Do we love gnocchi or do we love gnocchi?

Watch How to Make This Sweet Potato Gnocchi:

More Gnocchi Goodness:

Common Questions About This Sweet Potato Gnocchi

If I don’t like sweet potato, can I use something else?

We’d recommend pivoting to another recipe for this! Like this guide to making classic potato gnocchi, our yummy a href=”https://pinchofyum.com/pumpkin-gnocchi”>Pumpkin Gnocchi, or homemade Cauliflower Gnocchi.

Can I bake the sweet potato instead of microwaving it?

Yep! Just prick it all over with a fork, set it on a sheet pan, and bake for 45-50 minutes at 425 degrees.

Is there another sauce I can use with this gnocchi?

Sure! If you wanted to just lighten it up a bit, you could use some olive oil with the garlic and sage and create a lighter sauce without cream, but we’d recommend staying in the garlic/sage flavor profile. IT’S SO GOOD.

What can I serve with sweet potato gnocchi?

We’re serving it with broccoli rabe here, but you could sub in some spinach or kale or a favorite roasted veggie (or skip the veggies overall as we did in the video!). This is also delicious with a simple, tangy green salad.

Print
Sweet Potato Gnocchi in bowl with broccoli rabe.

Sweet Potato Gnocchi with Broccoli Rabe and Garlic Sage Butter Sauce


  • Author: Pinch of Yum
  • Prep Time: 20 mins
  • Cook Time: 20 mins
  • Total Time: 40 minutes
  • Yield: 6-8 servings

Description

Sweet Potato Gnocchi! The easiest and best way to make Sweet Potato Gnocchi! Serve it with broccoli rabe and garlic sage butter sauce for a BOMB meal.


Ingredients

Gnocchi:

  • One 1-lb sweet potato
  • 1 cup whole milk ricotta cheese
  • 1/4 cup Parmesan cheese
  • 1 1/2 teaspoons salt
  • 1 1/4 cup flour (more for dusting)

Sauce and Other Ingredients:

  • 5 cups finely chopped broccoli rabe (stems, leaves, and florets) – optional
  • 8 tablespoons butter
  • 1/3 cup heavy cream
  • 2 cloves garlic
  • 56 sage leaves
  • 1 teaspoon sea salt
  • 1/4 cup Parmesan cheese

Instructions

  1. For the gnocchi: Stick the sweet potato a few times with a fork, wrap in a damp paper towel, and microwave until soft, about 7 minutes. (You can also bake the sweet potato in the oven, which will take closer to an hour.)
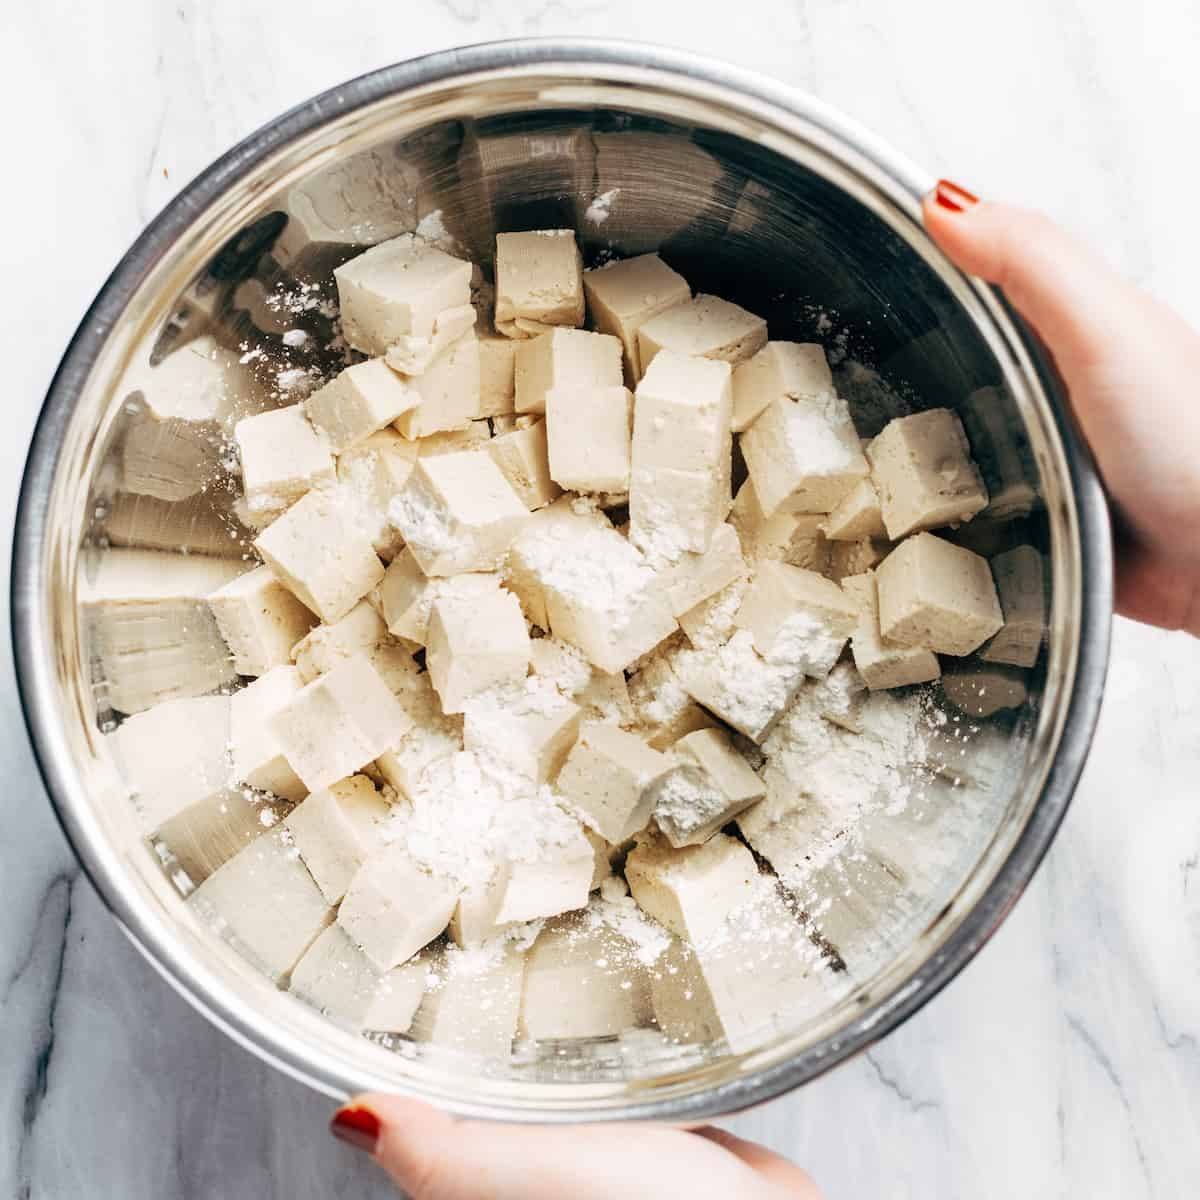
  2. Scoop the flesh of the sweet potato into a mixing bowl. Discard the skin. Mix the ricotta, parmesan, and salt until well combined and almost completely smooth. Add the flour 1/2 cup at a time, kneading very gently after each addition (don’t over knead it – you don’t want it to get tough).
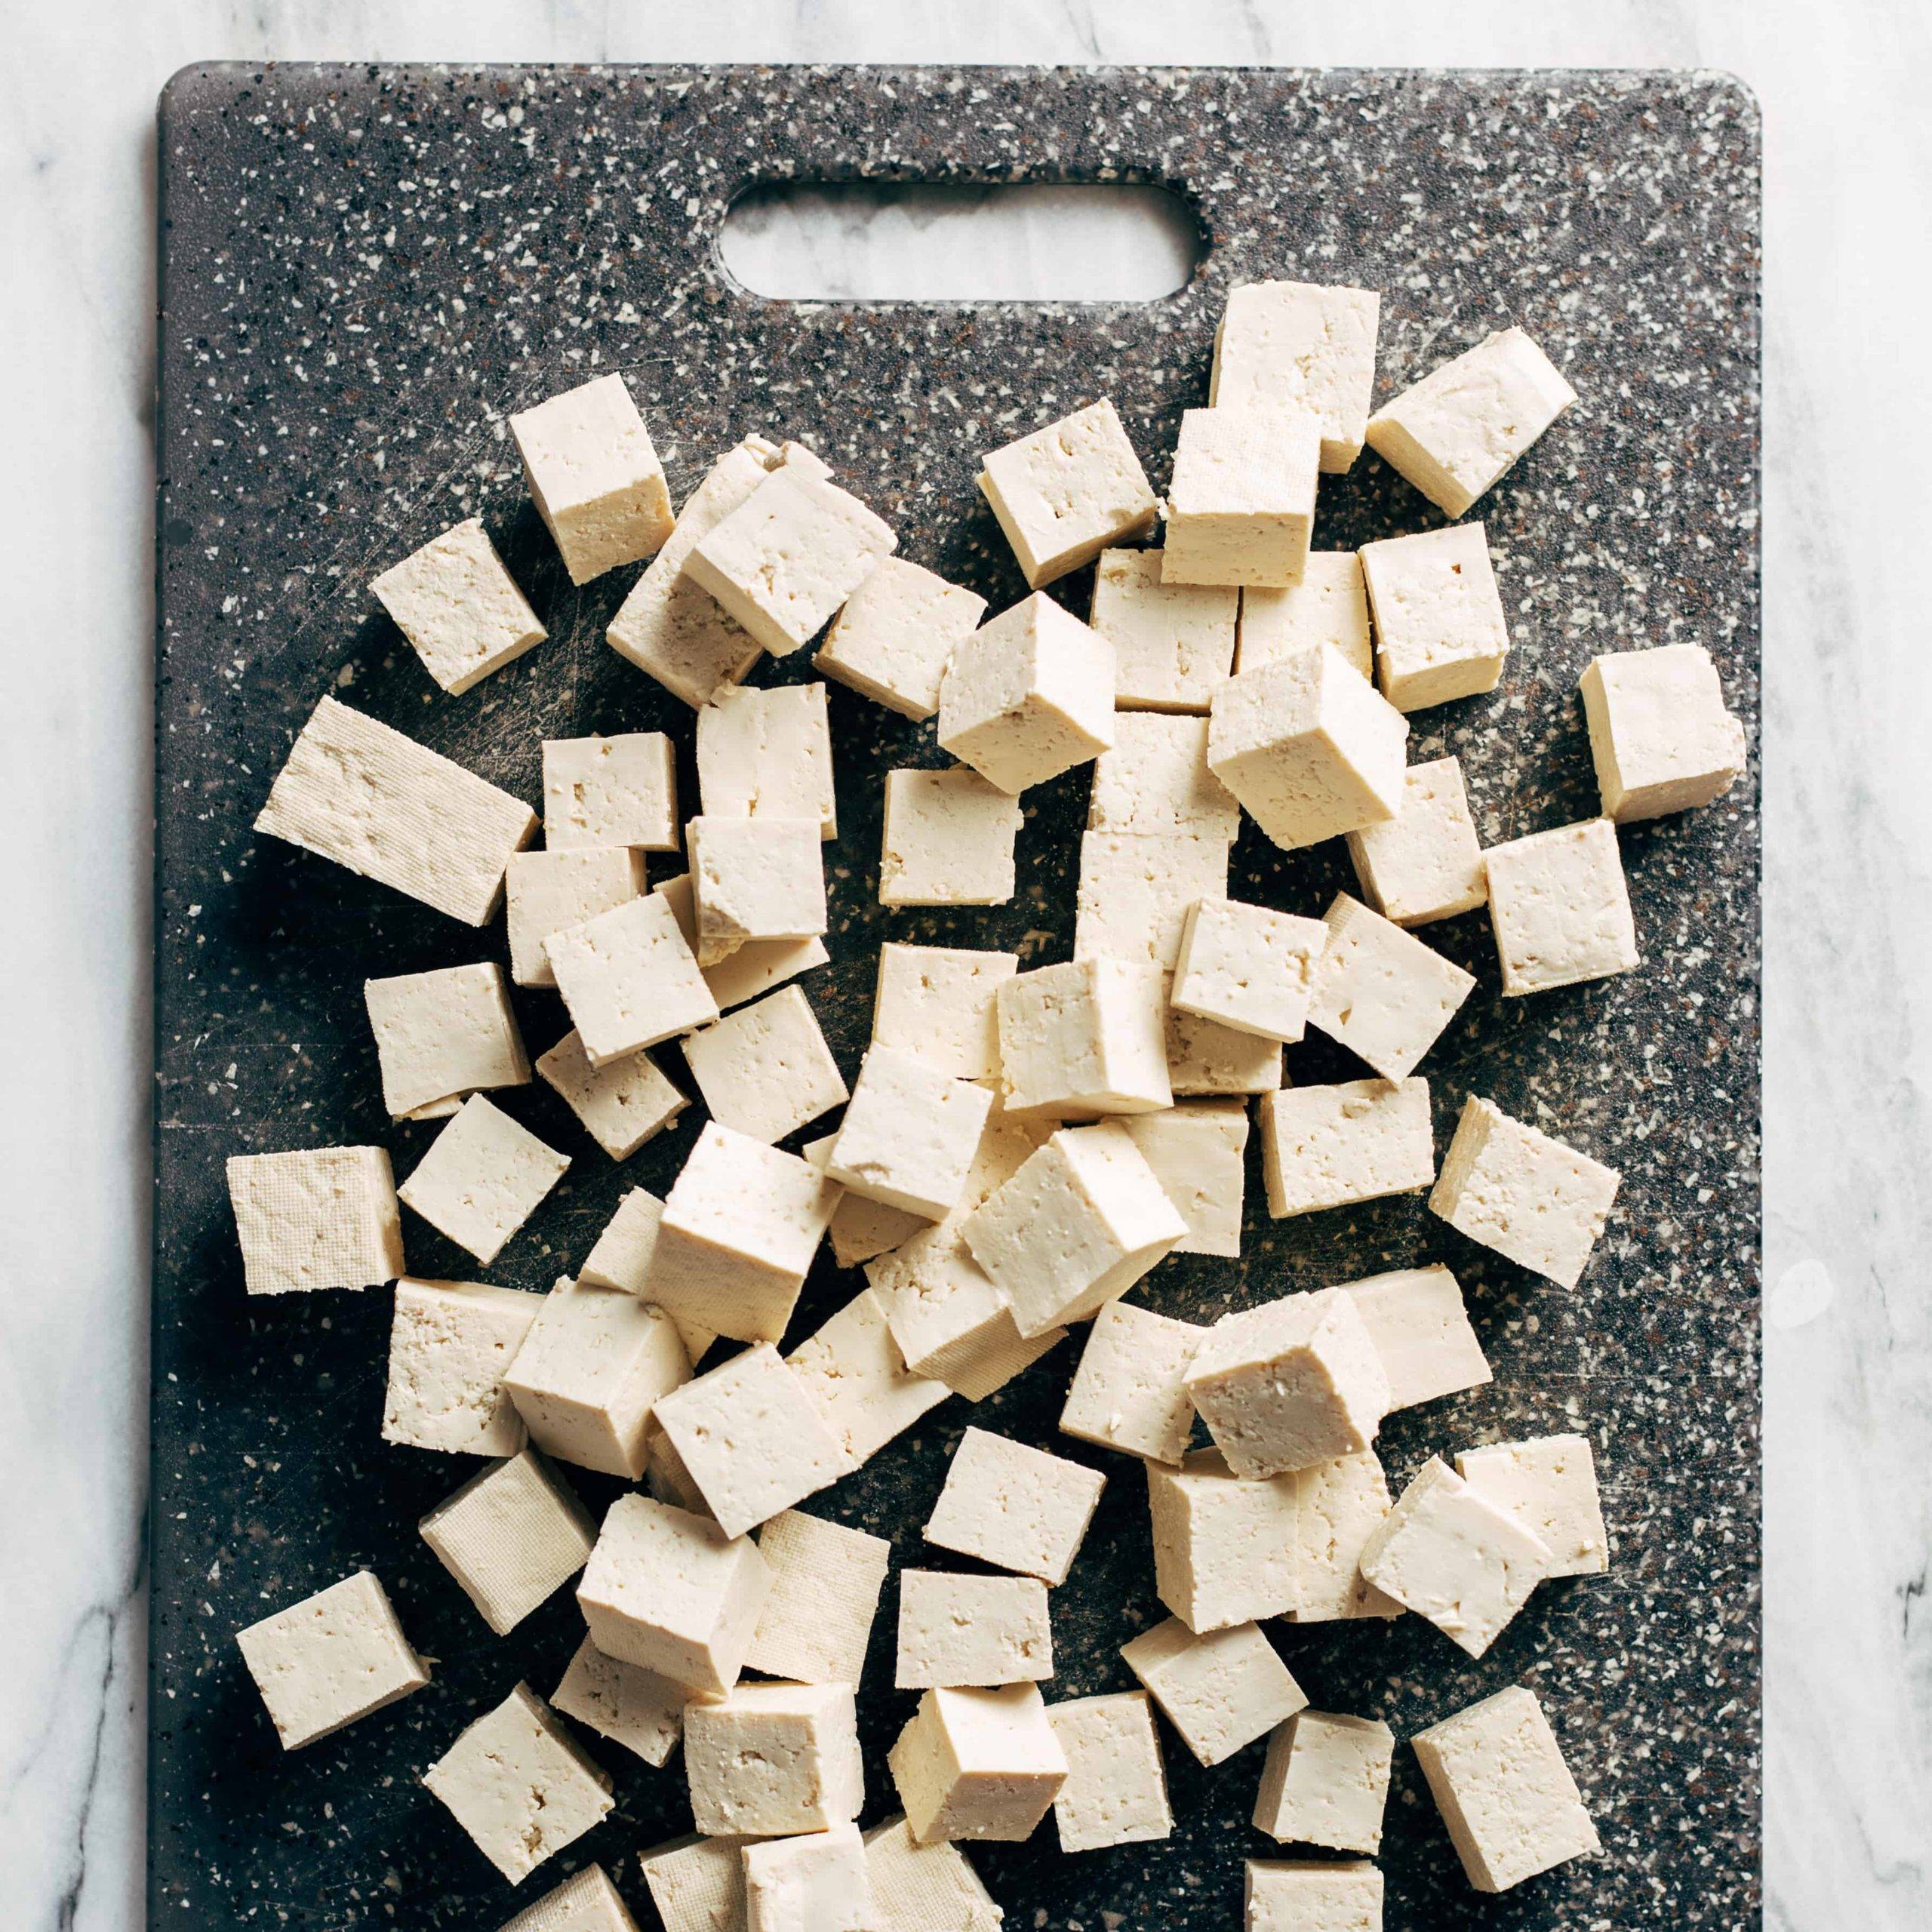
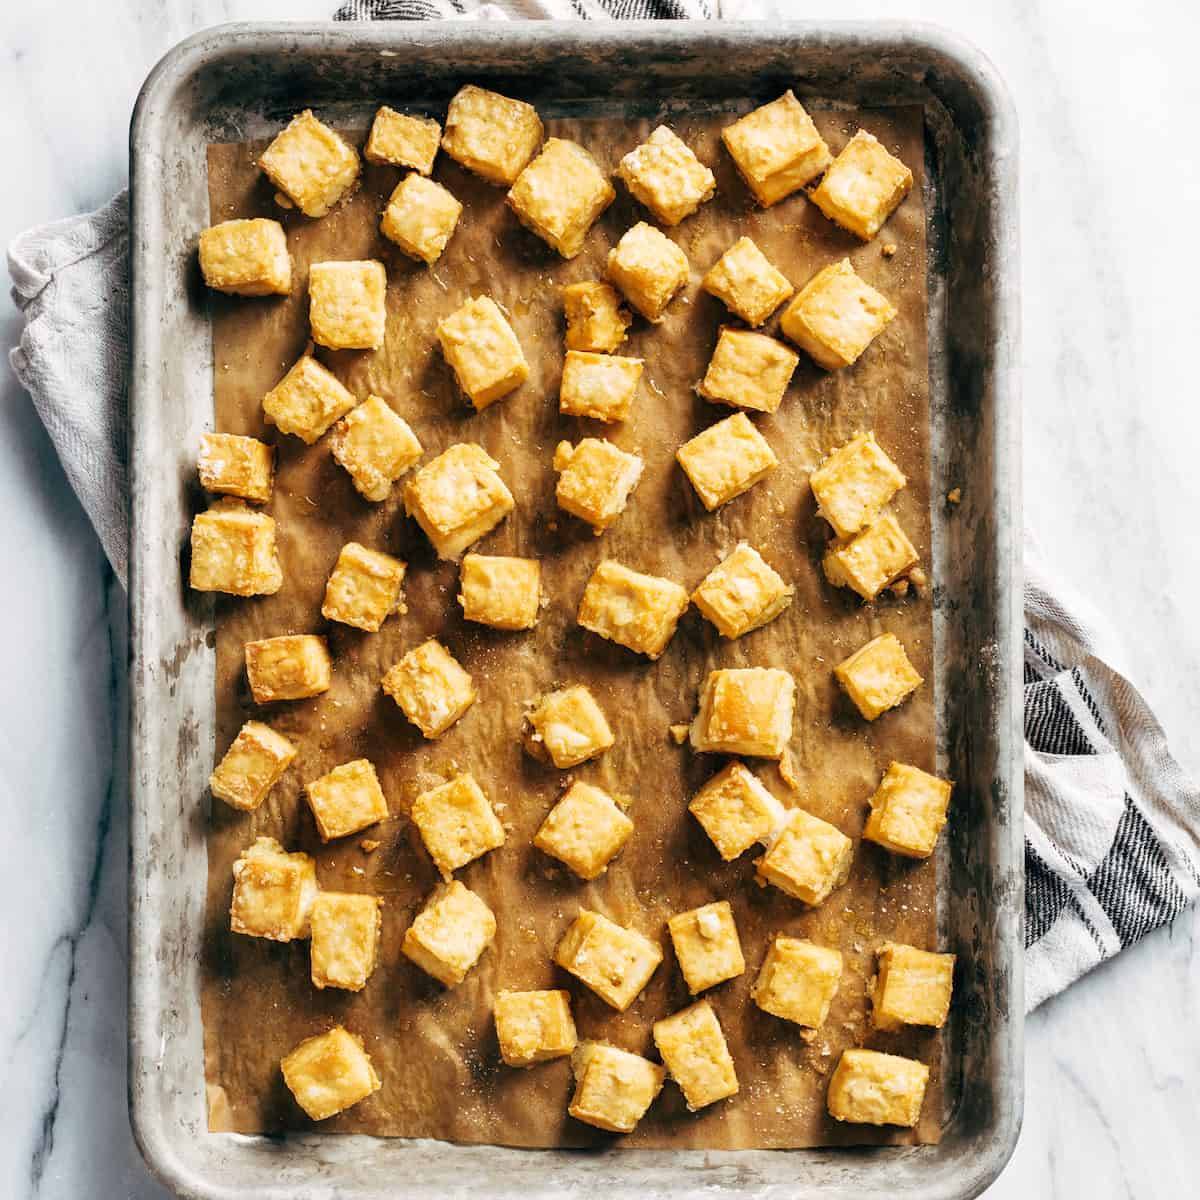
  3. Eventually, as the dough becomes easier to handle, transfer it to a clean floured work surface and form it into a loaf, about 9×5 inches. Cut a slice off of the loaf on the short side (think of it as if it were a loaf of banana bread and you were going to cut a slice to eat). Roll and stretch the slice on a floured surface until it forms a long, skinny rope-like shape. Cut the rope into 1-inch segments and transfer to a bowl: this is your gnocchi.
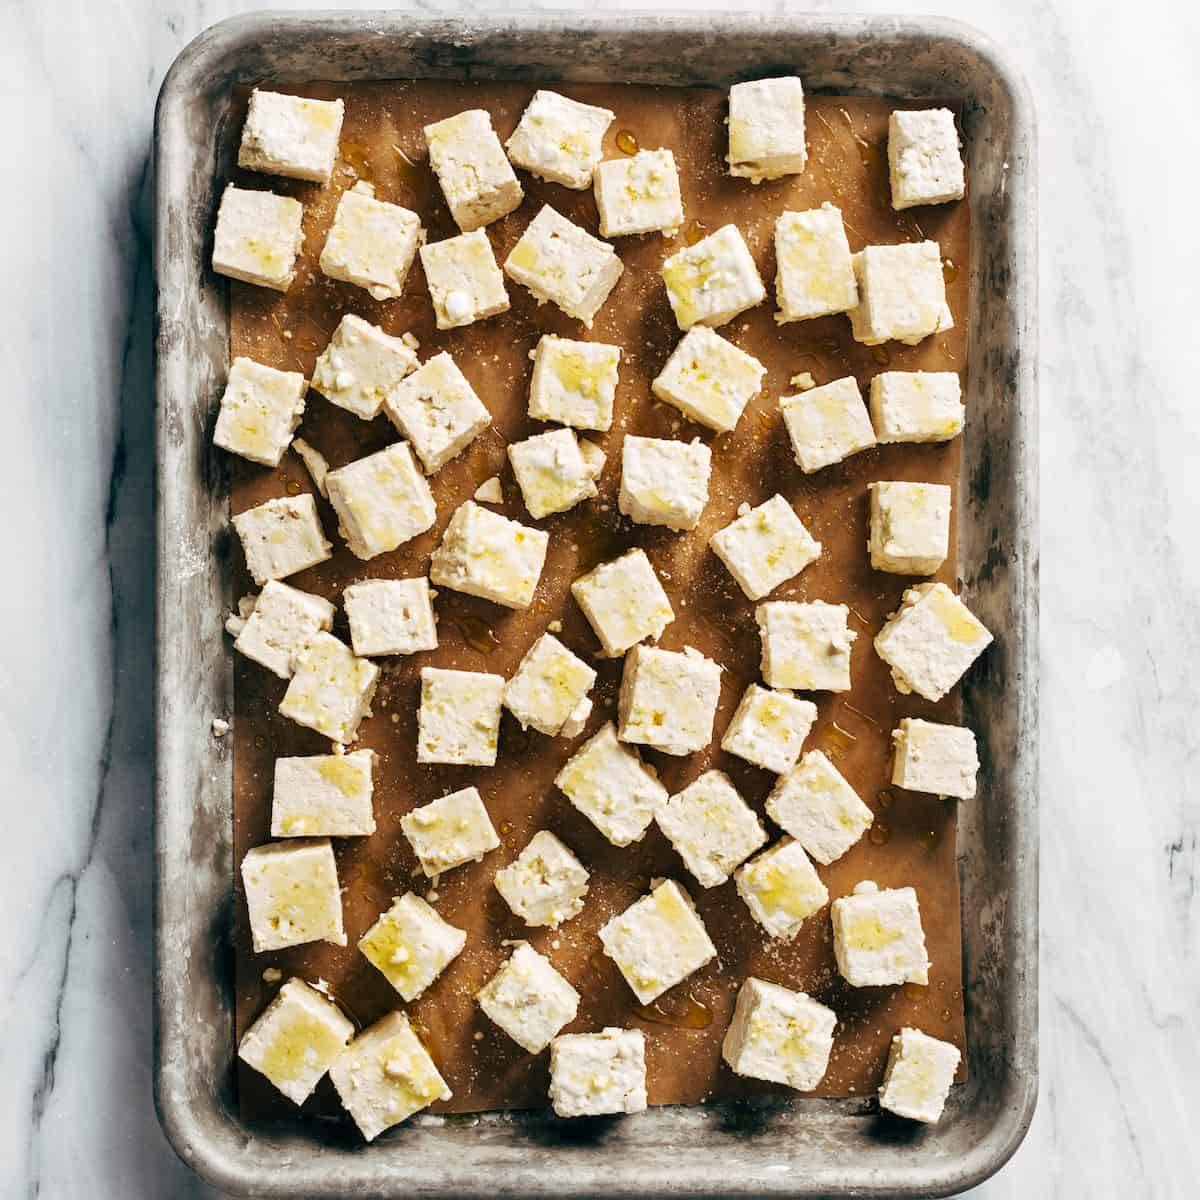
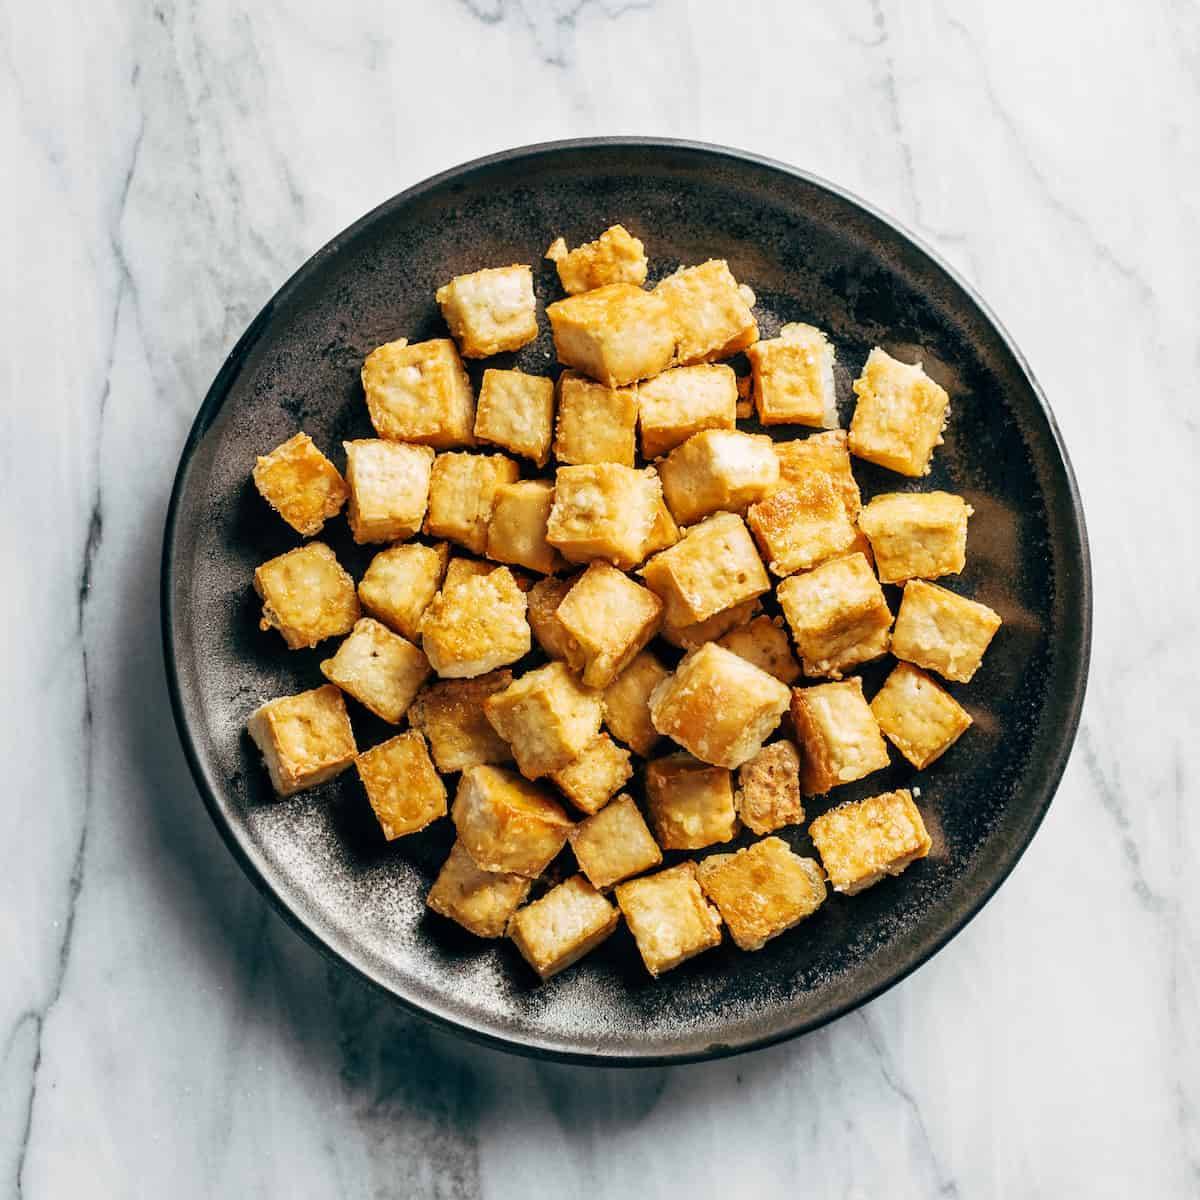
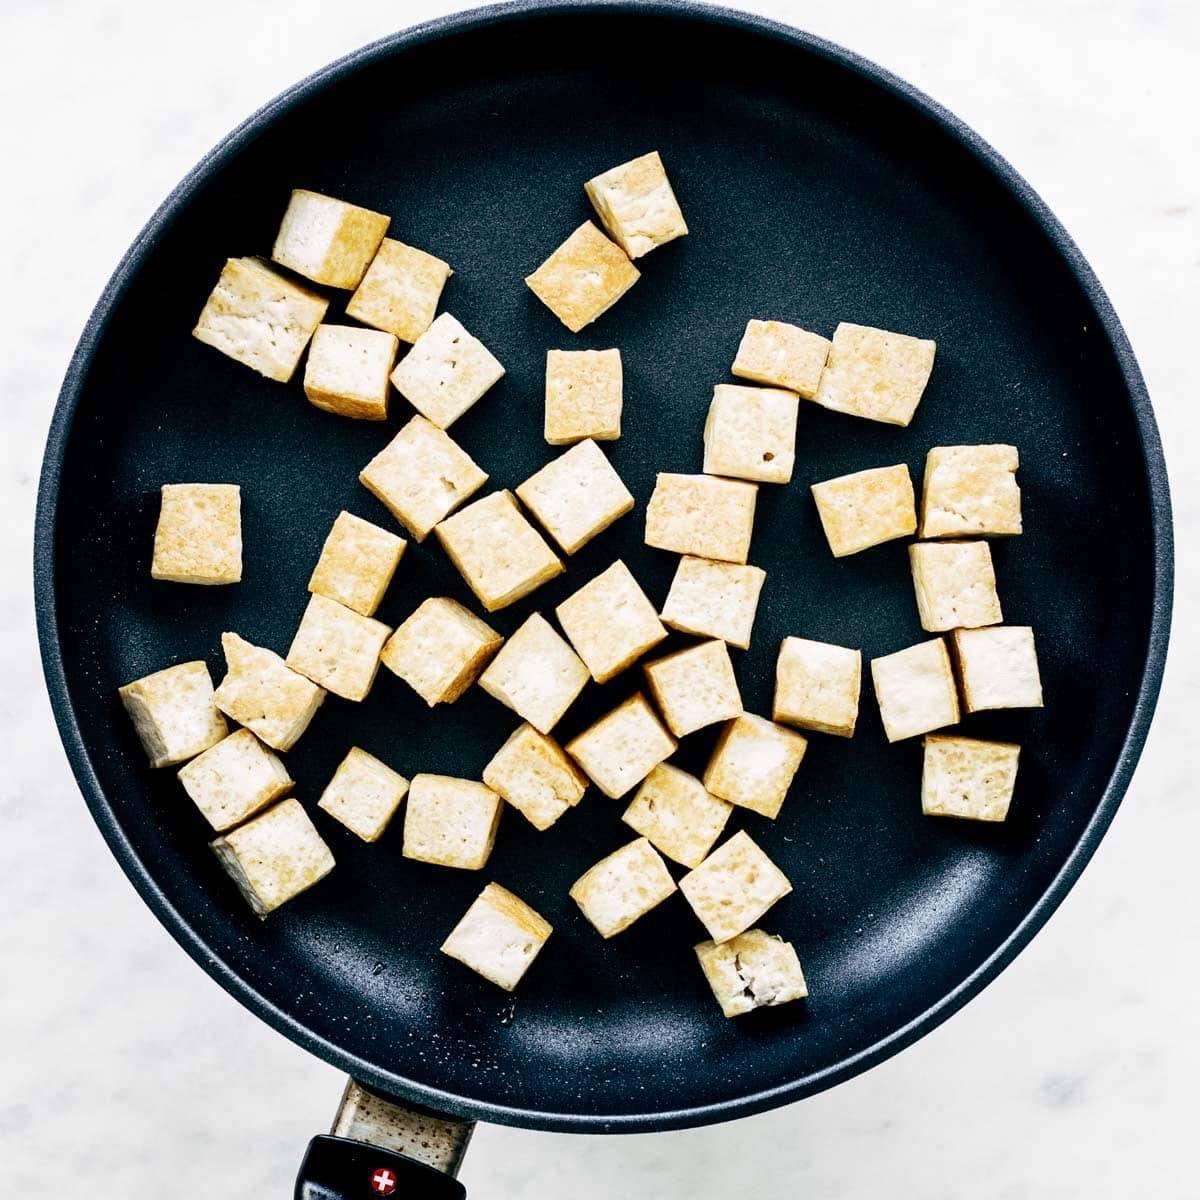
  4. Bring a large pot of water to boil, add the gnocchi, and boil until the gnocchi rise to the top of the water. Drain and toss gently with a little olive oil to prevent sticking. At this point you can make the rest of the recipe with the gnocchi, refrigerate the gnocchi to finish them later, or freeze them.
  5. For the Broccoli Rabe (optional): Bring a large pot of water to boil and prepare a bowl with ice water. Add the broccoli rabe to the boiling water and cook for 1 minute. Drain and transfer to the ice water to cool and stop the broccoli rabe from cooking further. Drain again and set aside.
  6. Putting it all together: Heat the butter in a large skillet over medium high heat until lightly bubbling and foaming. Add the gnocchi and pan-fry until golden brown on the outside (you may have to do this in batches). Once the gnocchi is done, add the broccoli rabe, garlic, sage, and salt and pan-fry for another few minutes (again, working in batches). Remove from heat and let cool for a few minutes so the butter thickens just a little. Add the cream to the pan along with the Parmesan cheese – toss gently a few times to combine (the sauce should coat the gnocchi and broccoli rabe very lightly) and serve immediately with salt, pepper, and a squeeze of lemon juice if you want.
  • Category: Dinner
  • Method: Stovetop
  • Cuisine: Italian-Inspired

Keywords: sweet potato gnocchi, gnocchi recipe, broccoli rabe, sweet potato recipe

Recipe Card powered by

The post Sweet Potato Gnocchi with Broccoli Rabe and Garlic Sage Butter Sauce appeared first on Pinch of Yum.


from Pinch of Yum https://ift.tt/2iTks91

Monday, October 26, 2020

Sarah’s White Chicken Chili

It’s pretty much subconscious at this point – when the weather turns colder, and the leaves start turning, I start craving bowl after bowl of this white chicken chili.

This is not just any white chicken chili – it is a specifically non-authentic, cheap-thrills-style white chicken chili that my friend Sarah made for us a few years ago, and it might be one of my favorite soups of all time. This chili contains several slices of thick bacon and a full block of cream cheese, and thank you for understanding why this is necessary. It is altogether creamy and smoky and cozy and spicy and just really wonderful in its big-flavorful-ness.

Sarah is the kind of person who knows the importance of chili toppings, and so naturally this white chicken chili is a welcoming canvas for chips, cheese, cilantro or green onions or, hmm, let’s see, EVERYTHING.

I can virtually guarantee that this meal is going to have your people bugging you for the recipe (I texted Sarah for the recipe after she made it for me, and my sister texted me for the recipe after I made it for her… this is just how these things work).

There is some amount of adjusting you can do here – pick the type of beans you like, pick the type of chicken (breasts or thighs) that you like, etc. – but I really do not recommend messing with the bacon or the cream cheese. Both are super essential for the creamy, smoky, Tex-Mex queso type vibe that you’re going to get with this soup.

The number of bowls of this white chicken chili that I’ve eaten on the couch, in front of the TV, loaded with chips and cheese and green onions, after a long day, really just living my best life? It’s too many to count. High and still rising.

I think we all owe Sarah a big virtual hug.

More Favorite Chili Recipes

Watch How to Make This White Chicken Chili

This recipe is inspired by the white chicken chili that my friend Sarah made for us a few years ago after our daughter was born. The recipe came to her from a husband’s friend’s co-worker, and she’s made many changes to it which she has now passed on to me. Maybe it’s just nostalgia, but I crave this hardcore every year in the fall!

Print

Sarah’s White Chicken Chili


  • Author: Lindsay
  • Prep Time: 10 minutes
  • Cook Time: 30 minutes
  • Total Time: 40 minutes
  • Yield: 6

Description

White Chicken Chili! One of my favorite soups. Creamy, smoky, cozy, and spicy with BIG flavor and simple ingredients. SO GOOD.


Ingredients

  • 45 strips of bacon
  • 12 jalapeños, ribs and seeds removed
  • half of a yellow onion
  • 3 cloves garlic
  • 2 teaspoons cumin
  • 2 teaspoons chili powder
  • 2 cups chicken broth
  • two 14-ounce cans diced tomatoes with green chiles (with juices!)
  • 1.25 pounds boneless skinless chicken thighs (you can also use chicken breasts – I like it both ways)
  • one 14-ounce can pinto beans
  • one 14-ounce can black beans
  • 8 ounces cream cheese

Instructions

  1. Food processor prep: Pulse the bacon through the food processor until it looks like a chunky paste. Remove bacon and do the same with the onion, garlic, and jalapeño.
  2. Cook bacon and veggies: Add the bacon to a large Dutch oven over medium heat. Once the bacon starts heating up, add the onion, garlic, and jalapeño mix so it all cooks together.
  3. Build the soup: Add spices, broth, and tomatoes. Bring to a simmer.
  4. Cook chicken: Add chicken. Bring to a low simmer. Cover and cook for 15 minutes, until the chicken is cooked through. Remove, cool, and shred.
  5. Tie it all up: Stir in the shredded chicken, beans, and cream cheese.  The chili will be THICK, especially as it cools. It’s almost like a dip because, yes, we are monsters. Thin it out with water as you like!
  6. Top and serve: Serve with every good thing under the sun, but mostly tortilla chips, cilantro, green onion, and cheese.

Notes

The equipment section above contains affiliate links to products we use and love!

Salt: I didn’t include a salt measurement here, or even a mention of seasoning, because I find that with both the bacon AND the chicken broth, it is plenty salty. But you do you!

Beans: This white chicken chili is also great with white beans, navy beans, and red beans. Mix and match as you like! And for a less chunky soup, use just one can of beans.

Bacon grease: The overall amount shouldn’t be overwhelming as there is no other oil in this recipe, and the bacon grease will work its way into leftovers nicely with really good flavor. That being said, I often just quickly skim the top if / when I start to see some of the grease pooling. If you want, you can drain off the extra tablespoon or so of grease after you fry the bacon with the onion, garlic, and jalapeño in step two.

  • Category: Dinner
  • Method: Stovetop
  • Cuisine: American

Keywords: white chicken chili, chicken chili, creamy chili, comfort food, fall recipe, easy chili recipe, retro chili recipe

Recipe Card powered by

The post Sarah’s White Chicken Chili appeared first on Pinch of Yum.


from Pinch of Yum https://ift.tt/3modq7K

Friday, October 23, 2020

How To Cook Tofu

How to cook tofu.

This post was originally published back in 2018, but thanks to our deep deep love for tofu, we wanted to share it again with our new favorite way to cook it (crispy baked tofu forever!) plus a new video.


Tofu! Familiar to some and bizarre to many. It can be baked, fried, sautéed, marinated, scrambled – in short: it can really do it all. And newsflash: you don’t need to be vegetarian to partake!

Tofu is high in protein and low in fat, and is a great alternative in many dishes that have meat. It can be cooked in a flash and served in SO many ways (see below!). Honestly, it’s truly just the best.

Watch All Our Favorite Ways to Cook Tofu:

In these examples, we used this sesame peanut sauce recipe.  It’s our favorite to use with tofu!

How To Bake Tofu

  • Temperature: 400°F
  • How long: 35-40 minutes
  • How to know it’s done: golden brown, slightly crispy at the edges and chewy in the center

Baked Tofu is a great way to prepare a large quantity of chewy bites of tofu that can get tossed with sauce and added to noodle bowls and or a stir fry. This method is also helpful because it frees up stove top space while preparing other elements of your recipe.

Press extra firm tofu for at least 30 minutes. Cut tofu into cubes or slabs and place in a glass dish.

Tofu in pan.

Add a sauce or marinade over the tofu. A variety of oil or soy sauce based marinades work well.

Tofu in baking pan with sauce.

Cover and allow tofu to marinate for about 30 minutes.

Tofu in baking pan with sauce.

Transfer tofu to parchment lined baking sheet. Bake at 400°F for 35-40 minutes, flipping halfway through. Marinade can be reserved and brushed onto tofu during the baking process for extra flavor.

Marinated tofu on baking sheet.

Baked Tofu can be served as a main dish or added to noodle bowls, rice bowls, or salads.

Baked tofu on a plate.

How to Bake Crispy Tofu

  • Temperature: 425°F
  • How long: 25 minutes
  • How to know it’s done: golden brown, very crispy at the edges ,and chewy in the center

If you want to stick with baking but are looking for a little/a lot more crispiness, this method will change your tofu life. If you try just one method, this is hands-down our favorite way to do it.

Press extra firm tofu for at least 30 minutes. Cut tofu into cubes.

Cubed tofu on a cutting board.

Place those cubes in a bowl, and toss gently with 1-2 tablespoons of cornstarch.

Cubed tofu in a bowl with cornstarch.

Arrange tofu on a parchment-lined baking sheet and drizzle with some olive oil and salt.

Tofu spread on a baking sheet before baking.

Bake at 425 degrees for 25 minutes, or until as crispy as you’d like.

Crispy tofu on a baking sheet after baking.

Serve in your favorite bowl or stir fry, or toss in a sauce and eat as an appetizer!

Crispy tofu in a bowl.

How To Sauté Tofu

  • Temperature: medium high heat
  • How long: 20 minutes
  • How to know it’s done: golden brown, slightly crispy at the edges and chewy in the center

Sauteed tofu is cooked with a small amount of oil and a bit of sauce to create a delightfully crispy exterior.

Sautèed tofu on a plate.

Press extra firm tofu for at least 30 minutes and cut into cubes. Add a small amount of oil to a non-stick skillet and heat over medium high heat. Add tofu to pan and brown on each side for about 1-2 minutes for a total of about 15 minutes.

Tofu in a sautè pan.

Once all sides of tofu are lightly golden brown, add about 1/4 cup of sauce.

Pouring sauce on tofu in a sautè pan.

Cook tofu, stirring frequently until sauce has been absorbed into tofu and caramelized around the edges creating a crispy exterior.

Sautèed tofu in a pan.

Add sautéed tofu to salads, stir fry, noodle bowls, or soup.

Sautèed tofu in a pan.

How To Fry Tofu

  • Temperature: medium high heat
  • How long: 9-11 minutes
  • How to know it’s done: both sides are golden and crispy

Frying tofu is a very simple and quick way to cook tofu. It achieves a reeeally golden crunchy exterior that makes for a hearty plant-based meal.

Fried tofu with salt.

Press extra firm tofu for about 30 minutes and cut into triangles. Heat a few tablespoons of oil in a skillet over medium high heat. Add tofu to the pan in a single layer. Do not overcrowd the pan. Allow tofu to cook, undisturbed for about 4-5 minutes or until the underside is golden brown and crispy.

Tofu frying in a pan.

Flip the tofu pieces and season the cooked side with salt. Allow the second side to cook for an additional 4 minutes or until the second side is golden brown and crispy. Remove from pan and drain on a paper towel. Season second side with salt.

Tofu frying in a pan.

This crispy tofu can be tossed with a sauce after cooking for extra flavor. We used triangles of tofu, but cubed or sliced tofu works well with this cooking method, too. If cooking cubed tofu, flip onto all sides during the cooking process to ensure even crispiness.

If desired you can add a sauce toward the end of the cooking process and flip tofu over to coat and allow sauce to brown at the edges. If planning to add sauce during cooking process, use slightly less oil while frying to avoid splattering and an overly oily sauce.


How To Scramble Tofu

  • Temperature: medium high heat
  • How long: 15-17 minutes
  • How to know it’s done: tofu pieces are browned and crispy

Scrambled tofu is similar to pan fried tofu, but instead of large pieces, the result is flavorful crispy bits of tofu that can be added to tacos, casseroles, bowls, and salads.

Scrambled tofu on a plate.

Heat about 1 tablespoon of oil in a nonstick or cast iron skillet over medium high heat. Add pressed and sliced tofu to the pan. Use a wooden spoon or spatula to break or ‘scramble’ the tofu into small pieces.

Tofu in a pan with oil. Tofu being scrambled in pan.

Once the tofu is scrambled, add some sauce or seasoning to the pan. Cook for about 3-4 minutes stirring or until all the tofu has been evenly coated in the seasoning or sauce and it has started to absorb into the tofu.

Scrambling tofu in a pan.

Then allow tofu to cook, undisturbed for about 4 minutes. This allows the tofu to become crispy. Give the tofu another quick stir to redistribute the cooking surface, and allow to cook for an additional 3-4 minutes or until the tofu has achieved the desired crispiness. The longer you let the tofu cook undisturbed, the crispier the tofu will get.

Scrambled tofu in a pan.

Do You Have To Cook Tofu?

Technically, tofu does not need to be cooked. It is ready to eat straight out of the package.

The most common tofu to eat raw is silken tofu. It’s often used in vegan desserts to achieve a creamy texture. For example, this mind-blowing vegan chocolate pie.

Firm tofu, while able to eat raw, is best used in various cooking applications.

How Do You Press Tofu?

Pressing water out of tofu.

Tofu contains a large amount of water when it comes out of the package. In order to bake, fry, or scramble tofu, it’s best to press out as much water as possible before cooking. The longer you press your tofu, the firmer the texture will be and the easier it will be to achieve a nice crispy texture.

If you make a lot of tofu, you may want to purchase a tofu press designed specifically for pressing out the water from tofu.

Pressing tofu with a tofu press.

If you do not have a tofu press, you can use standard kitchen items to help with this process.

  • Line a baking sheet with several layers of paper towel
  • Drain your tofu block and place on top of paper towel lined baking sheet
  • Place 2-3 more layers of paper towel on top of tofu block
  • Place a heavy skillet or second baking sheet on top
  • Weight the skillet down with a few canned goods
  • Allow tofu to press for about 30 minutes
  • If pressing longer, place baking sheet set up in the refrigerator while it presses

This pressing method works best on firm or extra firm tofu. It is not recommended to press silken or soft tofu.

How Do You Cut Tofu?

Tofu can be cut in a variety of shapes and sizes. Once you have pressed your tofu, most shapes start by cutting the block of tofu into 1/4 inch – 1/2 inch thick slices.

Slicing tofu into blocks.

From there, you can cut the tofu into small cubes, triangles, or leave them as slices for more of a tofu steak. Cubes of tofu are very versatile and can pretty much be used in most cooking applications.

Tofu cut into shapes.

What Kind of Tofu Should I Use?

Tofu comes in a range of firmness from silken to extra firm.

  • Extra firm tofu has the tightest curds and can stand up to hearty cooking methods, such as pan frying and baking.
  • Firm tofu is often used in traditional Asian soups such as hot and sour soup and miso soup.
  • Silken Tofu is perfect for making creamy, vegan desserts or any in any recipe that requires the tofu to be blended.

Favorite Tofu Recipes We Love

If you’re looking for a little more direction, here are the five most popular tofu recipes on the blog:

You can also check out our full list of easy tofu recipes:

12 Favorite Tofu Recipes

The post How To Cook Tofu appeared first on Pinch of Yum.


from Pinch of Yum https://ift.tt/2Bx4ZSL