Thursday, April 29, 2021

Beet and Burrata Salad with Fried Bread

Beet and burrata salad in a bowl with fried bread

Here’s the thing, though: this is just my life now.

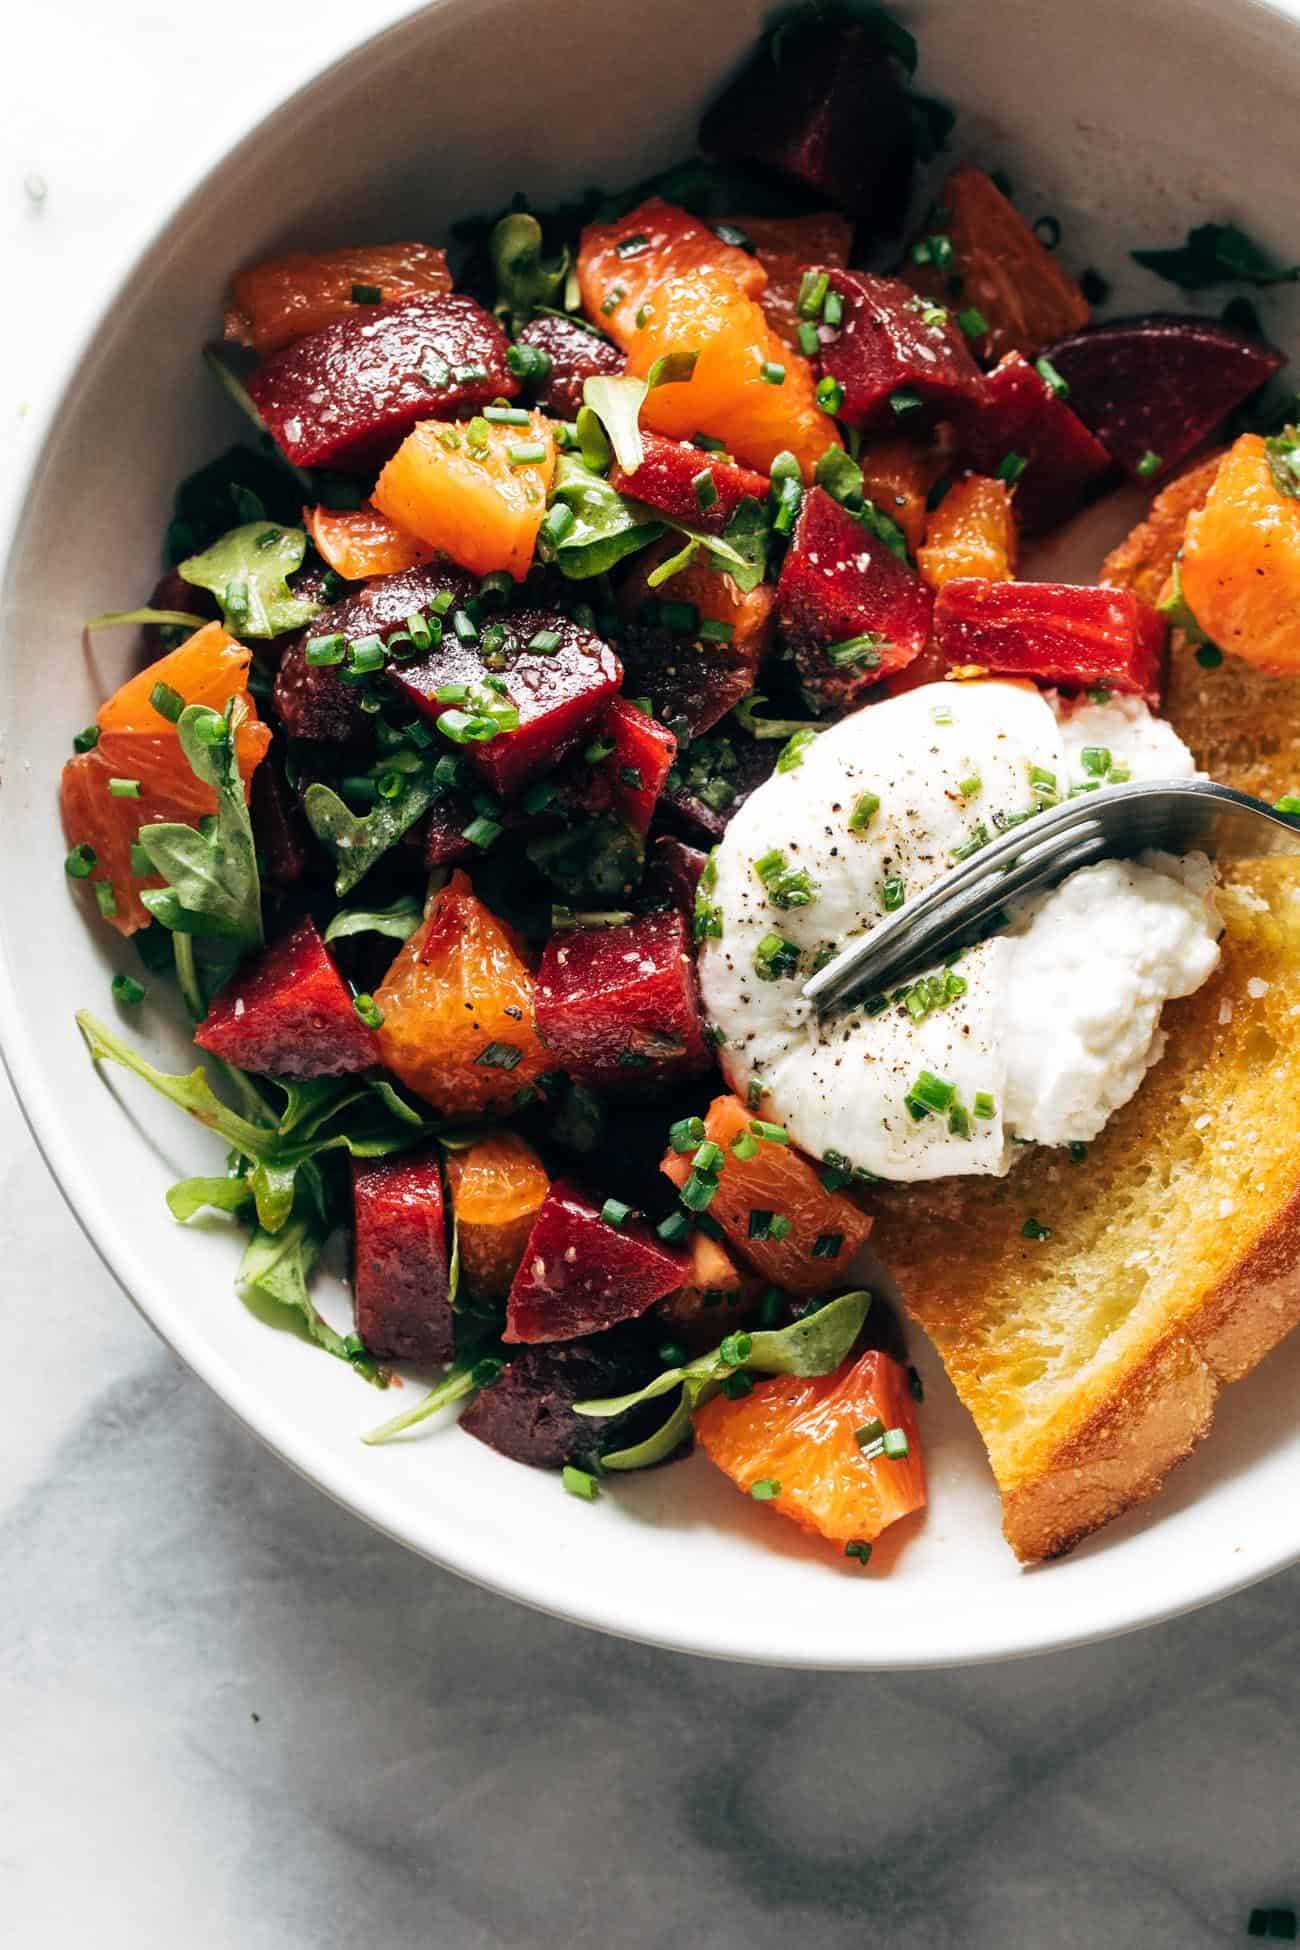
That picture of the vibrant juicy beet and orange goodness, slicked with dressing and scooped up with a hunk of creamy burrata on a bite of crispy fried sourdough? That is it. That is where I live. That is what I eat, breathe, and dream about.

Thanks for coming, but there is nothing more we need to talk about! Game over. I’ll just be eating this beet and burrata salad from here on out.

What You’ll Need For This Beet and Burrata Salad

Here’s our short and wonderful ingredient list:

  • pre-cooked beets
  • oranges
  • arugula
  • dressing (homemade or your favorite store-bought)
  • bread (sourdoooough)
  • burrata
Close-up of beet and burrata salad

Calling this bowl of beauty “a salad” feels not quite right, because if we’re being honest, salads leave a little to be desired sometimes.

But this salad – or maybe I should say, this big bowl of fried bread, juicy beets and oranges, quick vinaigrette, and creamy, luscious burrata – leaves exactly nothing be desired. The golden crispy-salty bites of the bread with the cool creaminess of the burrata and every juicy, vibrant, dressing-soaked bite of beets and oranges – it’s the total package. It’s a partial fork-and-knife, partial just-get-in-there-and-grab-that-bread-with-your-hands type of meal, which is my favorite kind.

New life rule: salads always need fried bread.

Beet and burrata salad in a bowl with fried bread

This Salad Makes For Great Leftovers Or Meal Prep

Some words on leftovers (or mainly just one word): YES, you can eat this as leftovers.

For max freshness, keep everything separate until you serve it.

But for the little bits of leftovers that are already mixed up, I find that the beets and the oranges hold up pretty well after they get tossed with the dressing – maybe 1-2 days. The arugula, as you can imagine, does not. So if you’re going to save leftovers, just freshen them up with a more perky handful of arugula.

The fried bread actually does pretty well if you just keep it in a container at room temp for a day or two and pop it back in the toaster / toaster oven / regular oven / skillet to get it warmed and a little crispy again. But really, any of those is going to be a sad stand-in for the real fresh fried bread. I know you don’t really need me to tell you, but where possibly, eat that fried bread right out of the pan.

Beet and burrata salad in a bowl with fried bread and a fork

Beet and Burrata Salad: Frequently Asked Questions

These salad bowls are amazing! Just want to switch up the dressing. Any ideas?

Store-bought champagne or lemon dressing would be yummy! If you want to whip up something yourself (other than what’s already written in the recipe), the lemon dressing from this salad recipe would be delicious, the kale chimichurri would be punchy and unique, and some 5-Minute Sunshine Sauce would give it a nice lift.

I want to make this, but I’m not totally sold on eating beets. What else would you recommend?

You could roast up some sweet potatoes or carrots in place of the beets if you’d prefer. Won’t have the same flavor but still yummy!

What kind of oranges should be used here?

Plain ol’ Navel oranges work just fine! But Cara Cara oranges, if you can find them, will really show off the colors in this beauty.

Prefer To Watch Instead Of Read?

Print

Beet and Burrata Salad with Fried Bread


  • Author: Lindsay
  • Prep Time: 20 minutes
  • Cook Time: 5 minutes
  • Total Time: 25 minutes
  • Yield: 3-4 servings

Description

This Beet and Burrata Salad is everything you need. Juicy beets and oranges, a creamy and luscious burrata scoop, peppery arugula, a quick vinaigrette, and crispy fried bread. SO MUCH YES!  


Ingredients

For the Dressing:

  • 1/4 cup olive oil
  • 1 tablespoon red wine vinegar
  • 1 teaspoon Dijon mustard
  • a few taps of garlic powder
  • a big handful of chopped chives
  • salt and pepper to taste

(OR, a bottle of your favorite champagne dressing, lemon dressing, or similar)

For the Salad:

  • one 8-ounce package cooked beets 
  • 2 oranges
  • a handful of arugula
  • 8 ounces burrata (two 4-ounce rounds)
  • 46 slices white Tuscan-style or sourdough bread 

Instructions

  1. Shake dressing ingredients in a jar.
  2. Press excess juice out of the beets with a paper towel; cut them into chunks. Cut the peel off the orange; cut into chunks. Toss beets and oranges with dressing. Add arugula if you want.
  3. Heat a generous swizzle of olive oil over medium high heat. Add bread; fry on each side until golden brown and crispy.
  4. Divide into bowls, serving each bowl with a chunk of creamy burrata and a piece (or three) of grilled bread. OMG.
  • Category: Salad
  • Method: Chop
  • Cuisine: American

Keywords: beet salad, burrata, fried bread

Recipe Card powered by Tasty Recipes logo

More “Salads That Don’t Feel Like Salads” Recipes

The post Beet and Burrata Salad with Fried Bread appeared first on Pinch of Yum.


from Pinch of Yum https://ift.tt/32WhqEP

Monday, April 26, 2021

Harissa Meatballs with Whipped Feta

Harissa Meatballs with Whipped Feta in a bowl with peppers, zucchini, and pita bread

Here’s a stunner for you.

You are looking at a big ol’ bowl of store-bought wonders such as hummus, olives, and pita bread, topped with a pile of meatballs (also store-bought! SOS life) that have been coated in a quick harissa / lemon / olive oil paste and baked to juicy-crisp perfection, roasted peppers and zucchini, and a super tangy, salty, whipped garlicky feta to add a little creamy punch to every bite.

It sounds fancy when I write it all out, and actually, every bite really does feel very complex and so delicious. But in reality, almost everything can be store-bought, and then you just have two tasks: roasting a meatball and veggie sheet pan, and whipping up a block of feta.

What You’ll Need To Make This Happen

Here’s our shortcut-friendly ingredient list:

  • meatballs
  • harissa paste (it usually comes in a jar and is often sold in the “global foods” section at many grocery stores)
  • bell peppers
  • zucchini
  • hummus
  • pita
  • feta

And assuming you’ve got olive oil, S&P, and garlic…this big bowl of goodness is yours for the taking.

Close-up of Harissa Meatballs in a bowl

How To Make This Bowl Come Together

Essentially what is happening here is the meatballs, peppers, and zucchini get roasted on one single pan.

I know technically this isn’t the correct way to do it because you want each veggie to be cooked to its own perfection. And if you are particular about your zucchini, feel free to give it its own pan for optimal zucchini-specific roasting. But I found it most efficient (and 100% delicious) to just add the zucchini on the same pan – not for the whole time, but just for the last few minutes of roasting. If there’s an easy way to do something that still gets the same super-yum end results, you know I’m all over that. And in this case, everybody-on-one-pan is the way.

Cooked ingredients on a sheet pan for Harissa Meatballs with Whipped Feta

The Whipped Feta Is a Must-Make

The only other really “active” cooking step here is blitzing up a block of feta cheese in a food processor or mini chopper (I love this one) until it becomes a creamy, spreadable, dollop-able wonder that you might be tempted to put on, like, everything from here on out.

This recipe, this combo of flavors, this textural heaven? This one is for those of us who like to go big. Lots of color, lots of puckery zip, lots of salt, and a good amount of heat from that harissa paste… more of all, please.

In terms of eating this, you can just fork-and-knife it, OR you can get right up in there with your pillowy pita and swoop it directly into the hummus, top with a meatball and some veggies, and do a final dunk into that whipped feta to just take this day right over the top. (10/10 would recommend.)

Close-up of Harissa Meatballs with Whipped Feta in a bowl

Source Notes: Harissa paste is “a Tunisian hot chili pepper paste, the main ingredients of which are roasted red peppers, Baklouti peppers, spices and herbs such as garlic paste, caraway seeds, coriander seeds, cumin and olive oil to carry the oil-soluble flavors.” (definition from Wiki!) It reminds me a little bit of curry paste – it’s packed with flavor and vibrantly red in color. In the US, you can find it at many grocery stores that have a solidly stocked “global foods” section. It’s usually is sold in small jars. If you want to dabble with making your own (and I am actually tempted to after reading Suzy’s description), here is a recipe for homemade harissa paste.

Harissa Meatballs with Whipped Feta: Frequently Asked Questions

What type of store-bought meatballs do you recommend?

Any kind! I’ve tried pork, beef, chicken, and turkey meatballs – and I think veggie meatballs would also work really well as a vegetarian option! This recipe is very forgiving – it can work with meatballs that are pre-cooked, and I’ve also enjoyed this recipe with the pre-made, UNCOOKED meatballs that you can often buy in the meat department. For a specific brand, I really enjoyed these with the ALDI pre-made uncooked Italian style meatballs (I know, wrong flavor profile, but it worked just fine and the meatballs were amazing). I just brushed them with the harissa sauce before baking.

I have some extra time. Can I make my own meatballs for this recipe?

Sure can! These baked chicken meatballs are perfect in this recipe, and major bonus – they’re freezer-friendly if you wanted to prep these ahead of time. Doubling the recipe is not a bad idea!

Is harissa paste spicy?

It’s not terribly spicy, but harissa paste does pack some heat. I would rate it as mild+ or medium- level heat. I left a few meatballs un-sauced for my toddler just to make sure it wasn’t too spicy for her.

I can’t find harissa paste. What else can I use?

Chili oil or even sriracha could work here instead! Just adjust the amounts as necessary so that you don’t make it too spicy.

Print

Harissa Meatballs with Whipped Feta


  • Author: Lindsay
  • Prep Time: 15 minutes
  • Cook Time: 30 minutes
  • Total Time: 45 minutes
  • Yield: 4-6 servings

Description

These Harissa Meatballs with Whipped Feta are perfect for an easy SOS dinner! Store-bought meatballs, bell peppers, zucchini, harissa, and whipped feta all in one bowl. YUMMY!


Ingredients

Meatballs and Such:

  • one 22-ounce bag of store-bought frozen meatballs (or homemade, if you’ve got them / got the time)
  • 2 bell peppers (yellow and red), sliced
  • 12 zucchini, sliced into half moons
  • 2 tablespoons harissa paste
  • olive oil, garlic powder, lemon juice, salt

Whipped Feta:

  • one 6-ounce container feta cheese
  • 12 ounces cream cheese or sour cream or I’ve used plain yogurt in a pinch
  • 1 clove garlic

Extras:

  • hummus
  • pita
  • olives / lemon wedges 

Instructions

  1. Sheet Pan, Part One: Preheat the oven to 425 degrees. Place the peppers on one side of a large sheet pan. Drizzle with oil and sprinkle with salt. Mix the harissa with a little bit of olive oil, lemon juice, and garlic powder until you have a nice spreadable red paste. Coat your meatballs with the sauce (you can do this by tossing the meatballs in a bowl with the sauce if they’re pre-cooked, or just brushing the meatballs directly on the sheet pan if your meatballs are raw). Add meatballs to the center of the sheet pan. Bake for 15-20 minutes.
  2. Sheet Pan, Part Two: Add the zucchini to the pan with some olive oil and salt. Roast for another 10 minutes. For extra browning on everything, broil for about 5 minutes.
  3. Whip That Feta: In a food processor, chopper, or blender, whip up the feta, cream cheese, and garlic until a thick and creamy sauce forms. 
  4. Serve: Serve meatballs and veggies with a dollop of hummus, your whipped feta, pita wedges, and anything else you like (olives, lemon, etc.). And now DEVOUR. And repeat. And repeat. And repeat.

Equipment

  • Category: Dinner
  • Method: Sheet Pan
  • Cuisine: American

Keywords: harissa paste, meatballs, whipped feta

Recipe Card powered by Tasty Recipes logo

We Love Sheet Pan Meals. Here Are More Faves!

The post Harissa Meatballs with Whipped Feta appeared first on Pinch of Yum.


from Pinch of Yum https://ift.tt/3xlIQlk

Friday, April 23, 2021

House Favorite Brussels Sprouts

Close-up of Brussels sprouts on pan with walnuts and cranberries

Let’s talk about these roasty, sweet, nutty brussels sprouts that combine those tender-crisp, whole-brussel bites with the ultra thin and crispy leaves, all coated with a lil’ mustard-maple drench and speckled with juicy bites of dried cranberry. Oh my gosh. WHY ARE THEY SO GOOD.

To be honest, I have very few “house favorites” in our house because I always change it up. Always trying new recipes, always moving on to the next thing. We hardly stay on any one recipe for more than just a few repeats because new! exciting! rah rah rah. But this recipe has been made WEEKLY for… um, the last five months? It has solidly earned its House Favorite status. We make these brussels sprouts all. the. time.

Dad loves them, toddler loves them, Mom loves them AND loves that everyone loves them. Also: guests love them, although usually if it’s more than just us, we’re going to need to double the recipe because, yes, in our house, we will for sure finish one pan between the three of us.

What You Need To Make These Brussels Sprouts

This is an SOS series recipe – as in, an excellent back pocket choice for when you just need to get something on the table quickly – so here’s our super short and sweet ingredient list:

  • brussels sprouts
  • walnuts
  • dried cranberries
  • maple syrup
  • Dijon mustard

And, of course, your standards: olive oil, salt, and pepper.

Ingredients for House Favorite Brussels Sprouts

These Sheet Pan Cuties Could Not Be Easier To Make

The brussels get roasted, cut side down, until they are nice and crispy.

The walnuts get added for the last minute for a little toasting.

The cranberries join the cool-down party.

And finally, the sauce gets added directly to the pan. And by sauce, I mean an eyeballed little squirt of Dijon mustard and a solid drizzle of maple syrup. Get a little more olive oil, salt, and pepper up in there and ohhhkay yes. That was easy. We are in business.

Roasted Brussels sprouts on a pan with a spatula

What To Serve with These Brussels In These SOS Times

The brussels in and of themselves aren’t a meal (although, with the cranberries and walnuts in there…maybe they are?), but here are some ideas for what to serve them with – SOS STYLE.

  • Good ol’ spaghetti
  • Chicken (for ultra ease, buy the chicken breasts that are pre-seasoned and just throw it in a skillet)
  • Easy pasta, such as this yummy vegan one
  • Baked salmon
  • Boxed mac and cheese for real I don’t know just an idea

The flavors of this recipe can go so many directions with whatever it is you’re eating. And I’m sure you can think of 100 or more fancier ideas to round out the table if you’re going for a more impressive-dinner-party situation, so don’t let me hold you back.

But for basic nights at home, when you want to really, truly, actually look forward to eating your vegetables, these basic, versatile, saucy, crispy sprouts are where it’s at.

I’m telling you – HOUSE FAVORITE.

Close-up of roasted Brussels sprouts on a pan with walnuts and cranberries.

House Favorite Brussels Sprouts: Frequently Asked Questions

I’m allergic to nuts. What can I substitute?

You could leave the nuts out completely or, if you can have seeds, you could add pumpkin seeds here. Once you add the pumpkin seeds, just keep a close eye on things so they don’t burn.

If they are more of a side dish, what can I serve these brussels sprouts with?

Great thing about these buddies is that they go with just about everything. Some ideas (if you have more time) include Date Night Lemon Pappardelle, these Swedish Meatballs, or this Skillet Chicken with Bacon and White Wine Sauce. YUM! (For SOS-friendly recipes to serve this with, see the list in the above section.)

Can I add meat to these brussels sprouts?

Sure! Some diced pancetta would be great!

Print

House Favorite Brussels Sprouts


  • Author: Lindsay
  • Prep Time: 5 minutes
  • Cook Time: 20 minutes
  • Total Time: 25 minutes
  • Yield: 3-4 servings

Description

These House Favorite Brussels Sprouts are the best side veg and are speckled with bright bursts of cranberries and nutty walnuts. The perfect addition to any meal! 


Ingredients

  • 1 package raw brussels sprouts, halved
  • 2 tablespoons olive oil
  • a pinch of salt and pepper
  • a handful of walnuts
  • a handful of dried cranberries
  • 1 teaspoon Dijon mustard
  • 2 tablespoons maple syrup
  • extra olive oil, salt, and pepper as needed

Instructions

  1. Preheat the oven to 425 degrees. Place brussels sprouts cut-side down directly on a baking sheet. Drizzle with oil and sprinkle with salt and pepper.
  2. Roast brussels sprouts for 15-20 minutes, until cut sides are very brown and some of the leaves are crispy. Add walnuts, mustard, and maple; return to oven for 5-10 minutes to get the walnuts toasted. (You can choose to either add the sauce now, or when the pan comes out of the oven in step 3. If you add it now, it gets kind of baked into the brussels, but if you add it when they’re done baking, it’ll be a little more saucy. I like it both ways. Your choice!)
  3. Remove from oven. Toss with cranberries directly on the baking sheet. Season and serve immediately. Yumo!

Equipment

  • Category: Side Dish
  • Method: Roast
  • Cuisine: American

Keywords: brussels sprouts, walnuts, cranberries

Recipe Card powered by Tasty Recipes logo

More Brussels Sprouts Favorites

The post House Favorite Brussels Sprouts appeared first on Pinch of Yum.


from Pinch of Yum https://ift.tt/3sJlp1K

Monday, April 19, 2021

Instant Pot Chicken and Dumplings

Instant Pot Chicken and Dumplings in a bowl.

Hello! Let’s put a chopped-up trio of celery, carrots, and onions, potatoes, chicken, spices, and pre-made – yes, I said it – pre-made biscuits in the Instant Pot and call it dinner.

The bakery in my hometown was famous for their chicken and dumpling soup, so I’ve eaten a lot of chicken and dumplings in my life. Growing up, it was essential to know when chicken and dumpling day was, and it was a need-to-get-there-early type situation, so that you didn’t miss out.

Chicken and dumplings, in this very weeknight SOS-friendly version, is something between a stew and a soup – it’s just a bowl of humble, comforting, creamy goodness. In this case, loaded with potatoes, peas, chicken, biscuit-like dumplings, and made without cream! The potatoes and biscuits share some of their starchiness to make the whole thing super creamy and rich without needing any additional dairy.

What You’ll Need To Make Chicken and Dumplings

Here’s our short ingredient list:

  • mirepoix (a mix of chopped carrots, celery, and onion that you can buy frozen or in the produce section to save time)
  • chicken thighs
  • potatoes
  • pre-made biscuits
  • peas
  • chicken broth
  • poultry seasoning
Close-up of Instant Pot Chicken and Dumplings in the Instant Pot

I wonder if, when we pull the little biscuit-dumpling-bits apart, and shred the chicken and stir in some bright green peas, and stand over the steamy pot just bathing in all the savory goodness, life will just feel a little bit better. (It will.)

I wonder if our family members, including toddlers, will be obsessed with it. (Mine did.)

I wonder if this would taste even better in sweats and a hoodie. (It does.)

Are you down for this?

I hope someday real soon you find yourself stirring up a pot of this rich, satisfying, comforting, super delicious chicken and dumpling goodness, whether it’s a rainy, snowy, dreary, or just very tired night. ♡ Let’s let this one take care of you.

Instant Pot Chicken and Dumplings in a bowl with a spoon

Source notes: I got on the chicken and dumplings train after we made this Instant Pot recipe from Simply Happy Foodie during the testing for our best-of-the-internet Instant Pot recipe reviews post. Sandy’s recipe is awesome. I made this version of the recipe, as written here, almost weekly during my maternity leave while trying to be dairy-free and manage two kids two-and-under and just generally keep my life afloat. It was a lifesaver.

Instant Pot Chicken and Dumplings: Frequently Asked Questions

What is the consistency of this? Is it soupy?

It can kind of be what you want it to be! Using 3 cups of broth will make for a thicker stew-like consistency, while 4 will give you a slightly soupier consistency. Totally your preference! Either way, it’s going to be a bowl-and-spoon type recipe.

Does this keep well as leftovers?

Yes! Some thickening is normal (as with any soup / stew) and you may have to thin it back out with a little more water.

I have a little bit more time. Can I make my own biscuits for this recipe?

Whoa! You. are. AMAZING! If you want to have a go at making your own biscuits, these ones are perfect.

Print

Instant Pot Chicken and Dumplings


  • Author: Lindsay
  • Prep Time: 20 minutes
  • Cook Time: 10 minutes
  • Total Time: 30 minutes
  • Yield: 6 servings

Description

This Instant Pot Chicken and Dumplings is the most comforting, delicious bowl of goodness. Chicken, veggies, pre-made biscuits, seasoning, and all of it made creamy by the humble potato. YUM!


Ingredients

  • 2 tablespoons olive oil
  • 23 cups mirepoix (diced trio of celery, carrot, and onion – you can often buy this pre-chopped in the produce or freezer section to save time)
  • 3 cloves minced garlic
  • 1 large Russet potato, peeled and diced
  • 1 lb. chicken thighs
  • 1/2 teaspoon poultry seasoning
  • 1 teaspoon salt
  • 1/2 teaspoon pepper
  • 34 cups chicken broth 
  • 12 ounces of refrigerated biscuits (about 6 biscuits), cut into small bite-sized pieces
  • 1 cup frozen peas
  • optional: fresh thyme or rosemary sprigs for cooking, and fresh parsley for serving

Instructions

  1. Place all ingredients in the Instant Pot except the peas. Throw some fresh herbs in there if you have them – sage, thyme, etc. If not, don’t sweat! This is shortcut cooking. Just turn on the Instant Pot and cook on high pressure for 7-10 minutes.
  2. After about 10 minutes of resting, use the “quick release” to let out the steam. Gently break apart any pieces of biscuits that got stuck together with two forks.
  3. Pull out the chicken and shred it or chop it up. Add it back in with the peas. Taste, season, and serve!

Equipment

  • Category: Dinner
  • Method: Instant Pot
  • Cuisine: American

Keywords: instant pot chicken and dumplings, chicken and dumplings, chicken recipe

Recipe Card powered by Tasty Recipes logo

More Instant Pot Favorites

The post Instant Pot Chicken and Dumplings appeared first on Pinch of Yum.


from Pinch of Yum https://ift.tt/2Q656iv