Thursday, June 17, 2021

Almond Butter Chocolate Chip Zucchini Bars

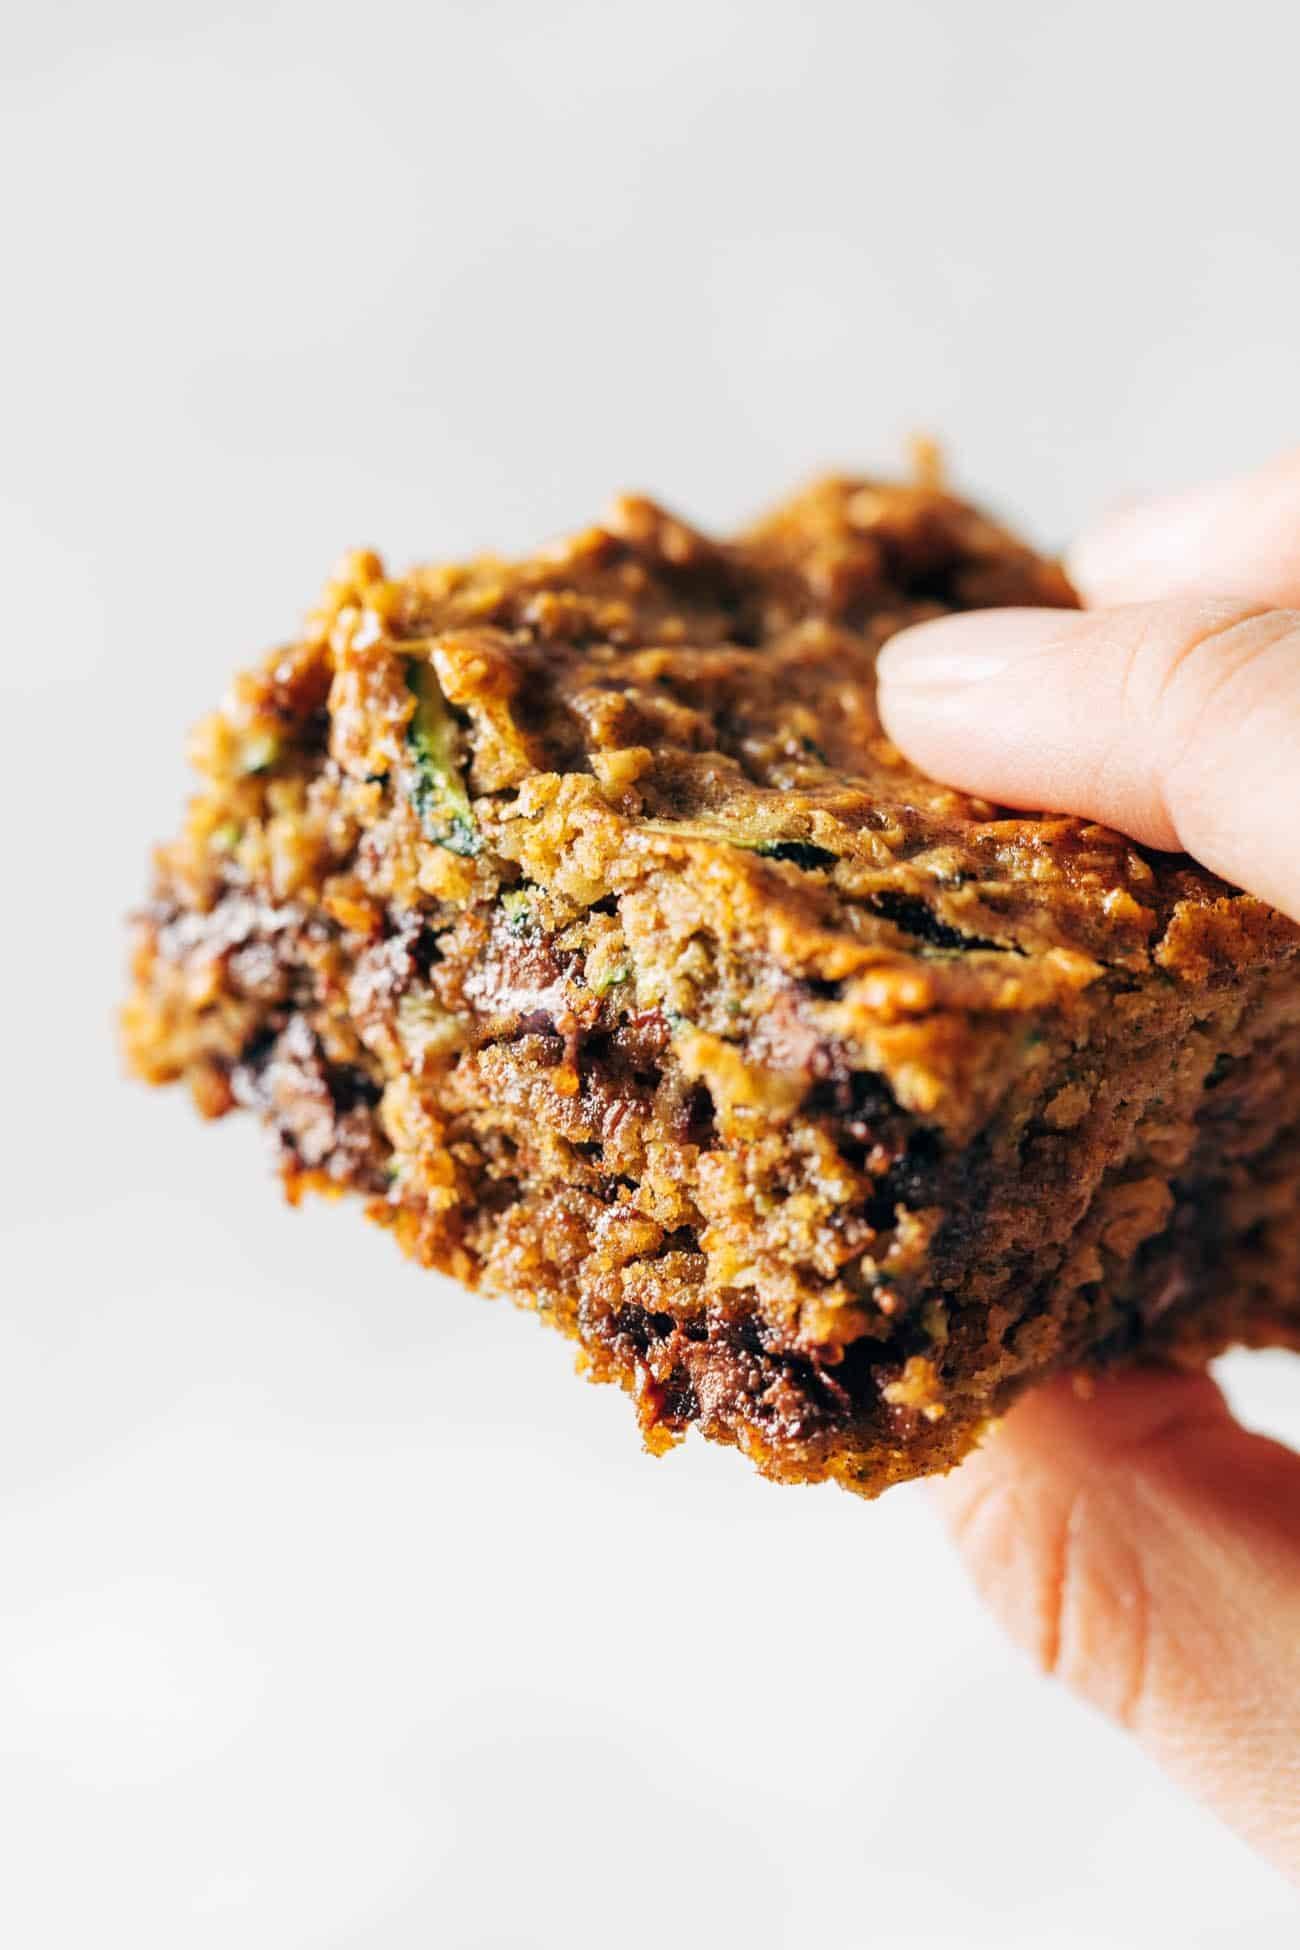
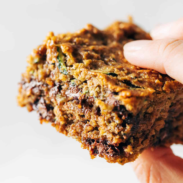
Close-up image of a white hand holding an almond butter chocolate chip zucchini bar.

So yes, I made my favorite zucchini muffins into a bar.

And yes, they are as dense, moist, blondie-like, wholesome (!!) and perfectly sweet as you are hoping they will be.

Zucchini Bars: A Love Story

Let me tell you 7 of the 100+ things I love about these zucchini bars:

  • Super easy to make. NO FUSS WHATSOEVER.
  • Shockingly nutritious. No refined sugar or flour. All ingredients that you can feel good about – oats, olive oil, maple syrup, zucchini, almond butter, etc.
  • Pantry friendly! You probably have everything you need already.
  • Breakfasty, but also snacky and desserty. There is no such thing as a bad time for these.
  • Delicious served warm or (wait for it) cold out of the fridge on a hot summer day. SO GOOD.
  • Extremely popular with the kidlets because they are so yummy.
  • Even more popular with the parentals who let the kidlets eat *almost* as many bars as they want because of the aforementioned wholesome factor.

If you can ignore my use of the words kidlets and parentals and just only take the really good things from that list, then you will be tracking with me on the awesomeness of these bars.
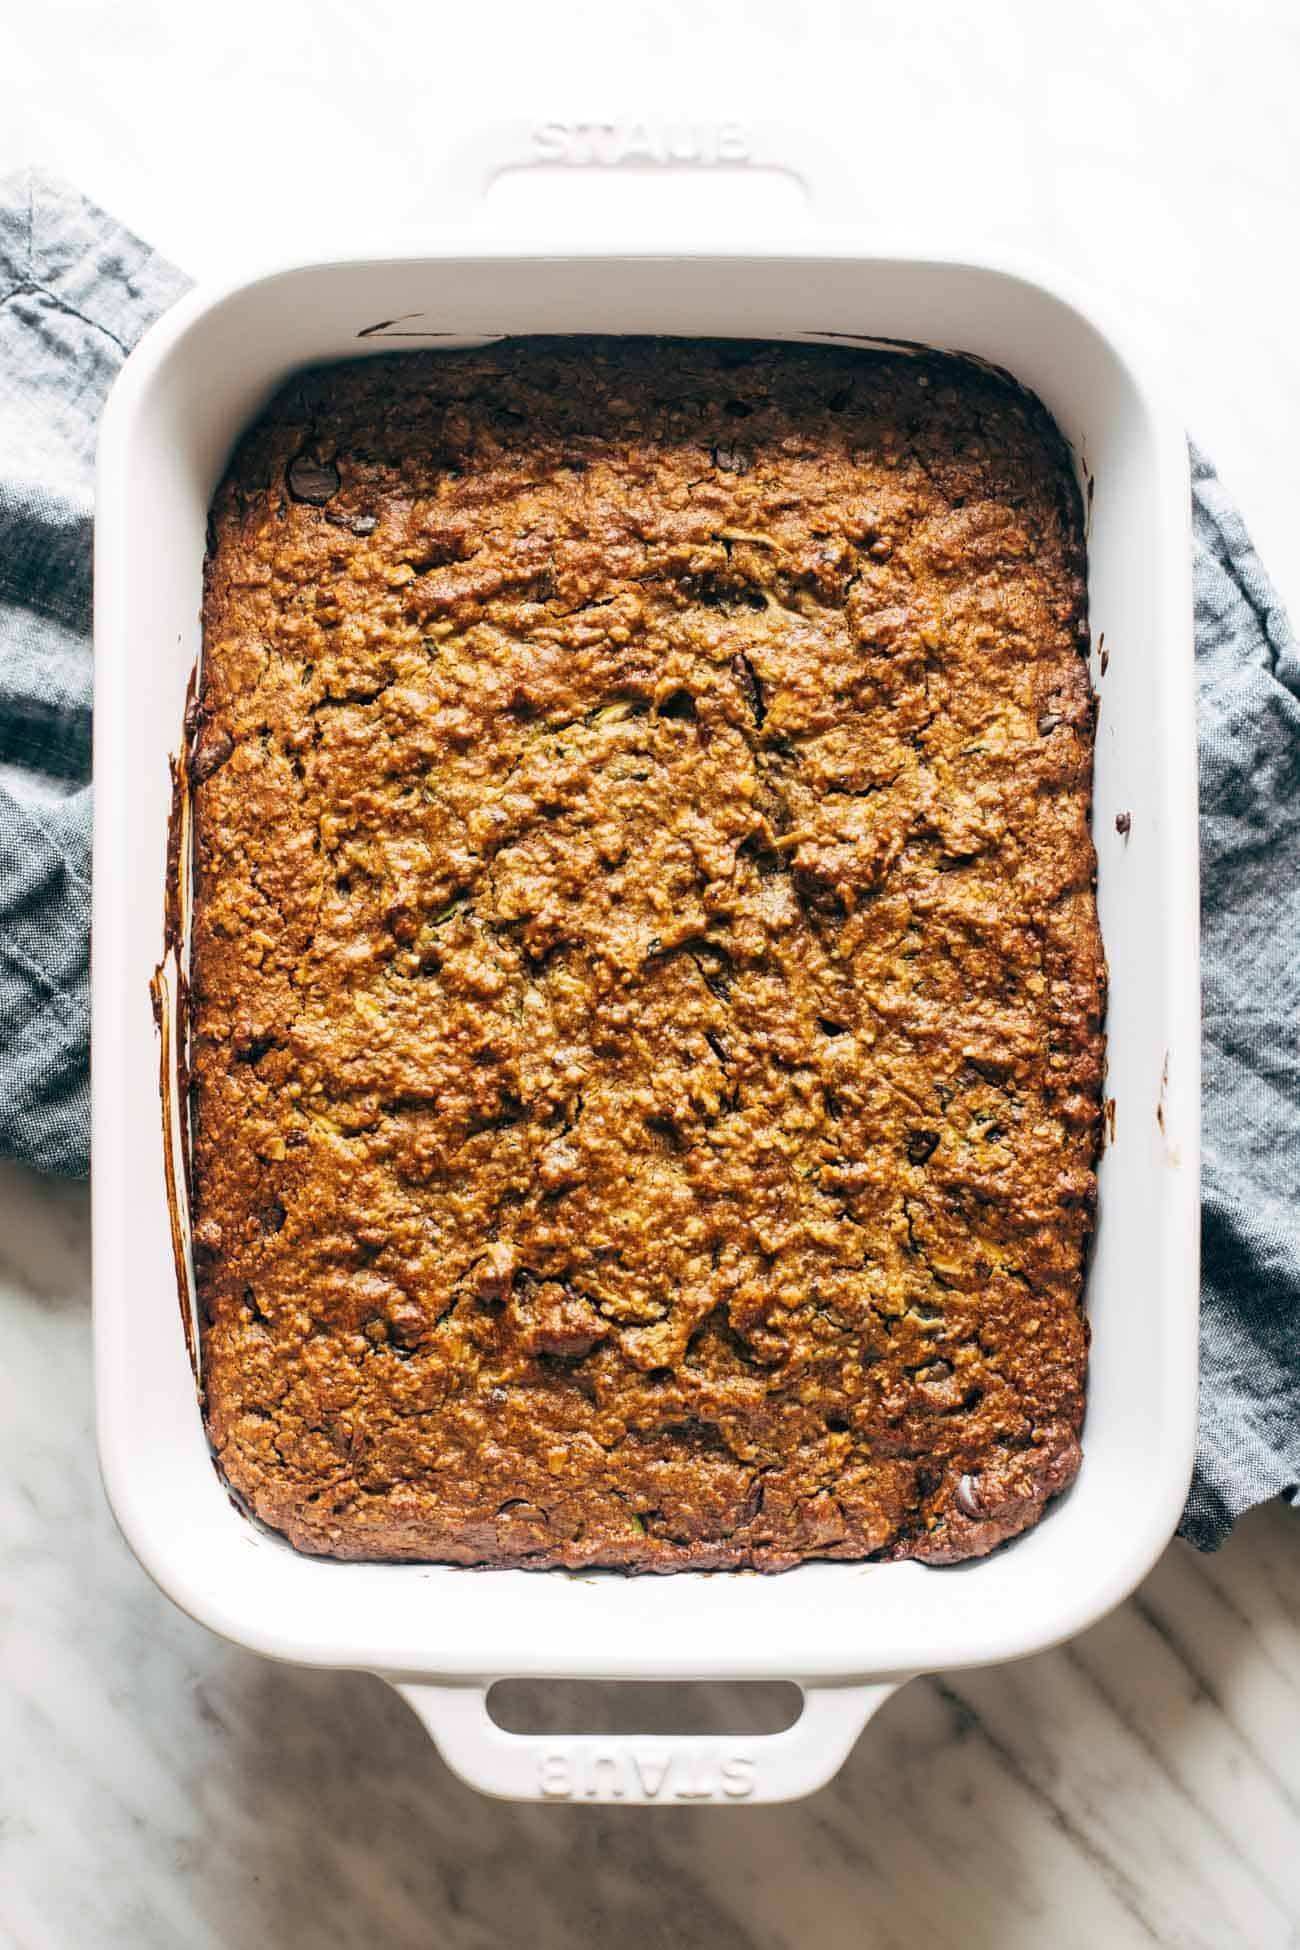
Overhead image of almond butter chocolate chip zucchini bars in a pan.
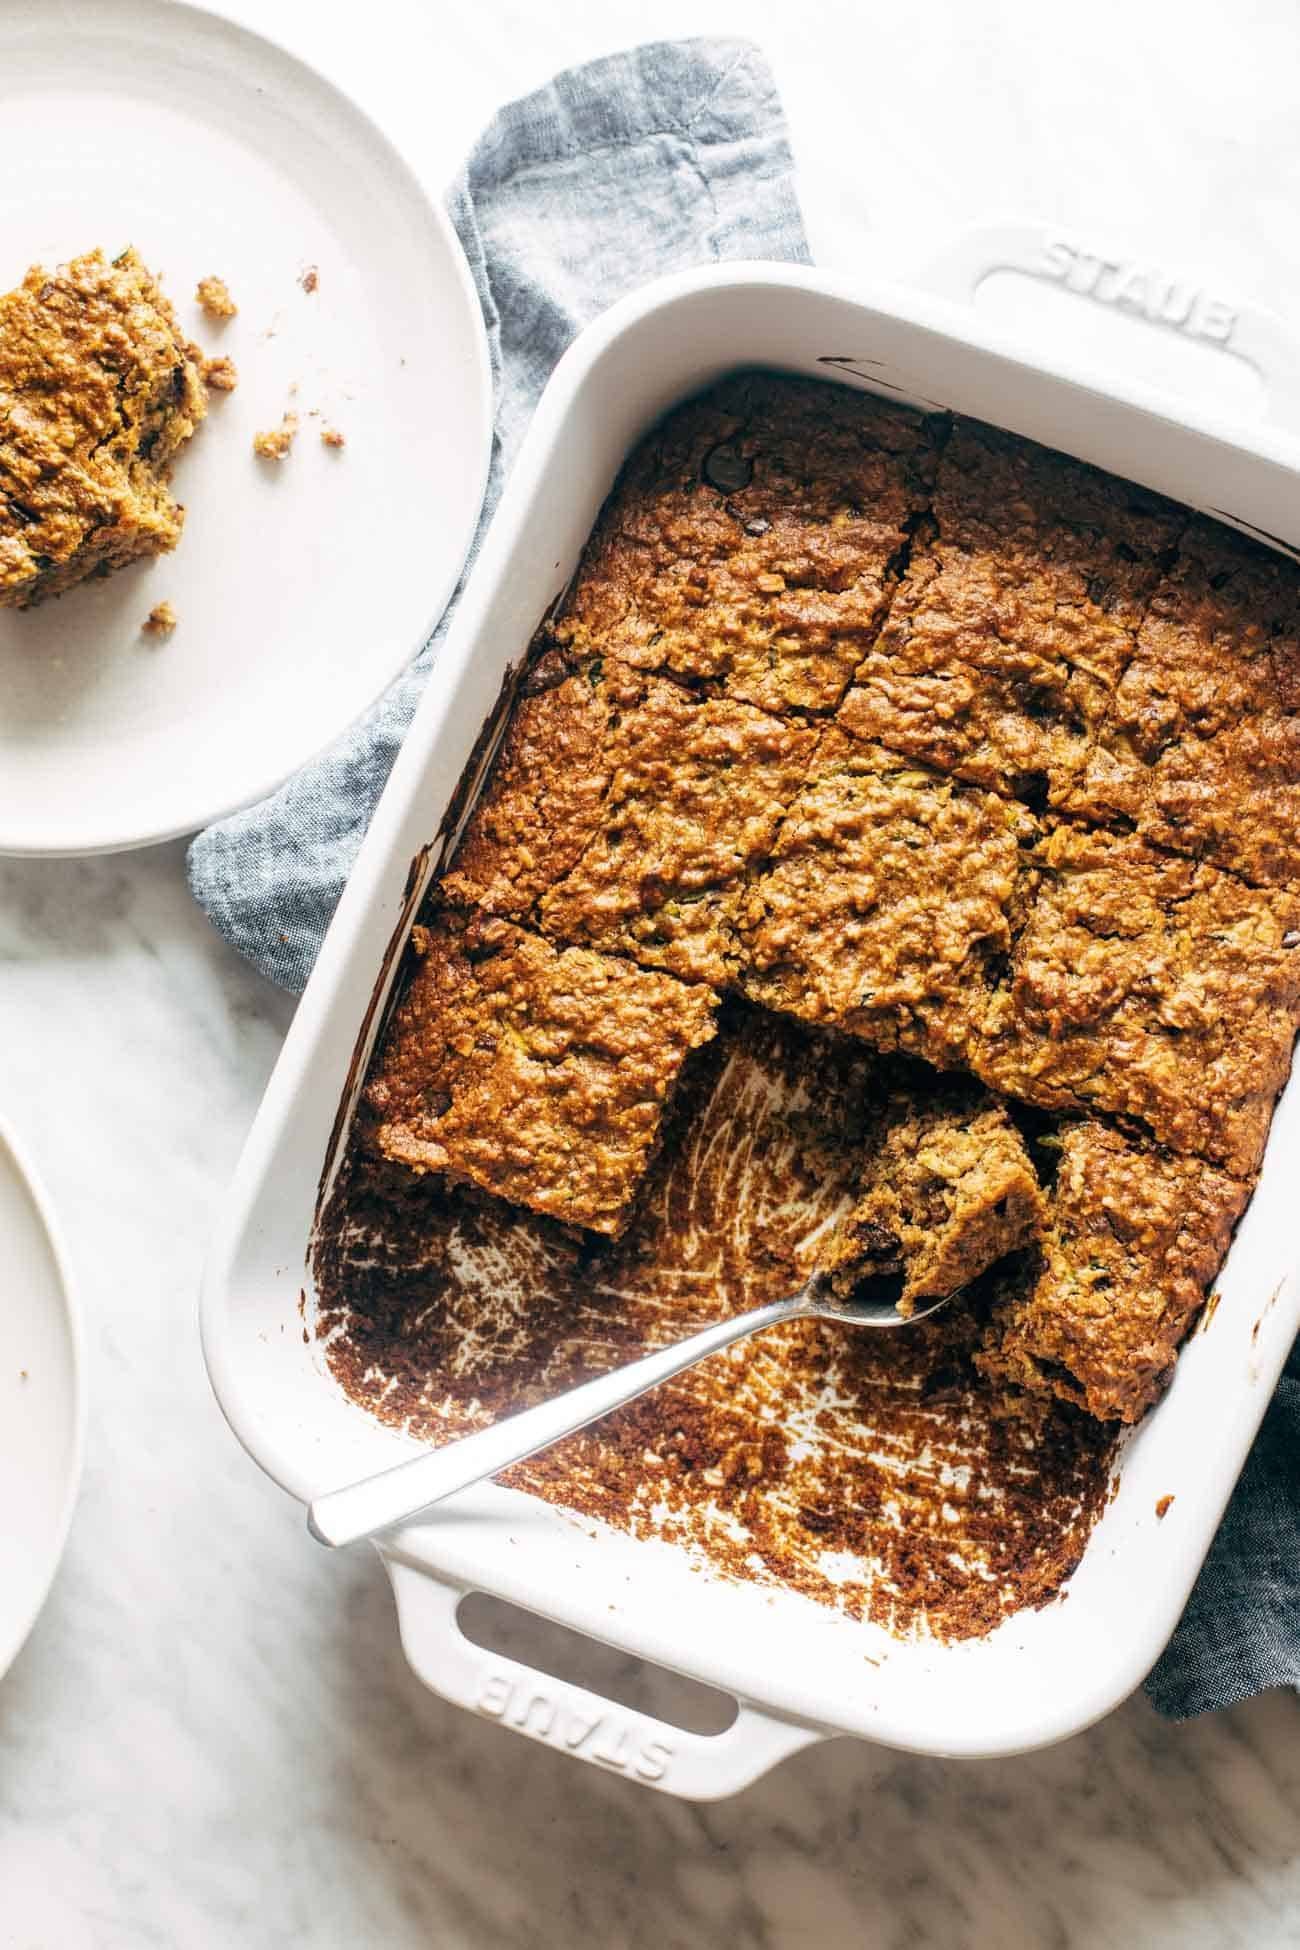
Overhead image of almond butter chocolate chip zucchini bars with a few bars taken out of the pan and a fork in the pan.

These Bars On Repeat All Summer Long (For Real)

We test so many recipes on this website and love them all, but because we’re always trying new things, there are actually very few recipes that earn a repeat-after-repeat, year-after-year place in my real life home kitchen.

I’m happy to tell you that these muffins (the zucchini muffin originals) and now their cousins, the almond butter chocolate chip zucchini bars, have BOTH earned a spot in that esteemed repeat-after-repeat, year-after-year category.

They were a near-weekly staple for us last summer (BIG HIT with 18-month-old Solvi last year, both the making and the eating), and they have been and will continue to be making an appearance in my kitchen all summer long. ♡
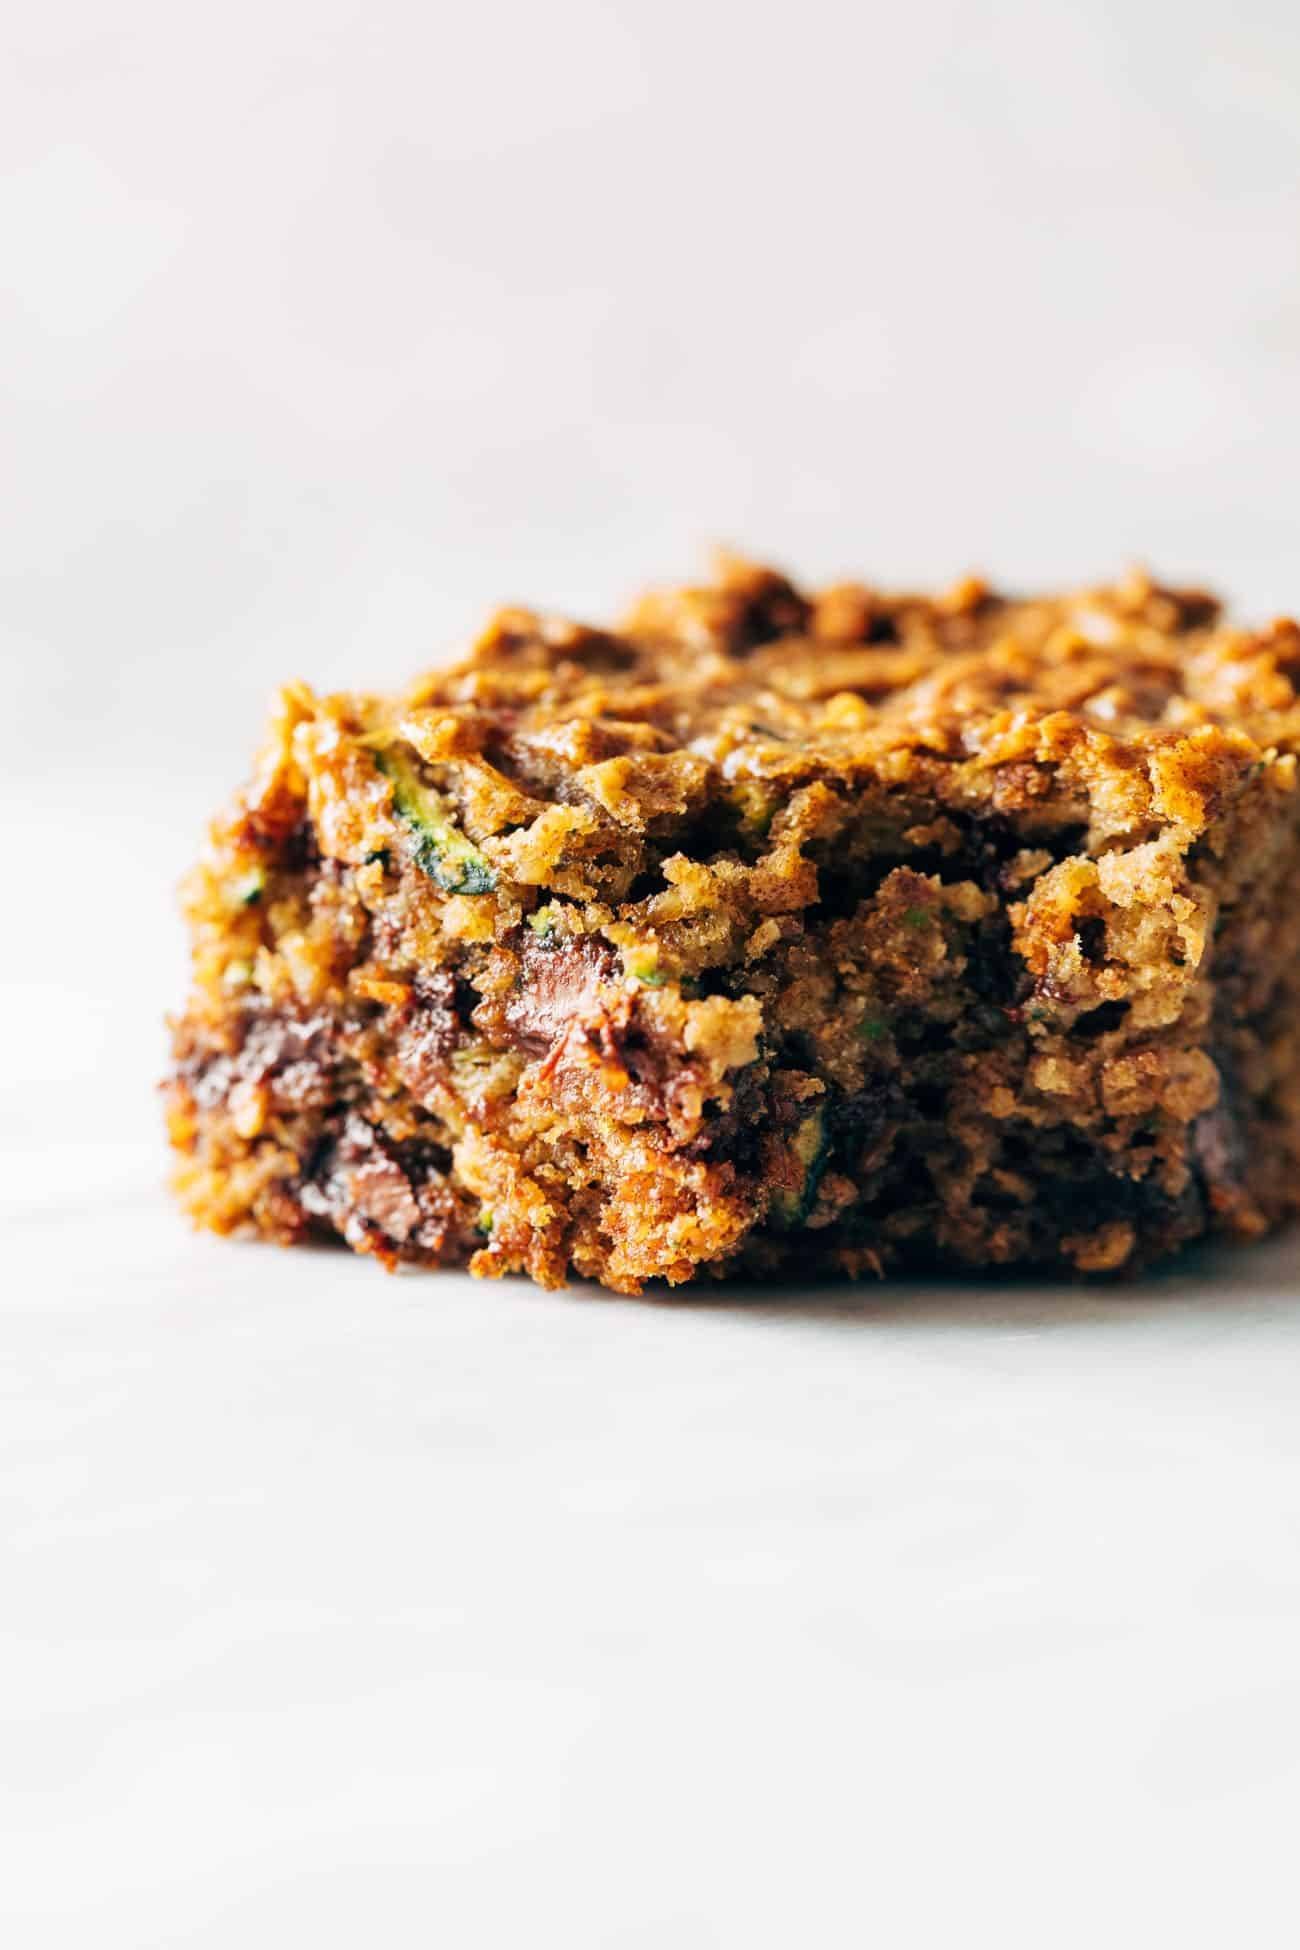
Almond butter chocolate chip zucchini bar with a bite taken out of it.

These Can Be Made Date Or Date-Free

A quick note about the dates in this recipe:

This “base recipe” which we use for so many baked yummies (apple muffins, carrot muffins, etc.) on POY started way back in the day with a genius idea from Krista and Alana on our team to try using dates in a muffin batter.

The dates make the bars gooey and dense in all the right ways, and they also add some natural sweetness.

That being said, I realize that not everybody loves dates and not everyone HAS dates on hand all the time, so we also included a version in the notes of the recipe for date-free option of these zucchini bars that is still really, really good.

Bottom line: dates or no dates, we can work with it either way!
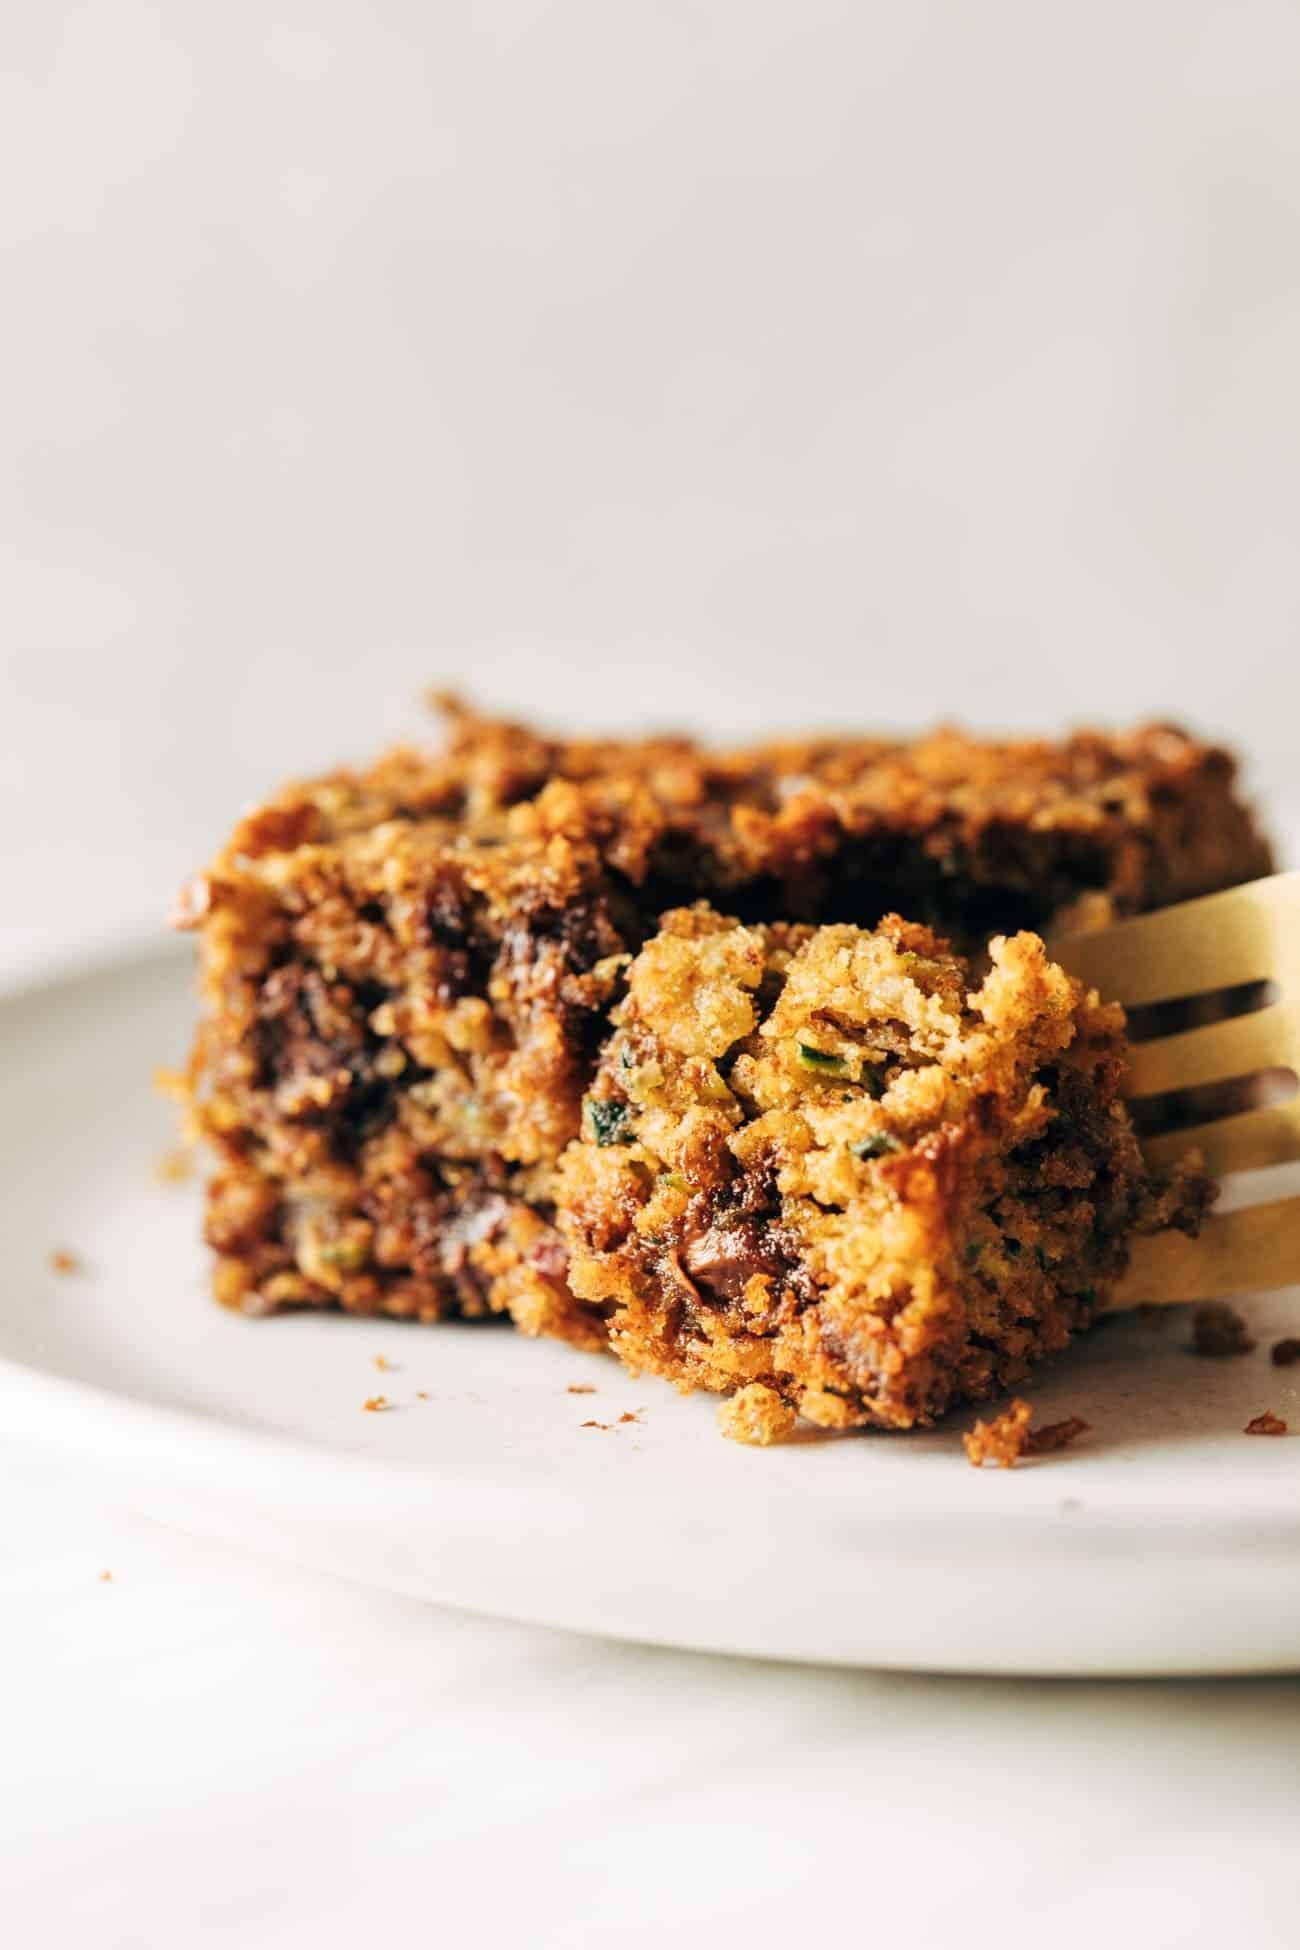
Almond butter chocolate chip zucchini bar on a white plate being cut into with a fork.

These are such an essential. They are a total easy summer baking project for, honestly, kind of everyone. Looks like it’s time for me to head home and… um, make another batch.

Prefer To Watch Instead Of Read?


Almond Butter Chocolate Chip Zucchini Bars: FAQs

These bars look amazing! Is there a way to make them totally vegan?

Yes! Try using a flax egg (or the equivalent of two regular eggs) here.

How should I store these zucchini bars?

These are best stored in a sealed container in the fridge to maintain freshness.

Do I have to drain out all of the excess water from the zucchini?

After you grate the zucchini, one quick squeeze to get out some of the extra water should do the trick.
Print

Almond Butter Chocolate Chip Zucchini Bars


  • Author: Lindsay
  • Prep Time: 10 minutes
  • Cook Time: 30 minutes
  • Total Time: 40 minutes
  • Yield: 9-12 bars

Description

These Almond Butter Chocolate Chip Zucchini Bars are wholesome and perfect and just everything your summer needs! Made with oats, almond butter, zucchini, dates, and maple syrup. So many feel-good ingredients packed into one bar! 


Ingredients

Units
  • 2 cups rolled oats
  • 1/4 cup + 2 tablespoons olive oil
  • 1/4 cup almond butter
  • 1/4 cup real maple syrup
  • 8 medjool dates, pitted
  • 12 zucchini, grated and squeezed once (about 2 cups total, divided)
  • 2 eggs
  • 1 teaspoon baking soda
  • pinch of kosher salt
  • chocolate chips (optional, for topping)

Instructions

  1. Preheat the oven to 350 degrees. Set aside about half of the zucchini and chocolate chips to stir in later. Blend everything else together until a smooth-ish batter comes together.
  2. Stir in chocolate chips and zucchini. Pour batter into a square baking dish (9×9 or similar). Bake for 30-40 minutes, until the top is golden brown and gently springs back when you press into it.
  3. For clean cuts, let it cool completely. (Or for hungry bellies, just get into it right warm out of the oven.) I like to store this in the refrigerator but you can serve warm or cold ALL DAY LONG! Snack, breakfast, dessert, all of it. ♡

Notes

For a date-free version, use 1/2 cup almond butter and 1/2 cup maple syrup (and omit the dates). Still delicious!

  • Category: Dessert
  • Method: Baking
  • Cuisine: American

Keywords: zucchini bars, zucchini dessert, chocolate dessert

Recipe Card powered by Tasty Recipes logo

Need More Zucchini Inspo?

The post Almond Butter Chocolate Chip Zucchini Bars appeared first on Pinch of Yum.


from Pinch of Yum https://ift.tt/3zAk8yT

Monday, June 14, 2021

Smoky Beans & Greens Tacos with Aji Verde

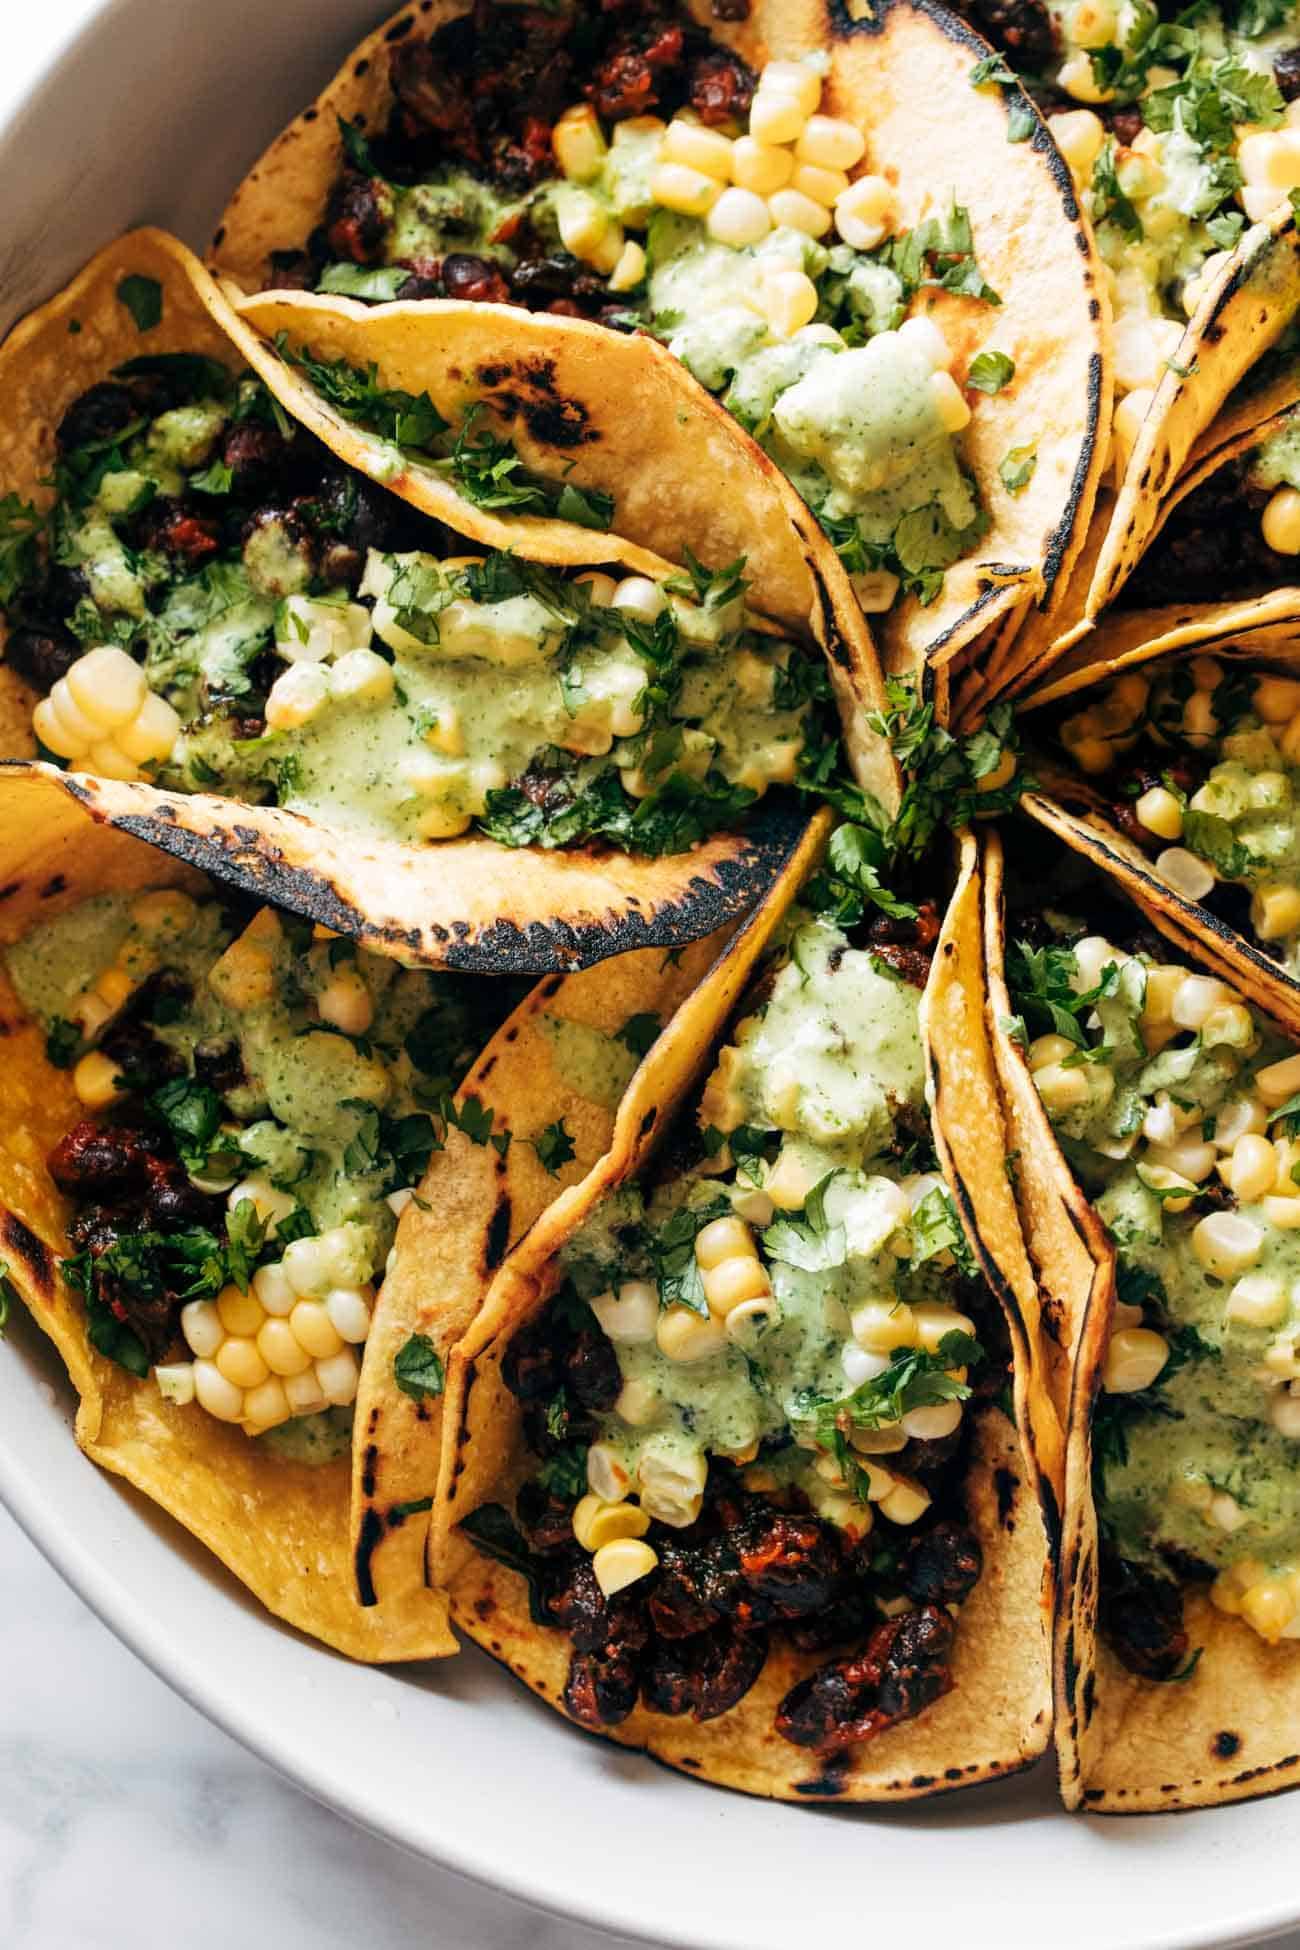
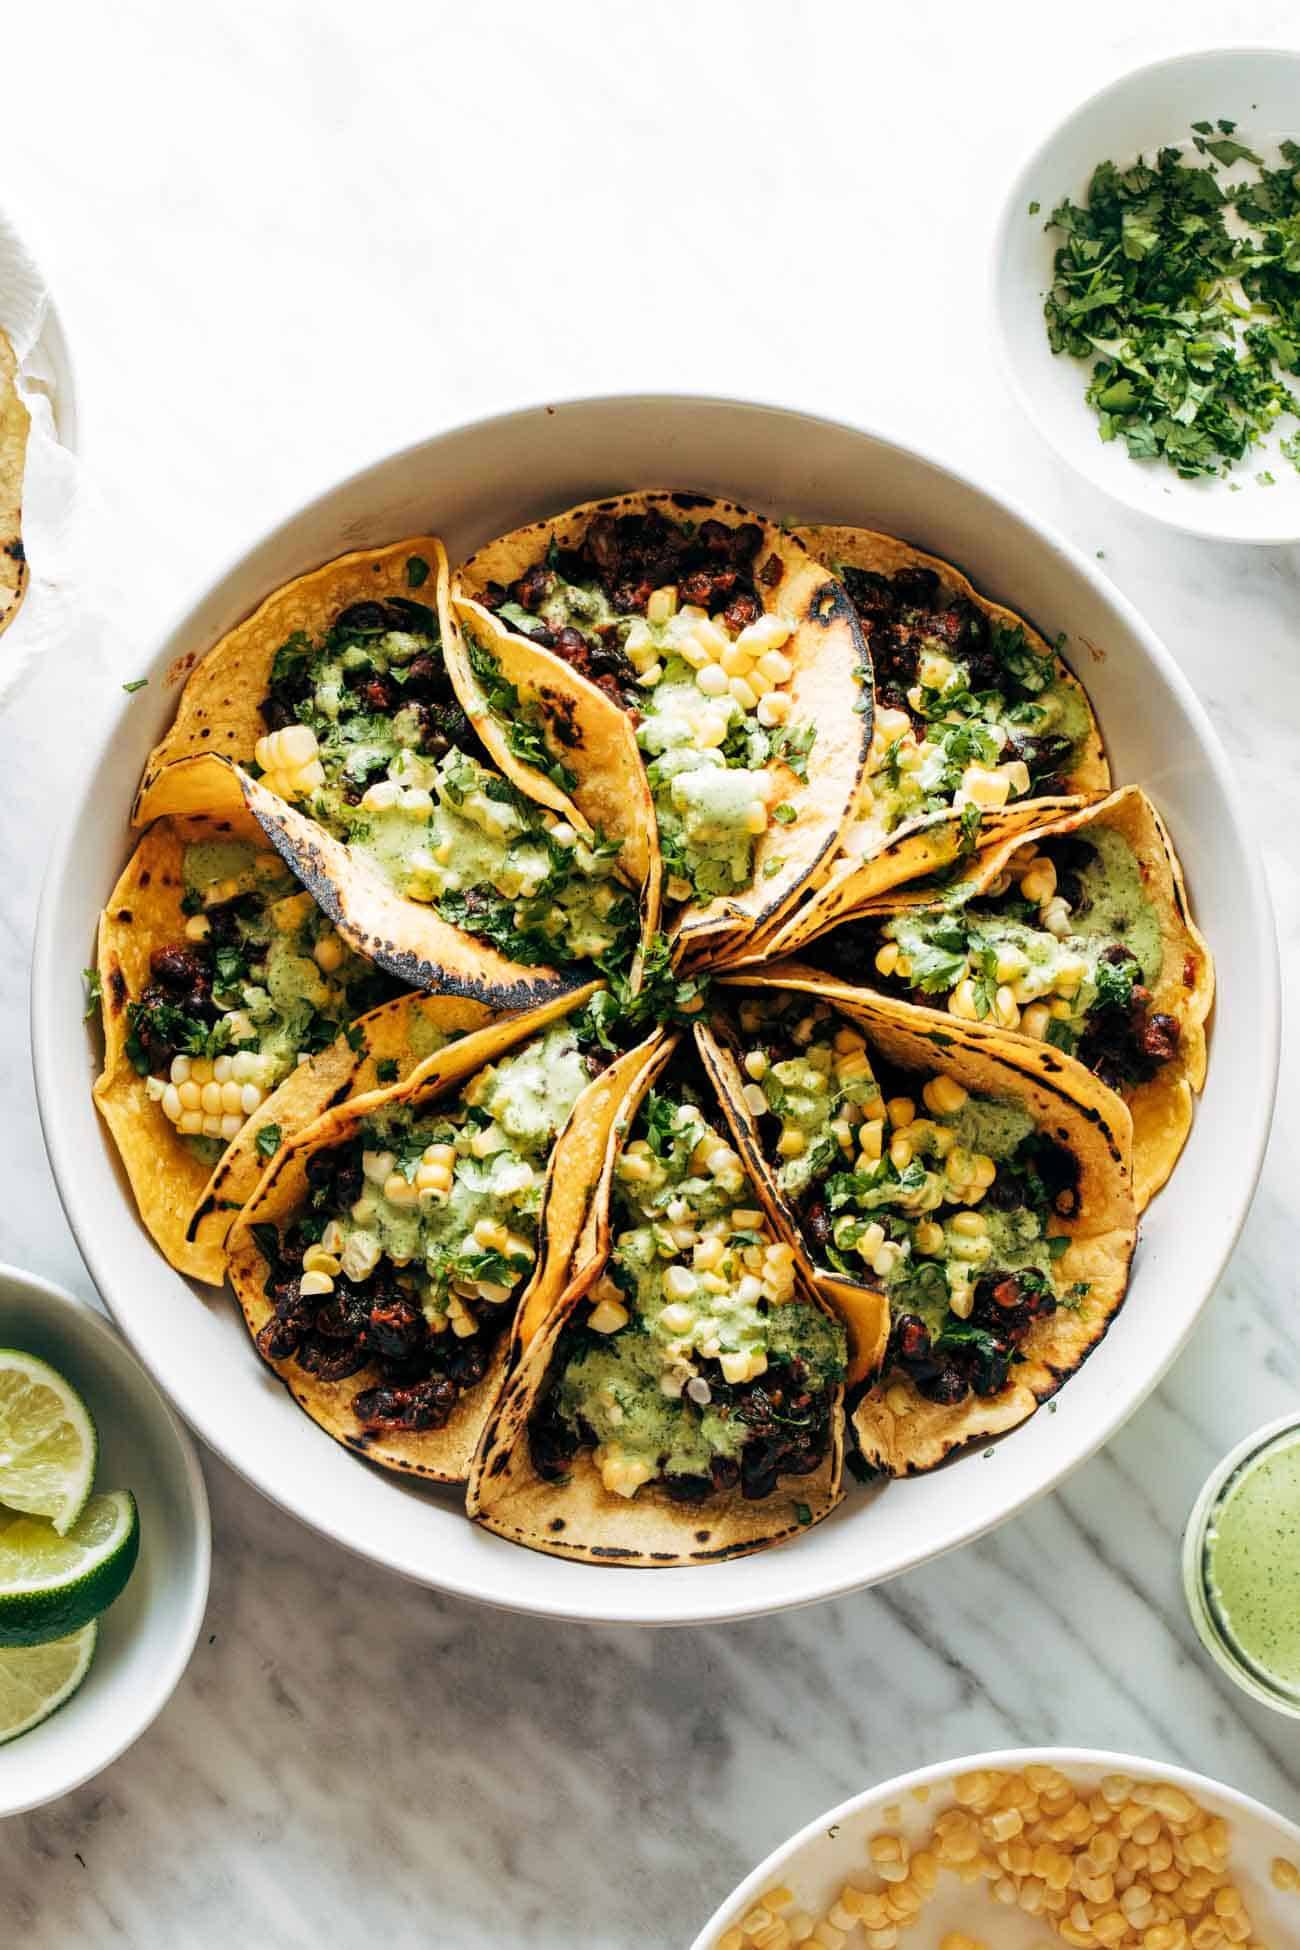
Smoky beans and greens tacos tucked together in a pan and topped with corn and Aji Verde sauce.

These tacos are just one long love letter to FLAVOR. ♡

Smoky chipotle black beans, sautéed with kale and garlic and spices, tucked into charred corn tortillas, topped with fresh, crisp sweet corn cut right off the cob, and smothered with too much (and yet never enough) aji verde.

As of lately I have been affectionately calling these guys “beans and greens tacos”, and OH MY GOODNESS, they are just so delightful. They appear humble with the black bean / kale vibes and a cutesy little name, but seriously, don’t sleep on these. They are a top summer recipe for me this year.

Smoky beans and greens tacos in a circular pattern on a plate and topped with Aji Verde sauce and corn.

Over the last few weeks these have been repeatedly served to myself, my husband, my toddler, and a random sampling of friends who happened to be over at dinnertime. Everyone has given them two thumbs up, and more importantly, everyone has confirmed what we all know in our hearts: that the real star here is the aji verde.

You Need To Know About Aji Verde

Aji verde is a spicy Peruvian green sauce, and it came into my life last year when I made it as a little drizzley drizzle for this plantain stew (um, incredible). Now here we are in the summer, when stew is out and tacos are in, so I’m revisiting the beloved aji verde for these beans and greens tacos. Because what’s a taco without a good sauce? Sad. That’s what it is. And we don’t do sad tacos. Enter: more aji verde.

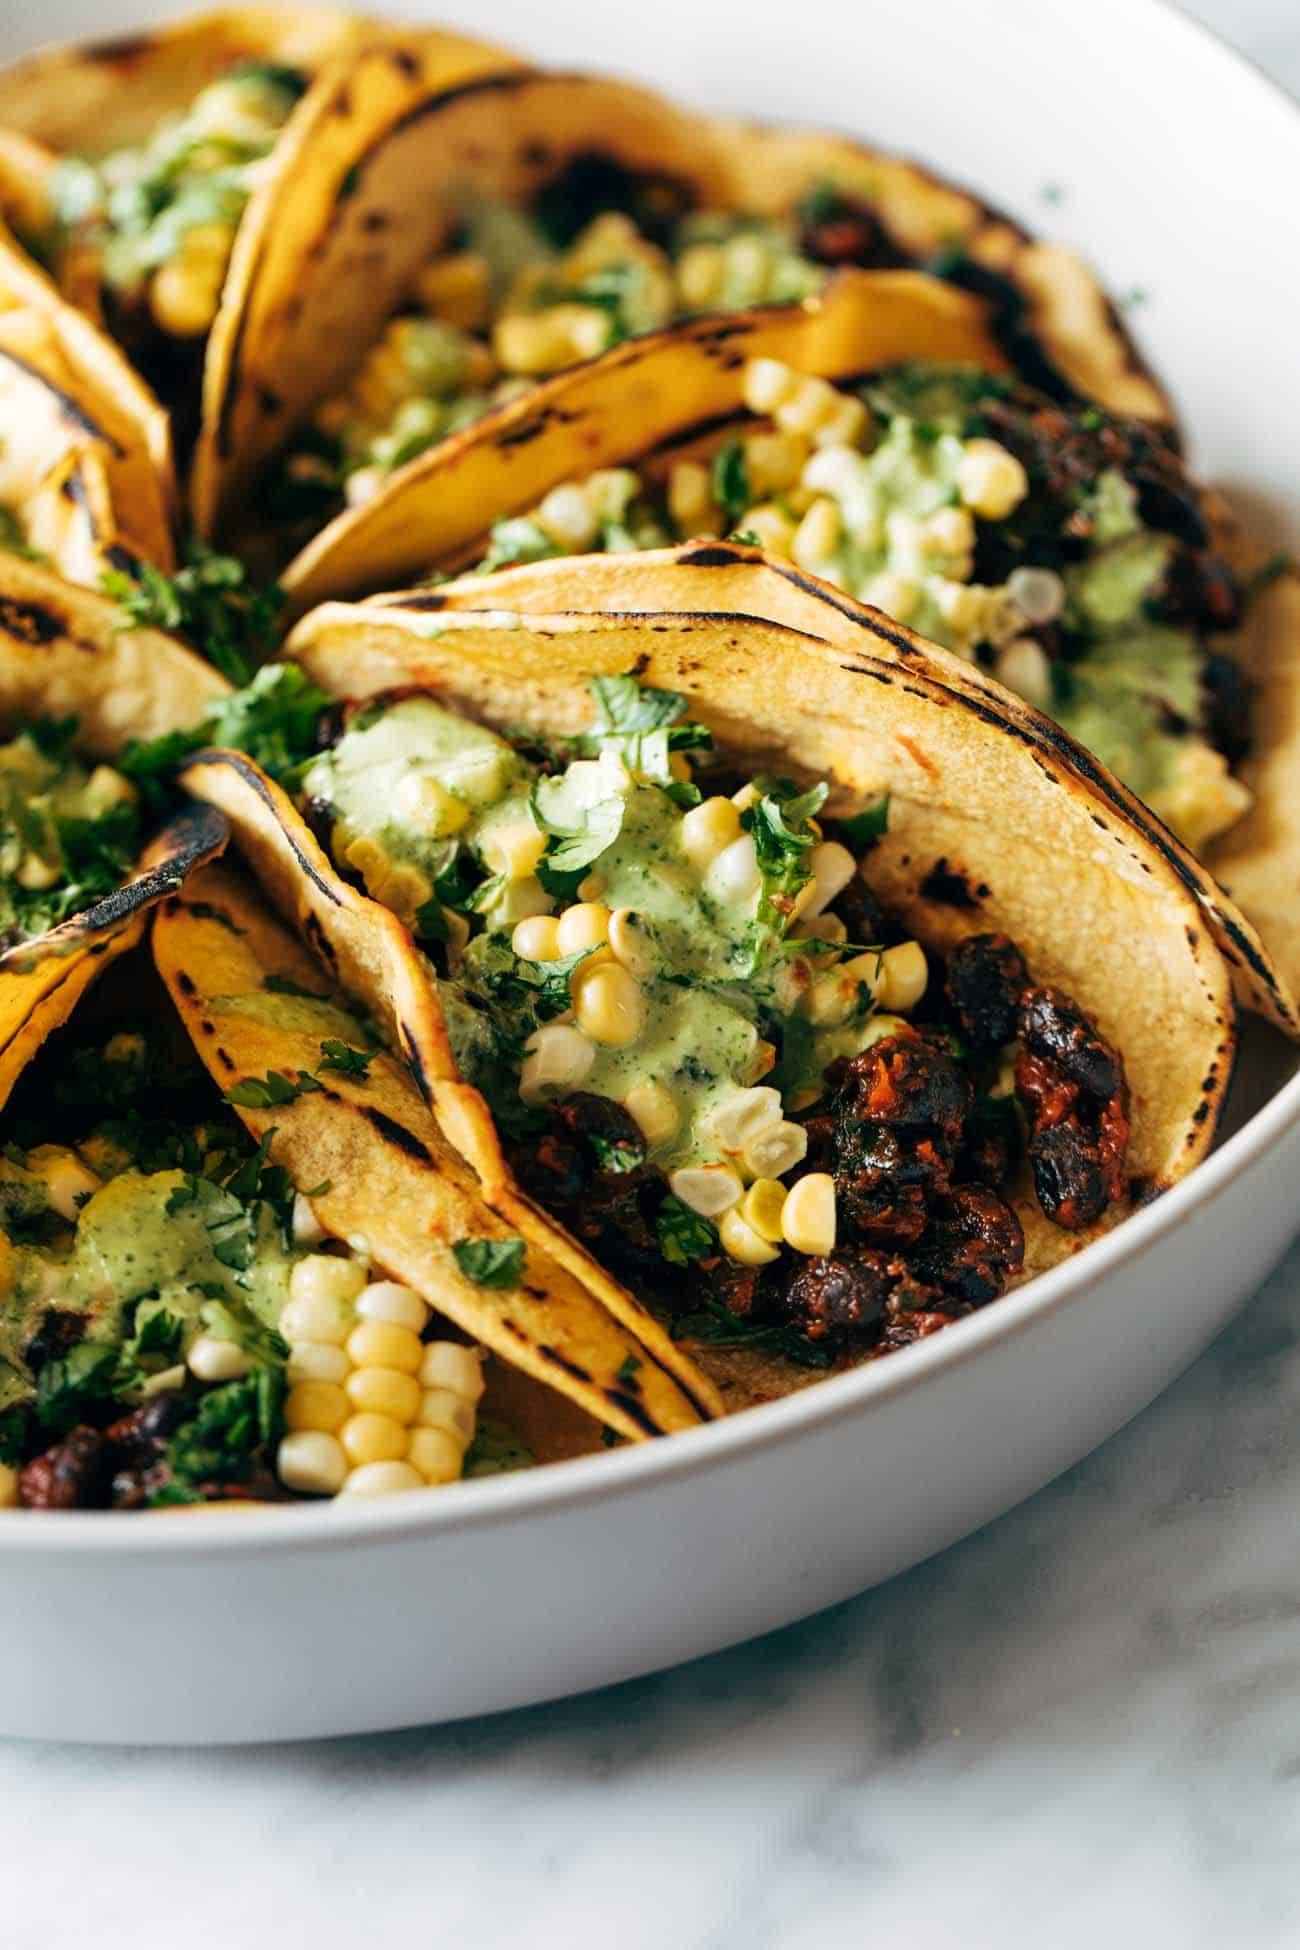
Close-up of Smoky Beans and Green tacos on a plate with corn and Aji verde sauce drizzled on top.

What To Pile On Top Of These Tacos

As with all tacos, please, by all means, go big with your toppings. You know I will approve of the more-is-more mentality here. For one, I can confirm that avocado is killer. Slaw or some kind of pico would be excellent. Pickled red onions would truly make the angels sing. And the sweet corn that I generously scooped all over my tacos was a peppy nod to summer and all things sweet, fresh, and a little bit crunchy.

But really, all you NEED need for the base of these are:

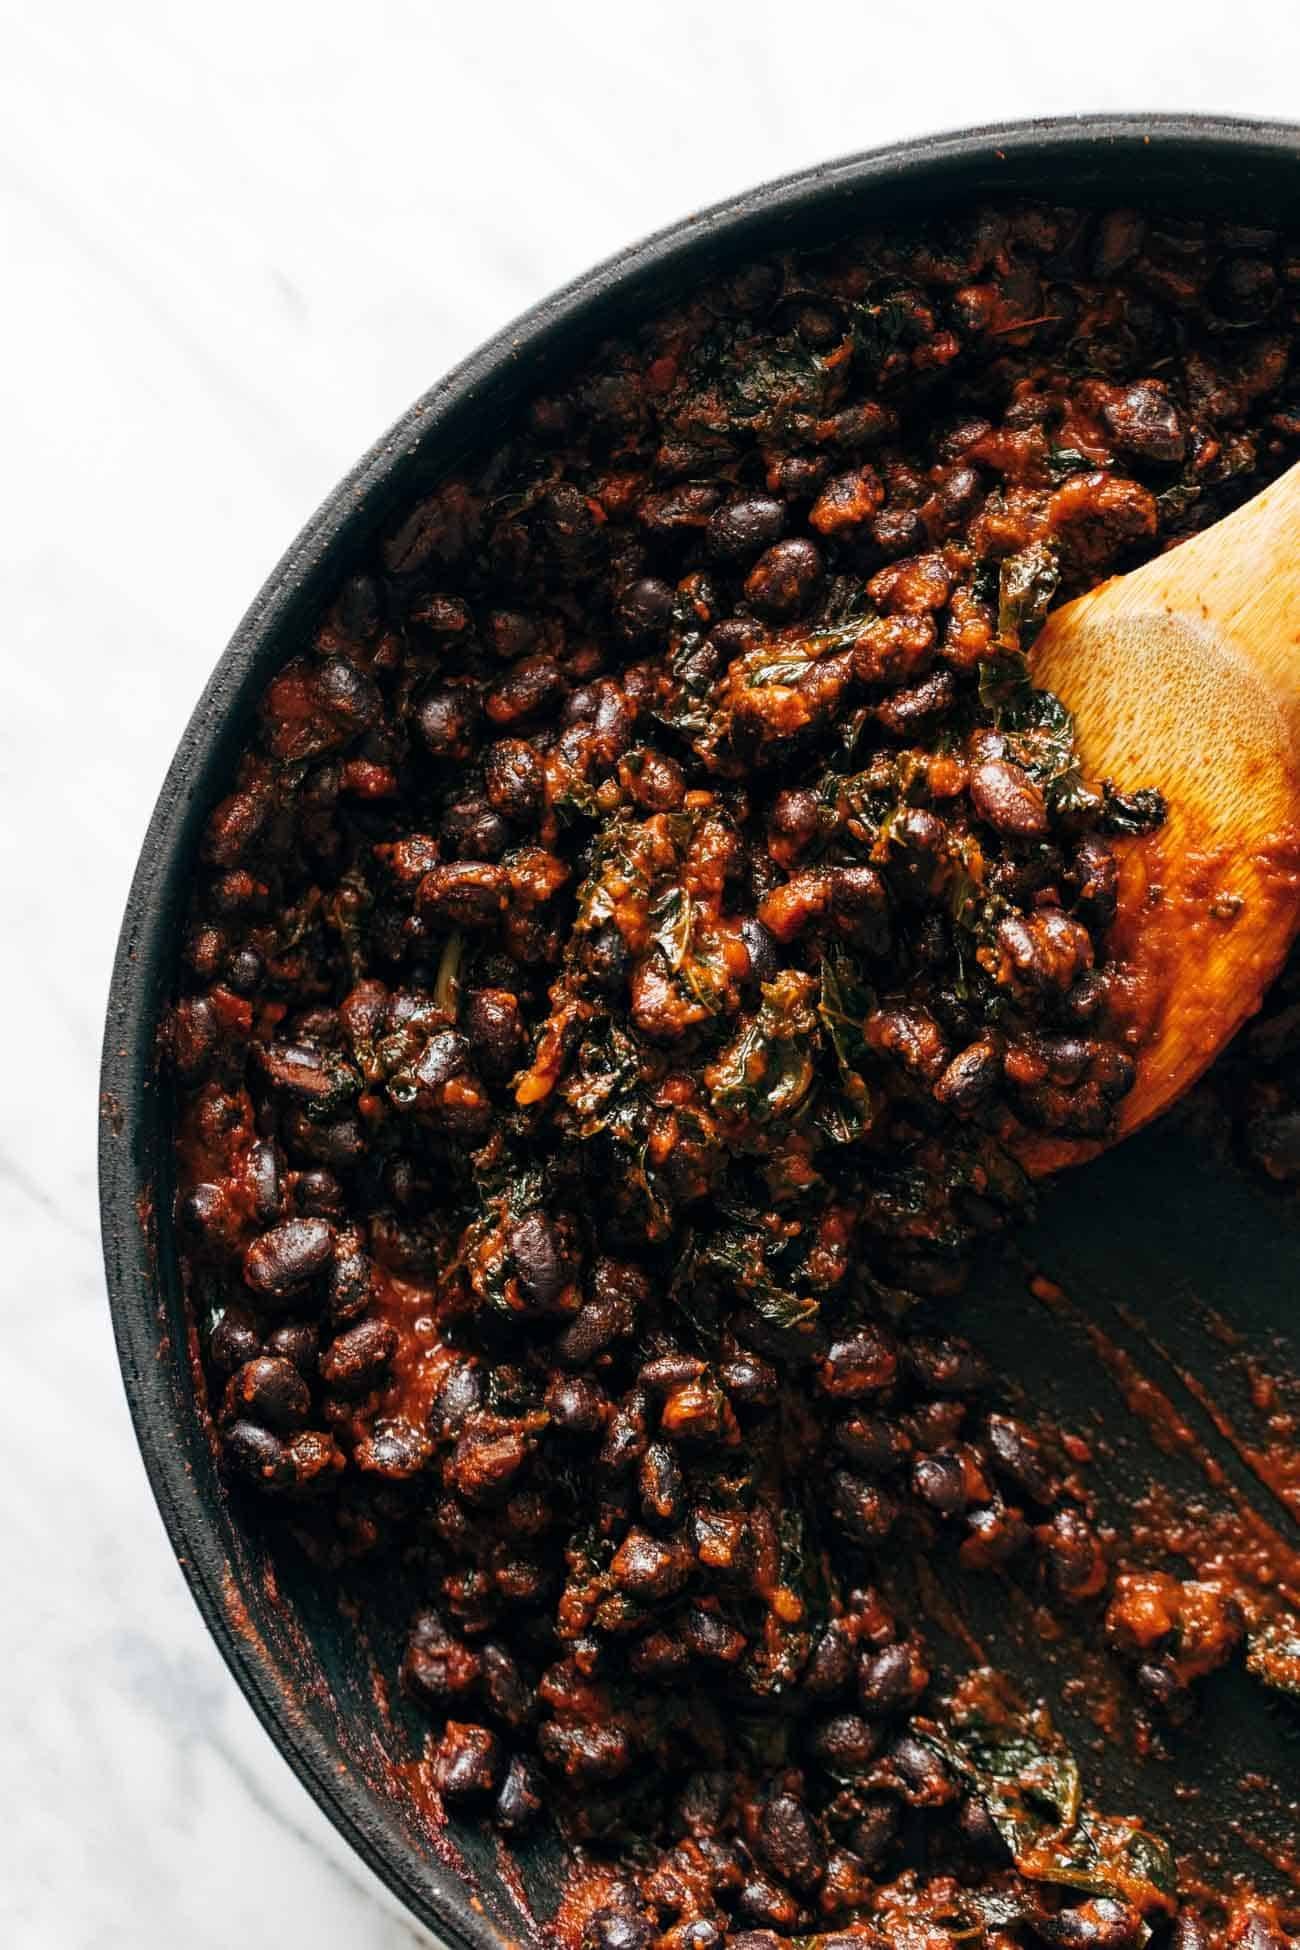
  • Chipotle black bean and kale mixture (pictured in the pan up there, looking spicy, mysterious, and delicious)
  • Aji verde x10
Smoky black bean filling with greens being stirred around in a pan with a wooden spoon.

Holy smoke show, these were so good. Three cheers for vegetarian tacos that you can look forward to eating and feel proud to serve to friends (aka self). YUM.

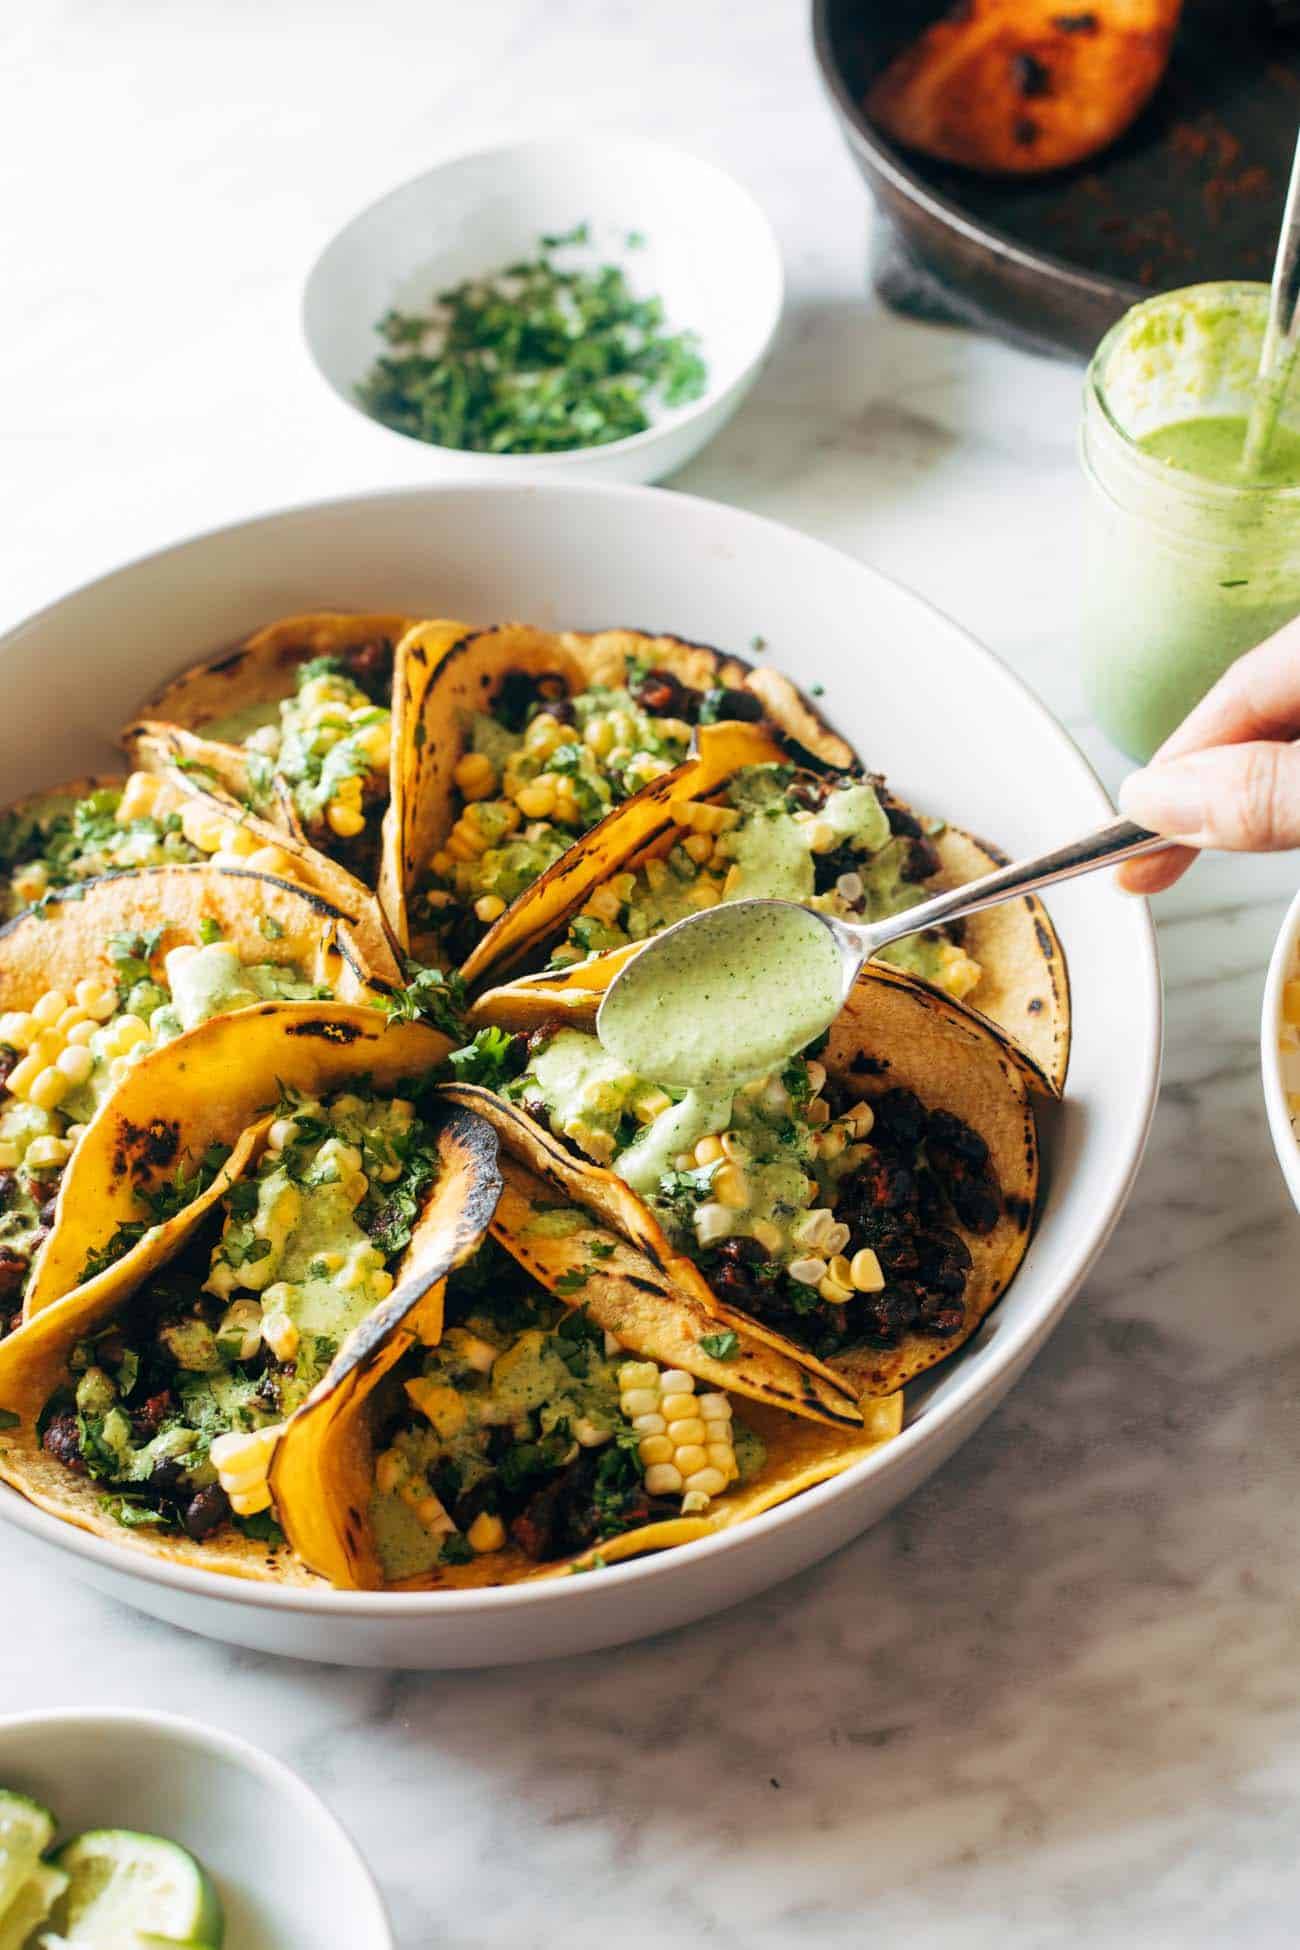
Smoky beans and greens tacos on a plate with corn and aji verde sauce being drizzled on top with a metal spoon.

Smoky Beans and Greens Tacos: FAQs

I want to make my own enchilada sauce. Would that work here?

Absolutely! This is the best homemade enchilada sauce and is ready for you in 5 minutes. Seriously!

Is there a way to make this vegan?

Good news! It’s super easy to vegan-ize this recipe. Just swap out the regular mayo for a vegan mayo here.

Are these tacos spicy?

The tacos themselves have a lot of flavor, but they aren’t really spicy. The Aji Verde sauce on the other hand has some heat and punch to it, so if you don’t love spicy food, it’s probably best to limit how much green sauce goes on top of your tacos.

Source notes: Aji verde is a Peruvian green sauce. I based this version off the recipe from A Cozy Kitchen, which is my all-time go-to for this amazing, punchy, fiesty green sauce (with a few swaps based on what I usually have in my fridge). So yummy!

Print

Smoky Beans and Greens Tacos with Aji Verde


  • Author: Lindsay
  • Prep Time: 10 minutes
  • Cook Time: 10 minutes
  • Total Time: 20 minutes
  • Yield: 4 servings

Description

Three cheers for summertime eating! Smoky black beans, sautéed with kale and garlic and spices, tucked into charred corn tortillas, and topped with the best feisty, punchy green sauce – Aji Verde! 


Ingredients

Units

Smoky Beans and Greens

  • 1 tablespoon olive oil
  • 23 cups shredded kale (no stems, please)
  • one 14-ounce can black beans
  • 1 cup enchilada sauce (I like this one)
  • 1 chipotle pepper, minced (or a sprinkle of ground dried chipotle spice)
  • salt to taste

Aji Verde

  • 2 tablespoons olive oil
  • 1/2 cup mayonnaise
  • 3 ounces of queso fresco (optional)
  • 1 jalapeno pepper, with seeds and ribs to keep it spicy (remove for a mild version)
  • 1 bunch cilantro
  • 2 cloves garlic
  • juice of 1 lime
  • pinch of salt (to taste)

Taco Extras

  • tortillas
  • fresh sweet corn, cut off the cob
  • anything else you like on your tacos

Instructions

  1. Make the aji verde: Blend aji verde sauce ingredients together until smooth.
  2. Cook the beans and greens: Heat the olive oil in a skillet over medium high heat. Add kale; sauté for 4-5 minutes until soft. Add beans, enchilada sauce, and chipotle. Season with salt. Simmer until the kale is very well-cooked and everything has taken on a roasty-tomato-chipotle kind of of vibe.
  3. Serve: Fill each tortilla with beans and greens, corn, and a heavy drizzle of aji verde sauce. Top with whatever else makes your heart happy. Mwah. So good.
  • Category: Tacos
  • Method: Stovetop
  • Cuisine: Peruvian-Inspired

Keywords: black bean tacos, taco recipe, vegetarian tacos

Recipe Card powered by Tasty Recipes logo

More Over-The-Top Delicious Black Bean Recipes

The post Smoky Beans & Greens Tacos with Aji Verde appeared first on Pinch of Yum.


from Pinch of Yum https://ift.tt/3iEC2KP

Thursday, June 10, 2021

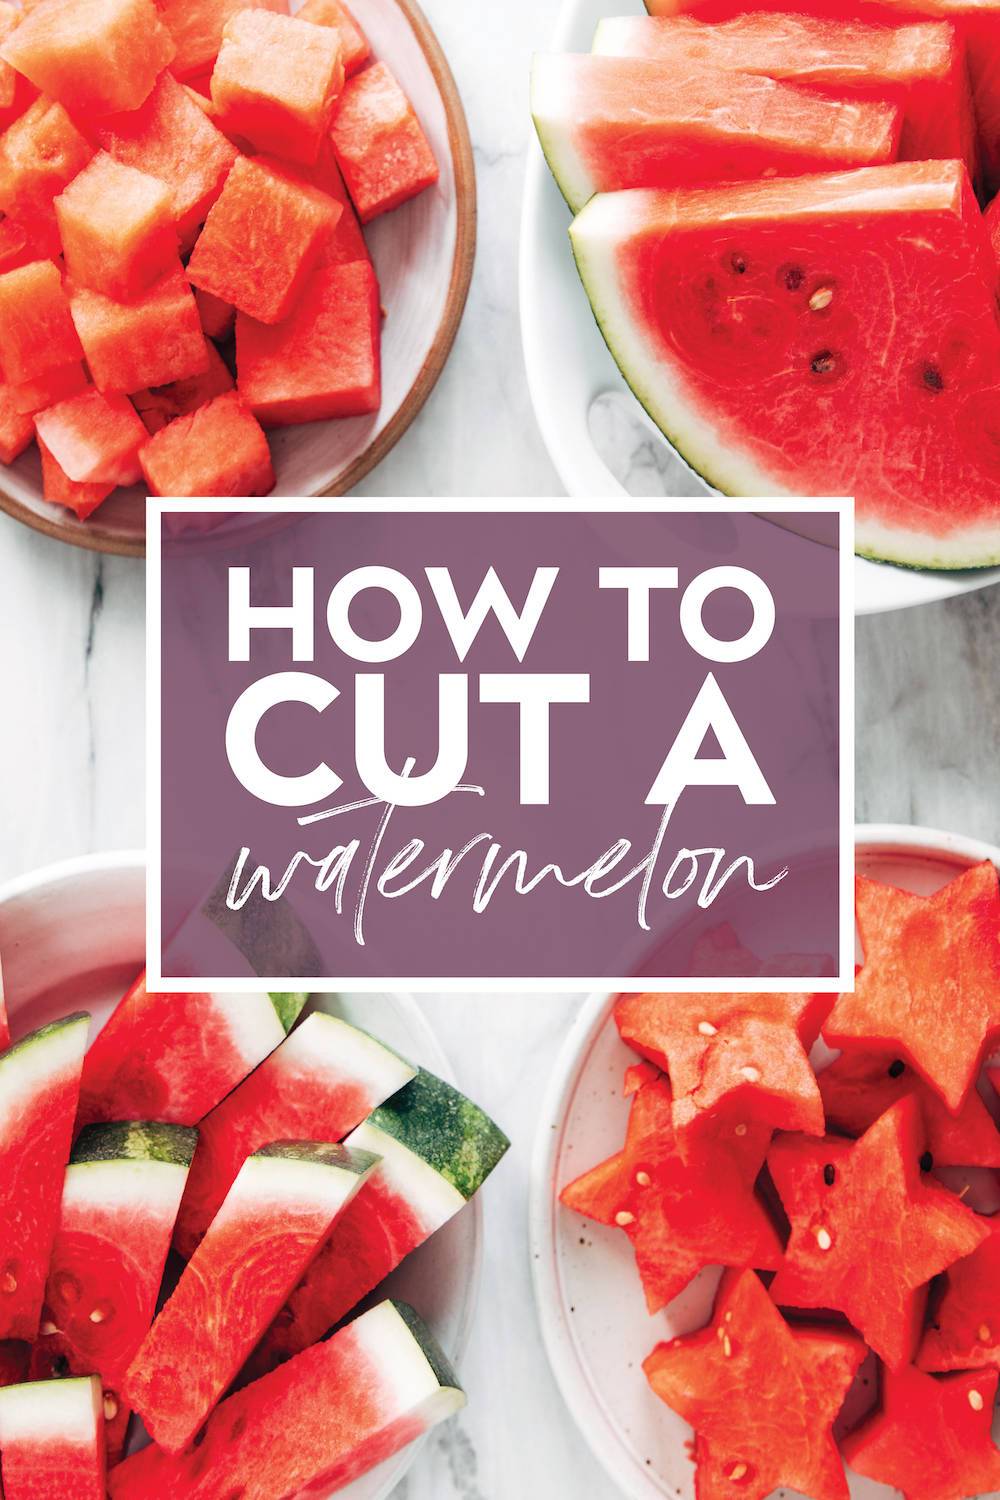
How to Cut a Watermelon

Okay, who among us hasn’t lugged one of these delicious juicy, red giants into our kitchens and then thought “Wow, where do I start?” It’s kinda nice to have a plan before you start wielding a knife around that rolly, wobbly, seriously-so-giant summer treat, you know? And there is so much possibility beyond your standard cube situation!

We’re not saying you have to, like, carve a shark into it or anything (although please trust us, SOMEONE HAS DONE THIS), but you could go for snack-sticks, fun shapes, or our favorite: turning that big ol’ melon into your own little juice keg to the absolute marvel of all your party guests. So scroll on, friends, for all things watermelon!

Prefer To Watch All The Ways Instead Of Read?

How To Cut a Watermelon Like a Pro

There are five main ways we love to cut a watermelon.

  1. Cubes (your standard cubed situation – great for easy snacking, fruit bowls, smoothies, and salads)
  2. Triangles (your cutie watermelon wedge – this one has a built-in rind handle for easy eating and has been voted “Most Likely to Be Spotted at a BBQ”)
  3. Sticks (your grab-and-go melon friend – an unconventional method but, honestly, just a really fun way to eat watermelon)
  4. Fancy (your extra-special fruit cut – just a quick way to make watermelon look like the superstar it truly is)
  5. Party Trick (your melon-turned-drink-vessel – pop a spigot on the front and instant watermelon juice)

The Basic Cube Cut

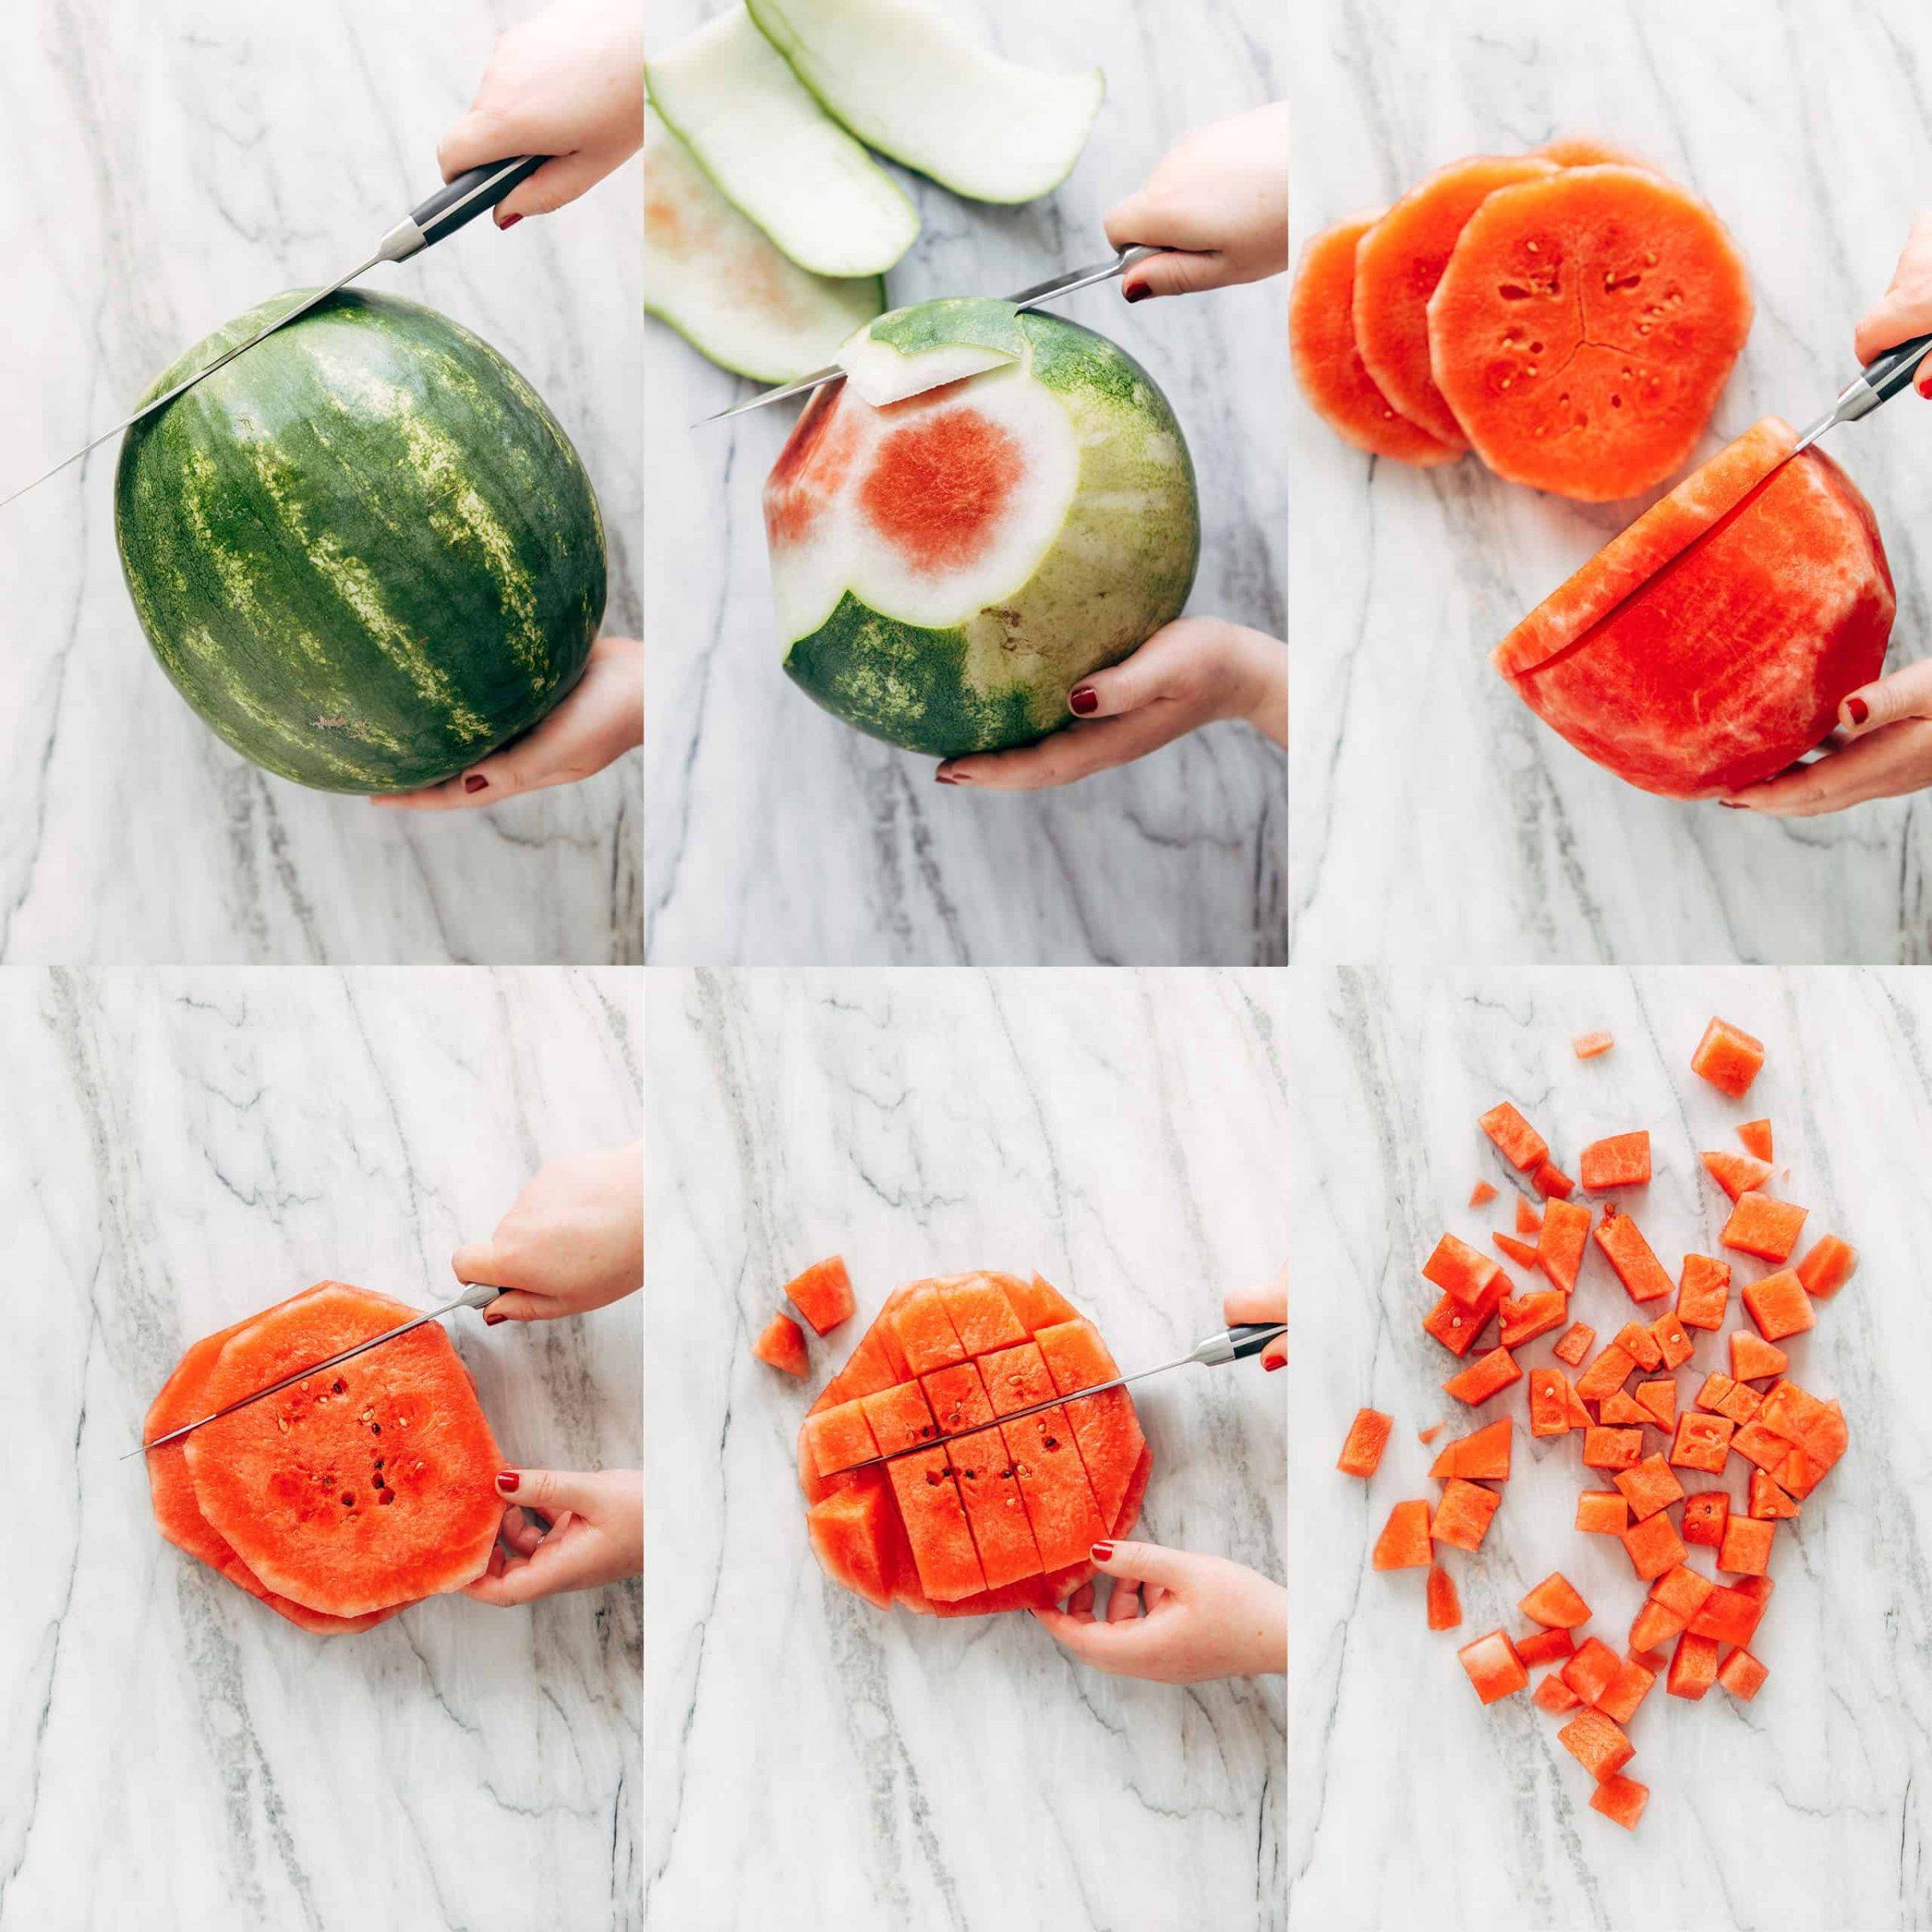
Collage showing how to cut a watermelon into cubes.

Step 1: Cut the ends off of the watermelon to make flat sides. This will help keep things stable when cutting, so your watermelon doesn’t roll right off the counter.

Step 2: Follow the shape of the melon with your knife to cut off the outside rind, including the white inner layer.

Step 3: Make 1-inch slices vertically, then 1-inch slices horizontally to form watermelon cubes.

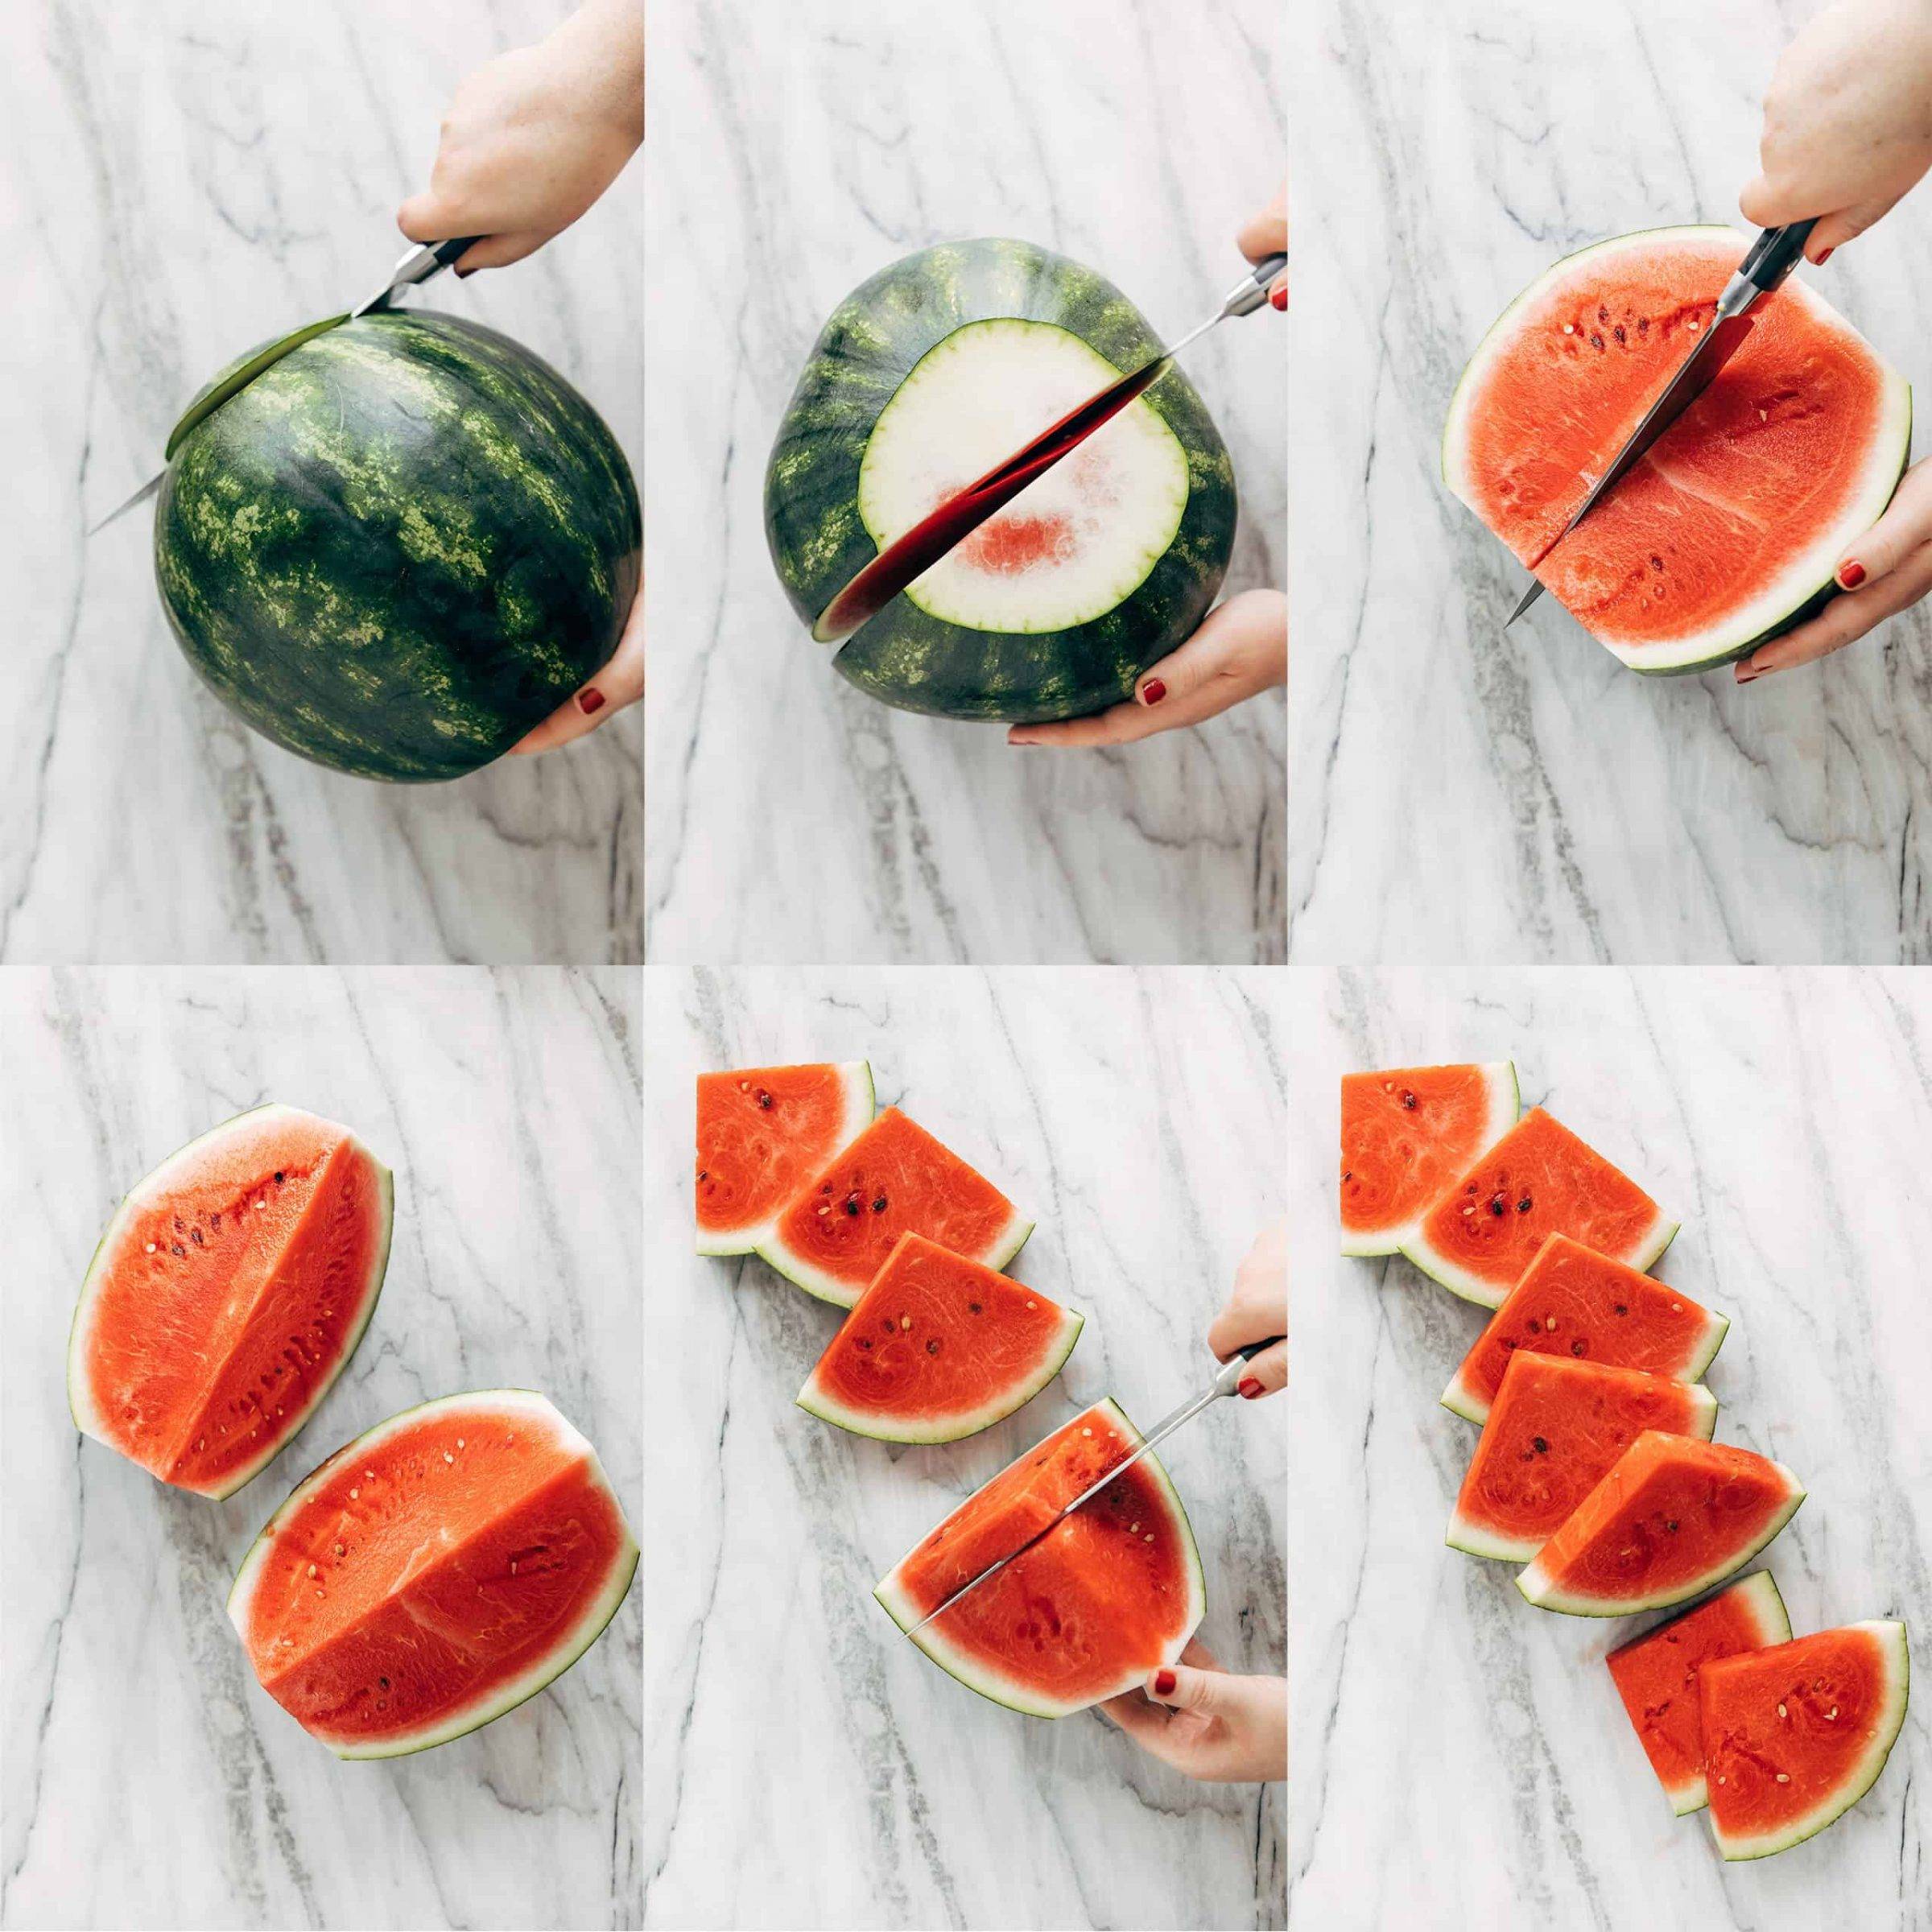
The Triangle Cut

Collage showing how to cut a watermelon into triangles.

Step 1: Cut ends off of the watermelon.

Step 2: Cut in half lengthwise, then cut each half lengthwise once more.

Step 3: Make cuts 1-inch apart to create watermelon wedges. Repeat with the other halves of the watermelon.

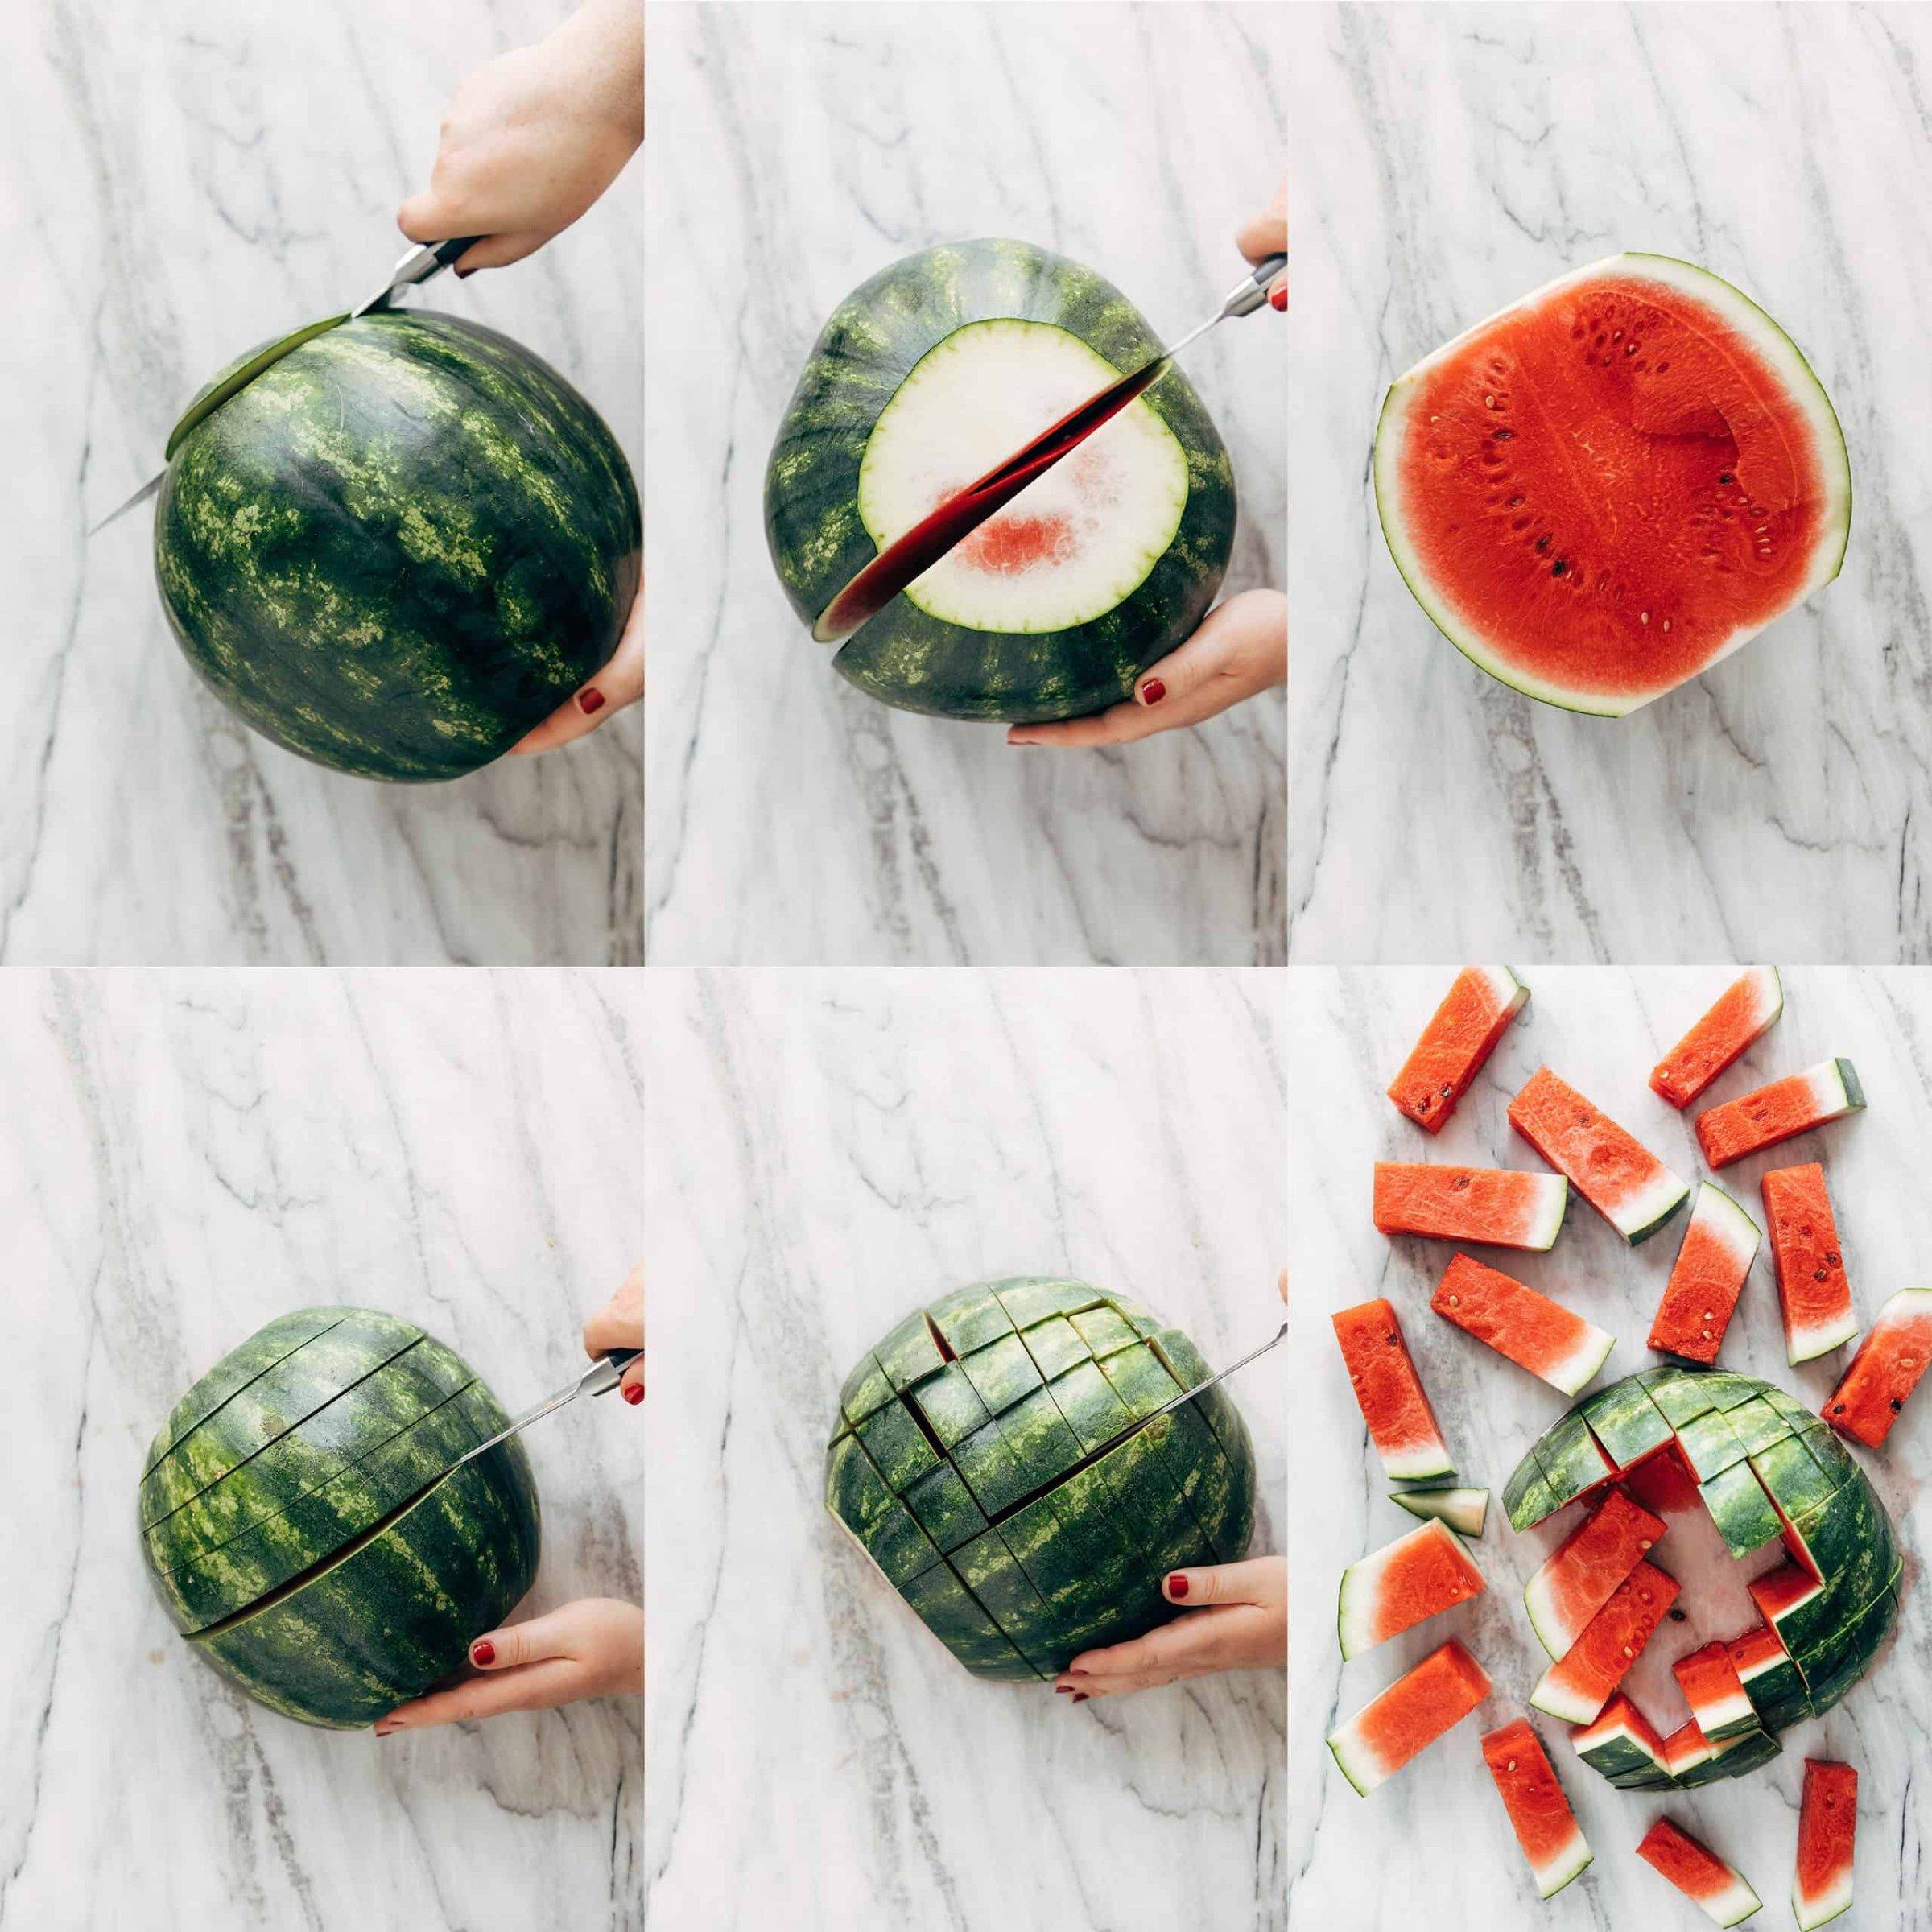
The Stick Cut

Collage showing how to cut a watermelon into sticks.

Step 1: Cut ends off of the watermelon, then cut watermelon in half.

Step 2: Put watermelon cut side down. Make cuts 1-2 inches wide.

Step 3: Rotate the watermelon and make another set of cuts to form sticks. Repeat with the other half of the watermelon.

Step 4: Pull watermelon sticks out and enjoy!

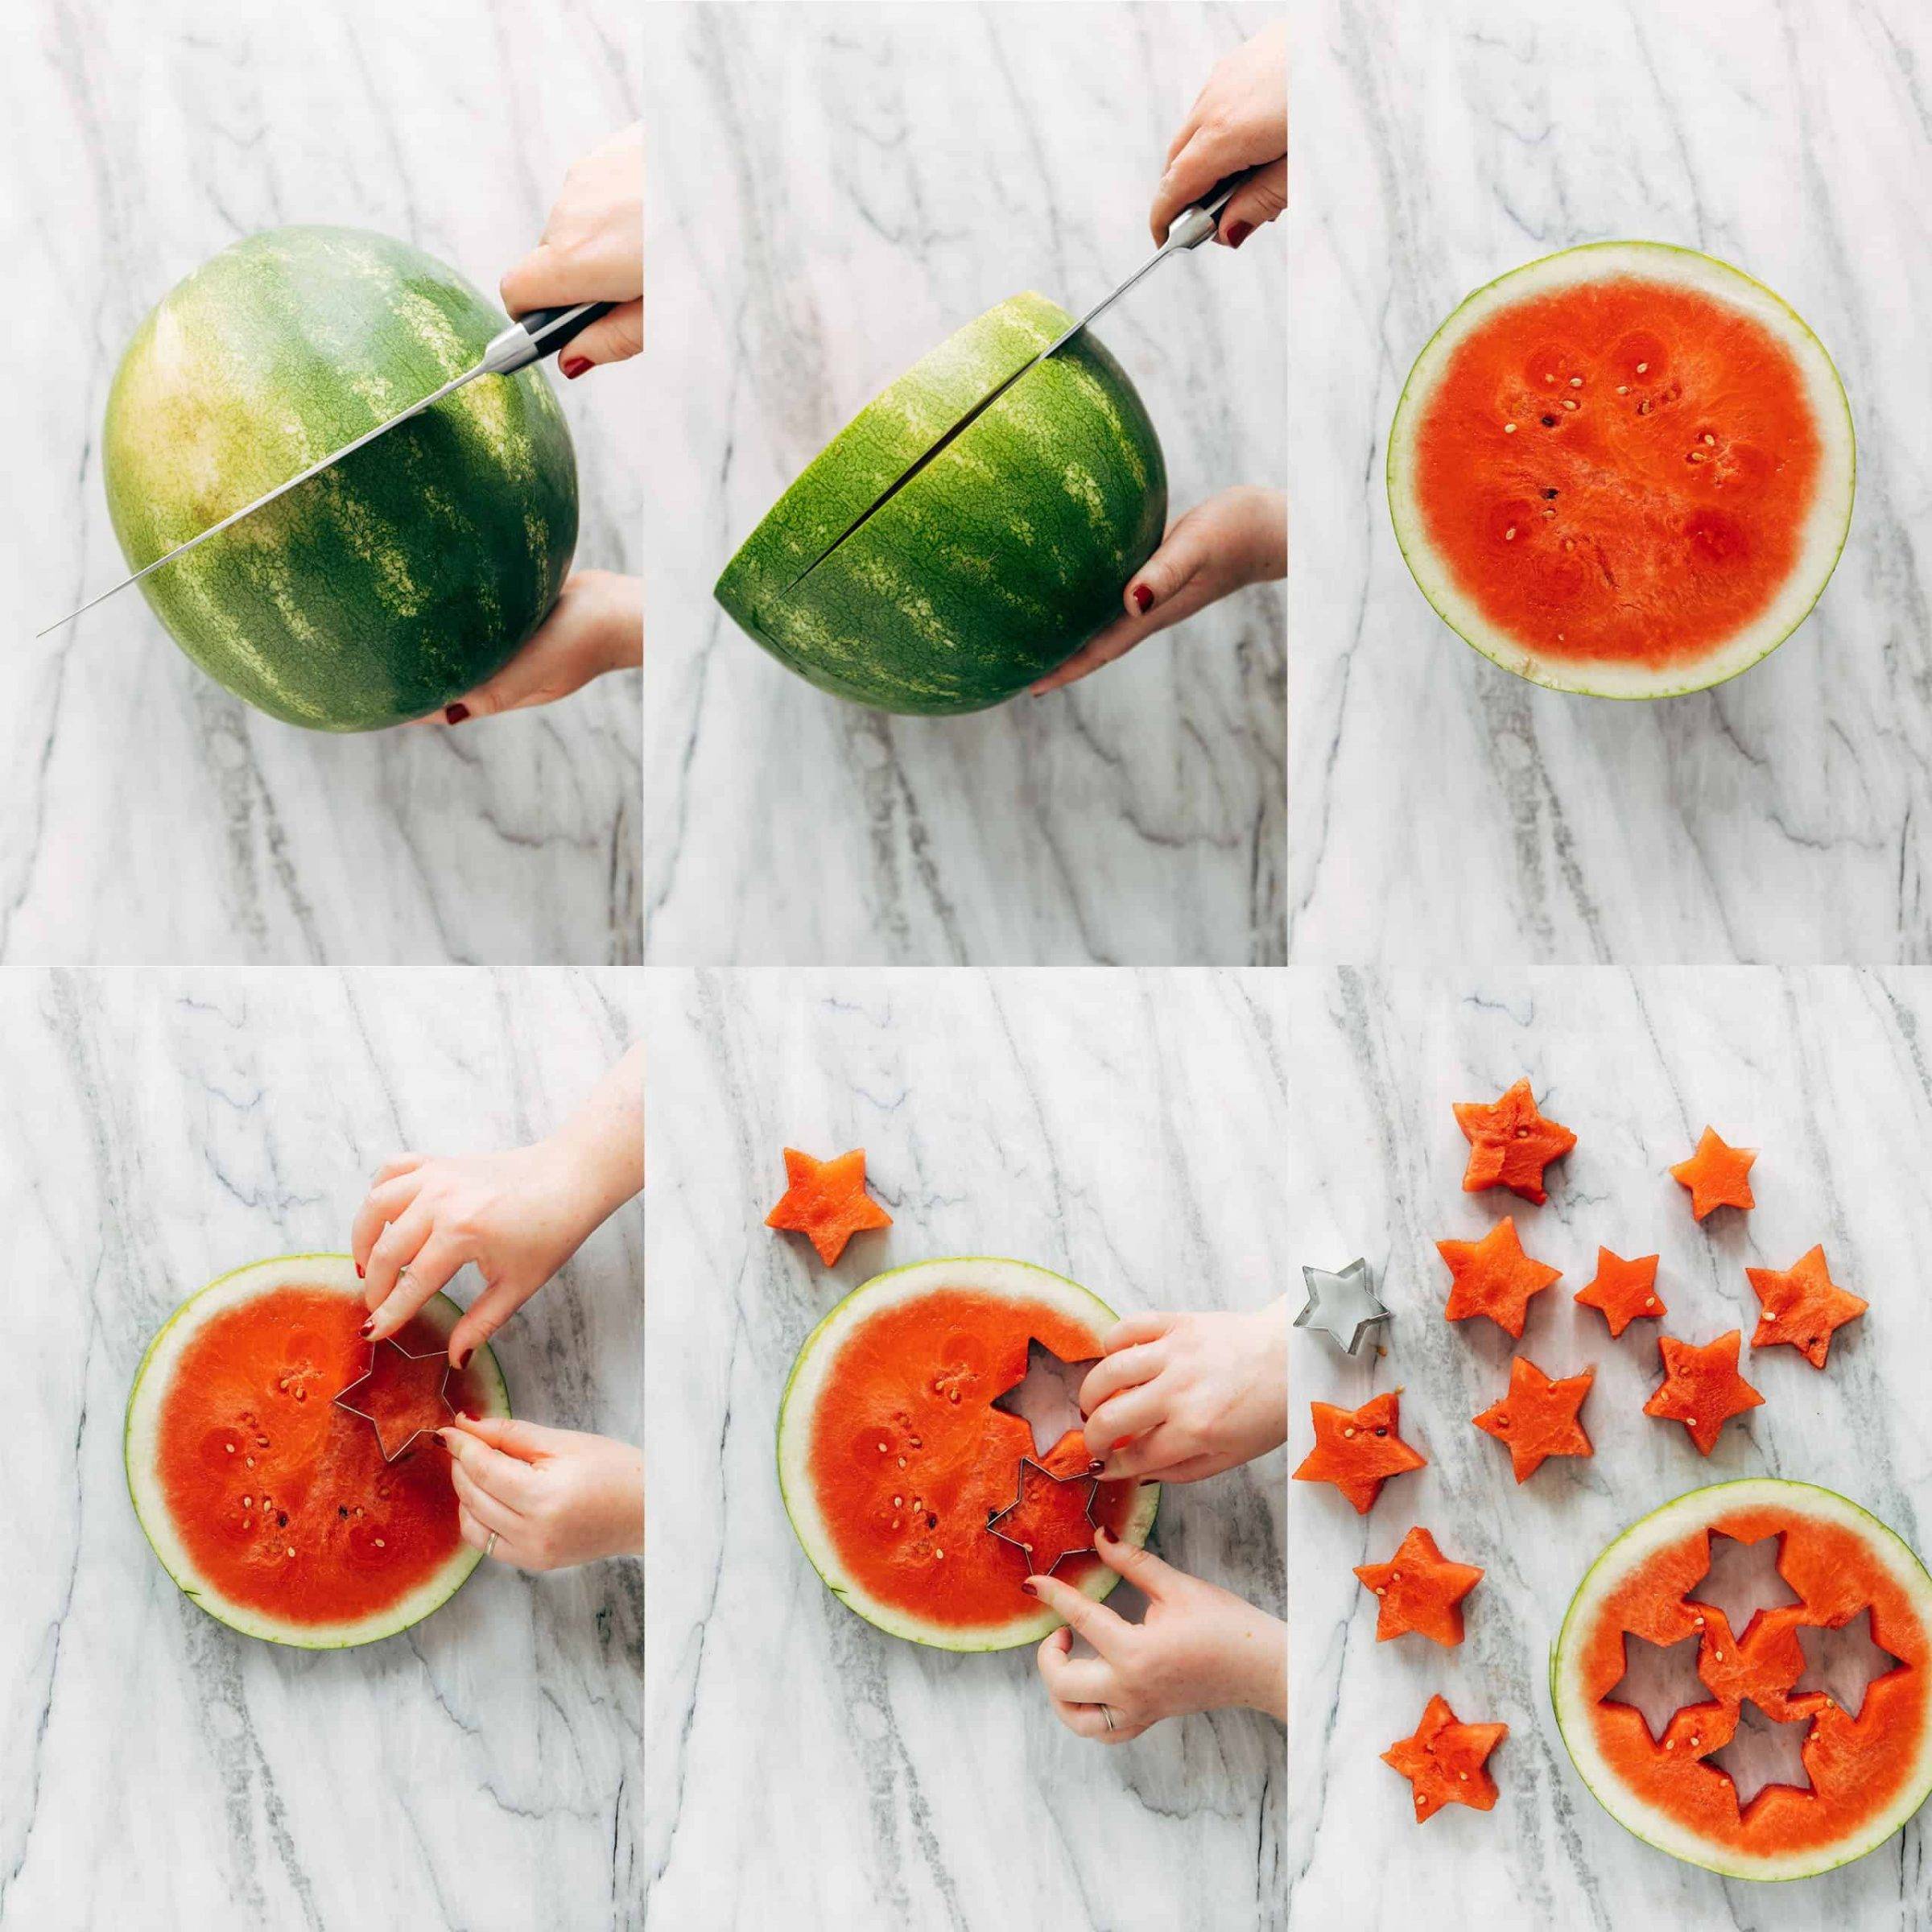
The Fancy Cut

Collage showing how to cut a watermelon into stars.

Step 1: Cut watermelon in half.

Step 2: Continuing width-wise, make cuts 1-inch apart to create watermelon circles.

Step 3: Use a cookie cutter to cut out different shapes of melon. Stars are our favorite and just so fun!

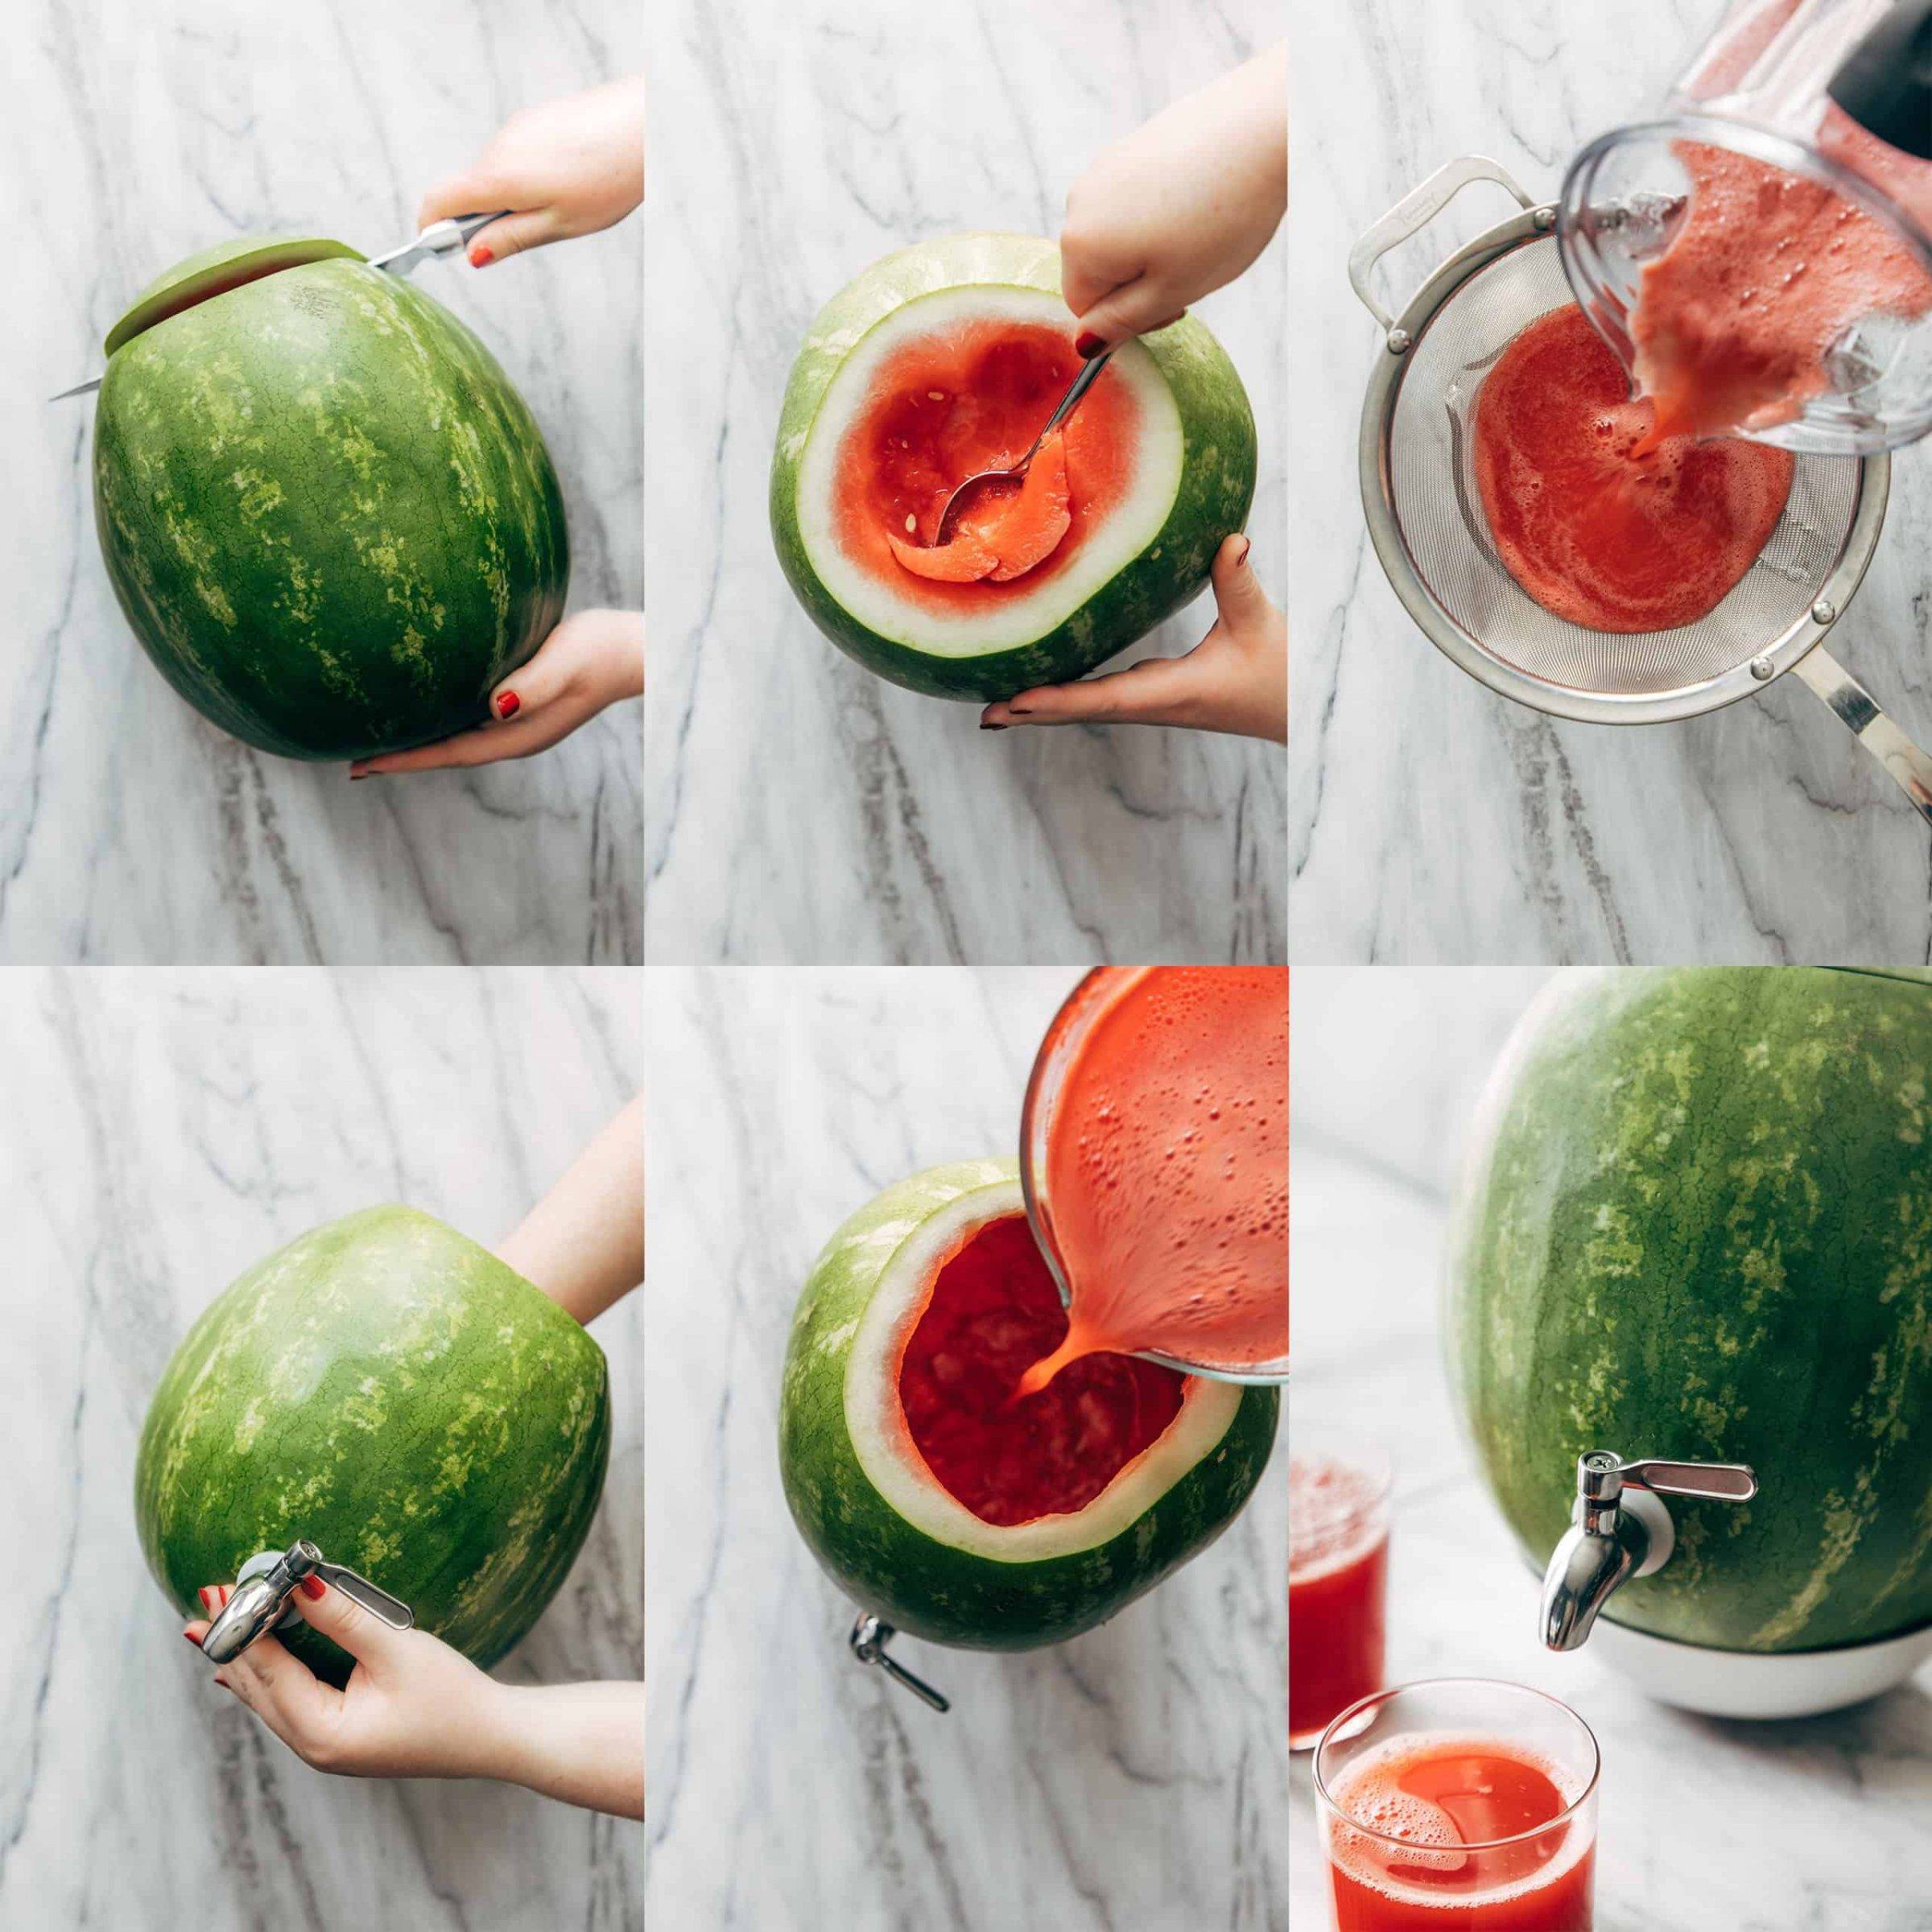
The Party Trick

Collage showing how to cut a watermelon to make watermelon juice with a spigot.

Step 1: Cut a tiny sliver off the end of the watermelon so it has a flat bottom to stand up straight.

Step 2: Cut the remainder of the watermelon 1/4 of the way from the top.

Step 3: Scoop out most of the melon from the inside and blitz everything up in a blender until it becomes like a melon puree. This will probably take a few rounds with all the melon scooped out. Put the fruit puree in the fridge for a bit to chill it.

Step 4: Using a knife, cut a little slit in the front where your spigot will go. Push the spigot into the melon and plop your melon in a bowl for stability and serving. Here’s the spigot we used (affiliate link)!

Step 5: Pour the fruit puree back into the whole watermelon and serve cold.

Is It Better To Cut a Watermelon Warm Or Cold?

It’s best to cut watermelon cold since it retains the juices are less likely to spill out from the fruit and it can hold its shape a bit better. Plus, it tastes a bit more refreshing when it’s cold, cold, cold!

How Long After You Buy a Watermelon Should You Cut It?

If you’re storing your watermelon on the counter at room temperature, we’d recommend cutting it up within a week or so. If you’re storing it in the fridge (whoa, this fruit baby takes up space), you have a bit more time and can cut it within 2-3 weeks.

How Long Is Cut Watermelon Good For?

After watermelon is cut, store it in the fridge in a sealed container. It tastes the best if it’s eaten within 3-5 days.

How To Pick Out a Good, Juicy Watermelon

  • Find a hefty melon. It should feel heavy for its size. That’s a good indicator that it has a lot of water and you’ve found a juicy one.
  • Give it a lil’ thwap. It should sound hollow inside and you should hear a deep thunk.
  • Your watermelon shouldn’t be totally green. You’ll want one that has a yellow-ish spot on one side.

How Do I Know When a Watermelon Is Ripe?

  • The sound will be a good indicator. If it sounds hollow, that means it’s juicy and ready for eating. If it sounds dull after tapping it, it needs a bit more time to ripen.
  • That spot on the bottom of the watermelon can also be a good indicator. If the spot is white, give it a little bit more time before cutting it open and wait until you see the yellow spot.

Can You Eat Watermelon Seeds?

The seeds are totally fine to eat. If you prefer though, you can always buy a seedless watermelon.

Favorite Watermelon Recipes We Love


We need to know! Do you have a favorite cut? Maybe a way to chop up that big melon that we didn’t cover? Let’s hear it!

The post How to Cut a Watermelon appeared first on Pinch of Yum.


from Pinch of Yum https://ift.tt/3ivPdNP

Monday, June 7, 2021

Sticky Ginger Rice Bowls with Pickled Veg and Mango

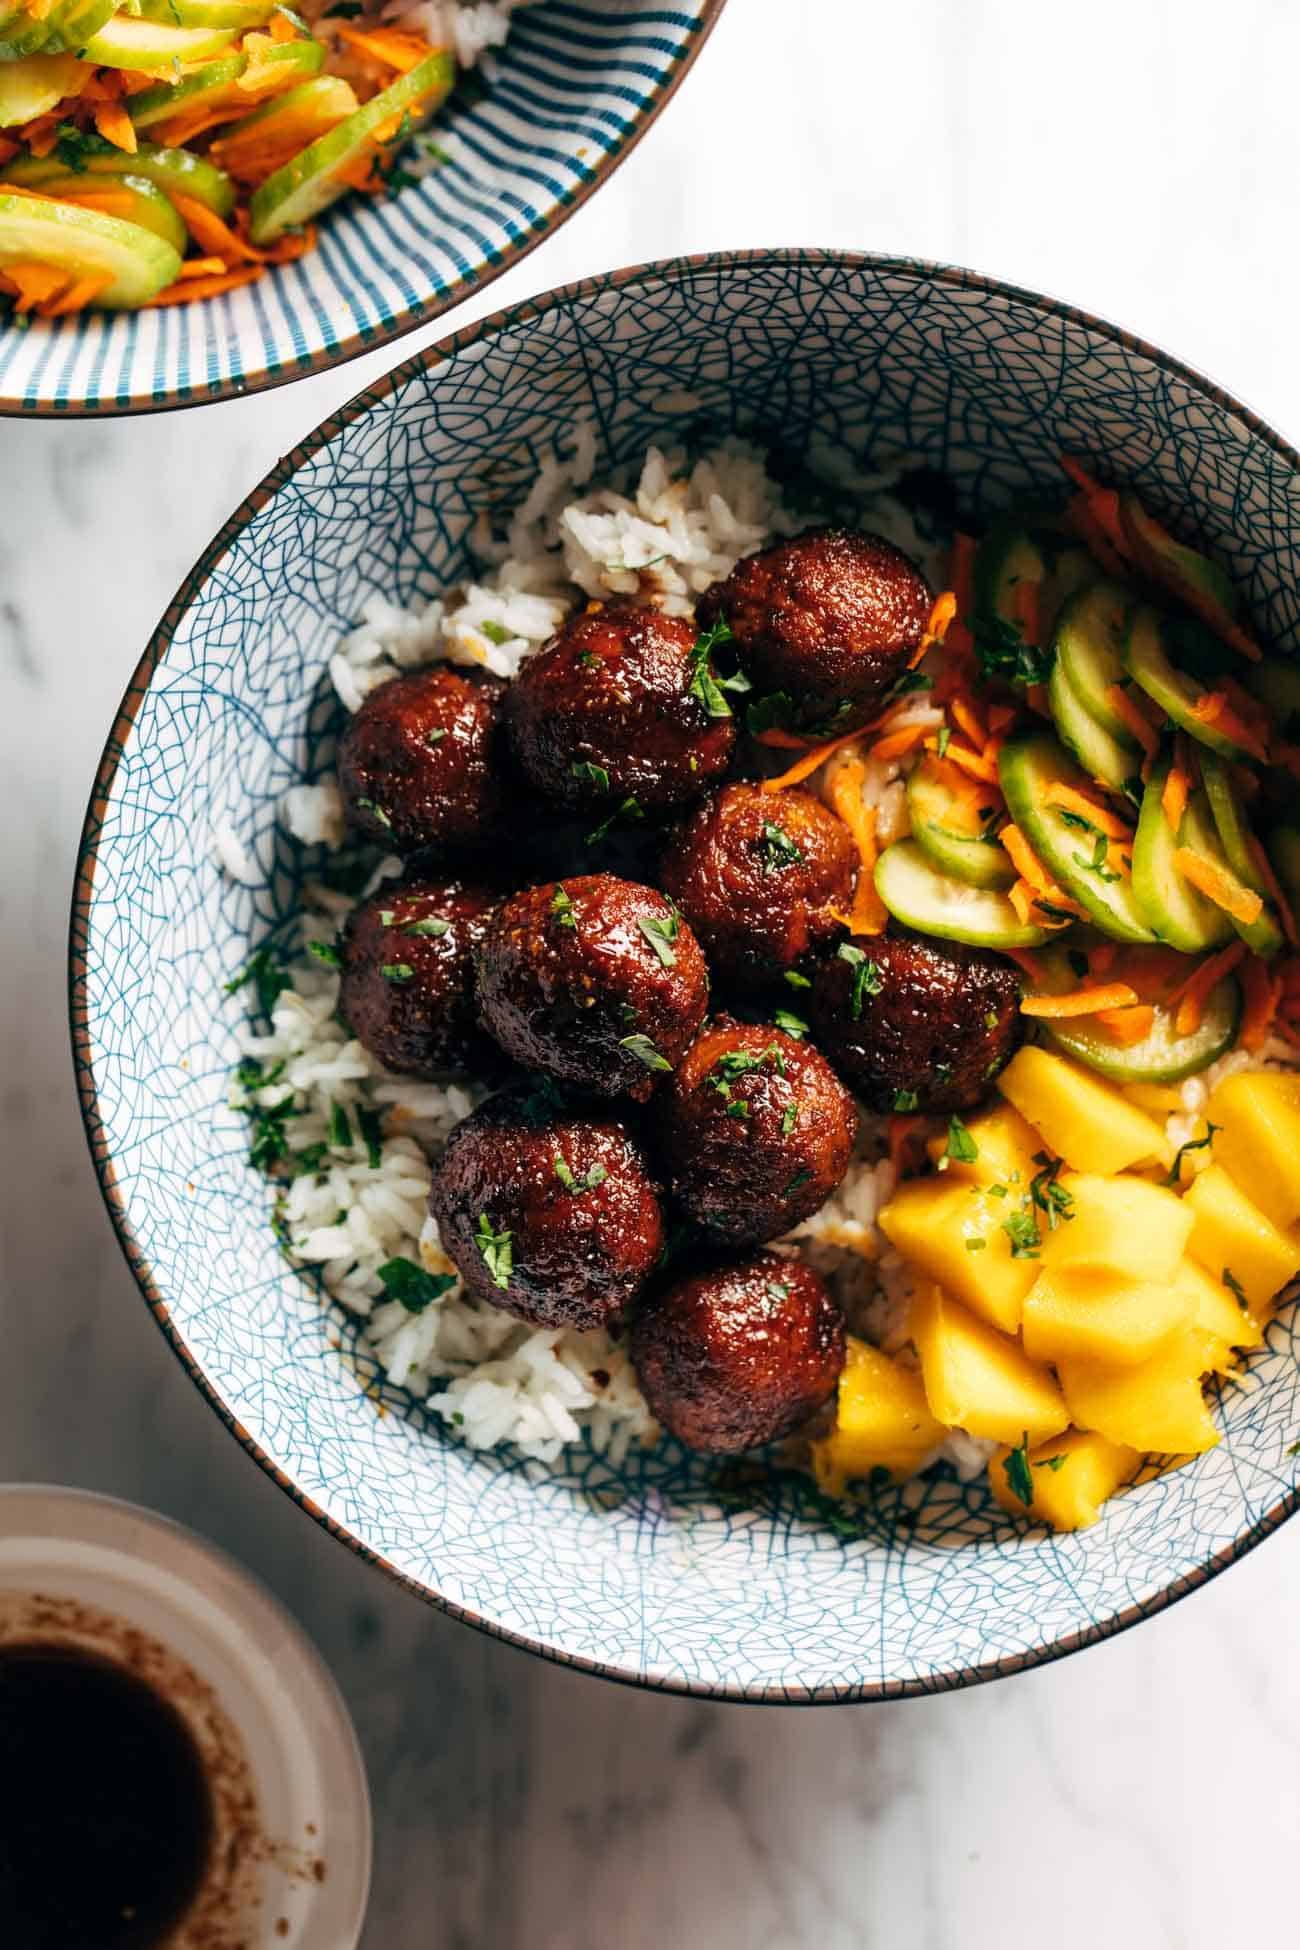
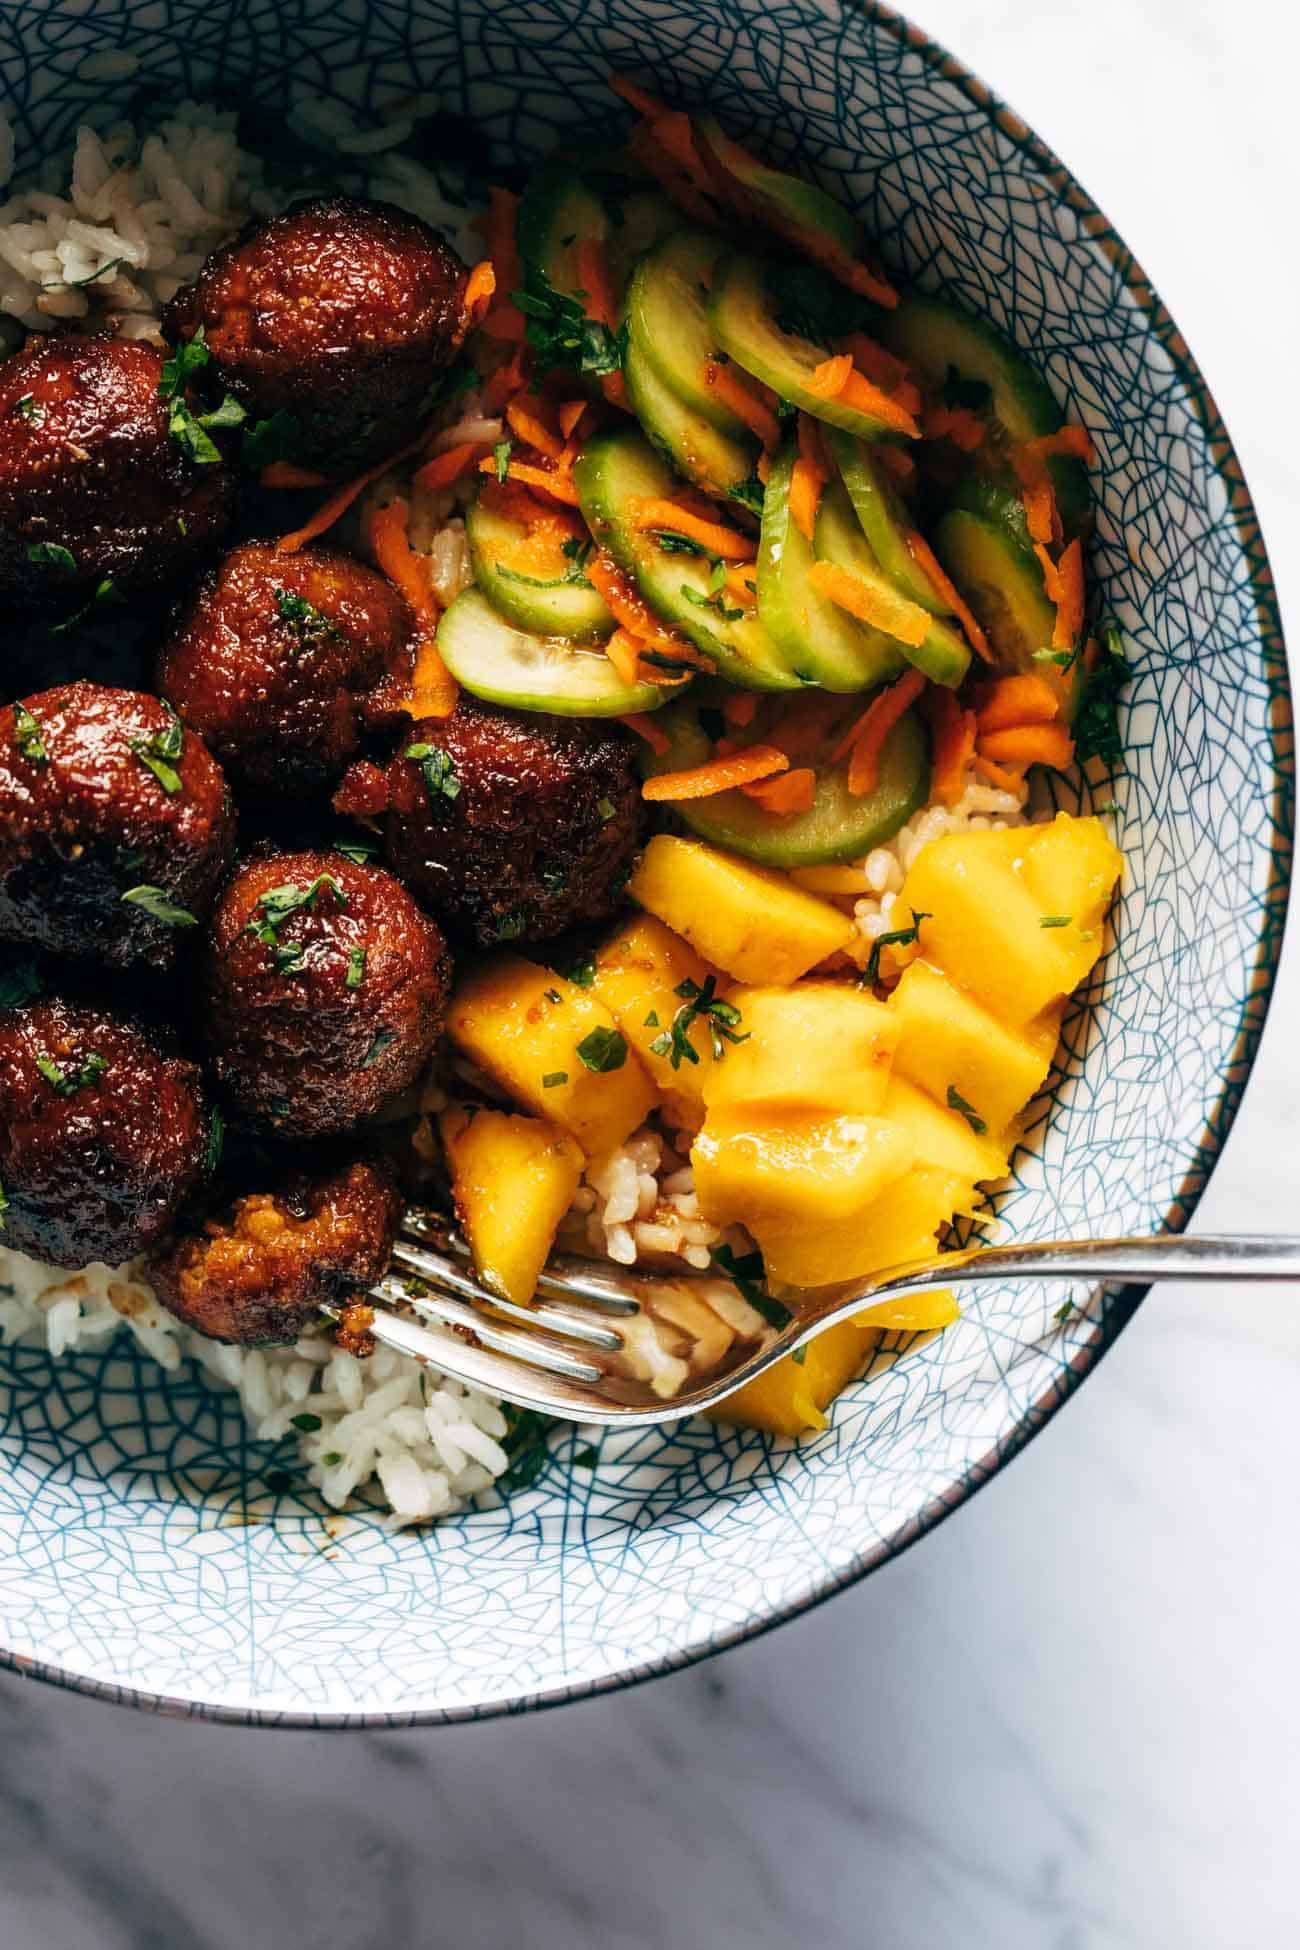
Sticky ginger rice bowls with pickled veg and mango in a bowl
This recipe is sponsored by ALDI

Let me tell you about something that I capital L-O-V-E love to eat.

It’s a sticky ginger rice bowl with hot white rice, sticky-sweet meatballs with a little bit of kick, crunchy quick pickled vegetables, and a fresh juicy ripe mango. Hello flavor, color, and texture. Hello happy, feel-good, full in my belly.

There’s Everything To Love About These Rice Bowls

In addition to being the thing I can’t stop eating lately, it’s also:

  • vegan (!!)
  • gingery and fresh
  • sticky and sweet
  • just a tiny bit spicy
  • the right amount of crispy-crunchy
  • juicy and fresh
  • and flexible to whatever protein or other vegetables you like.

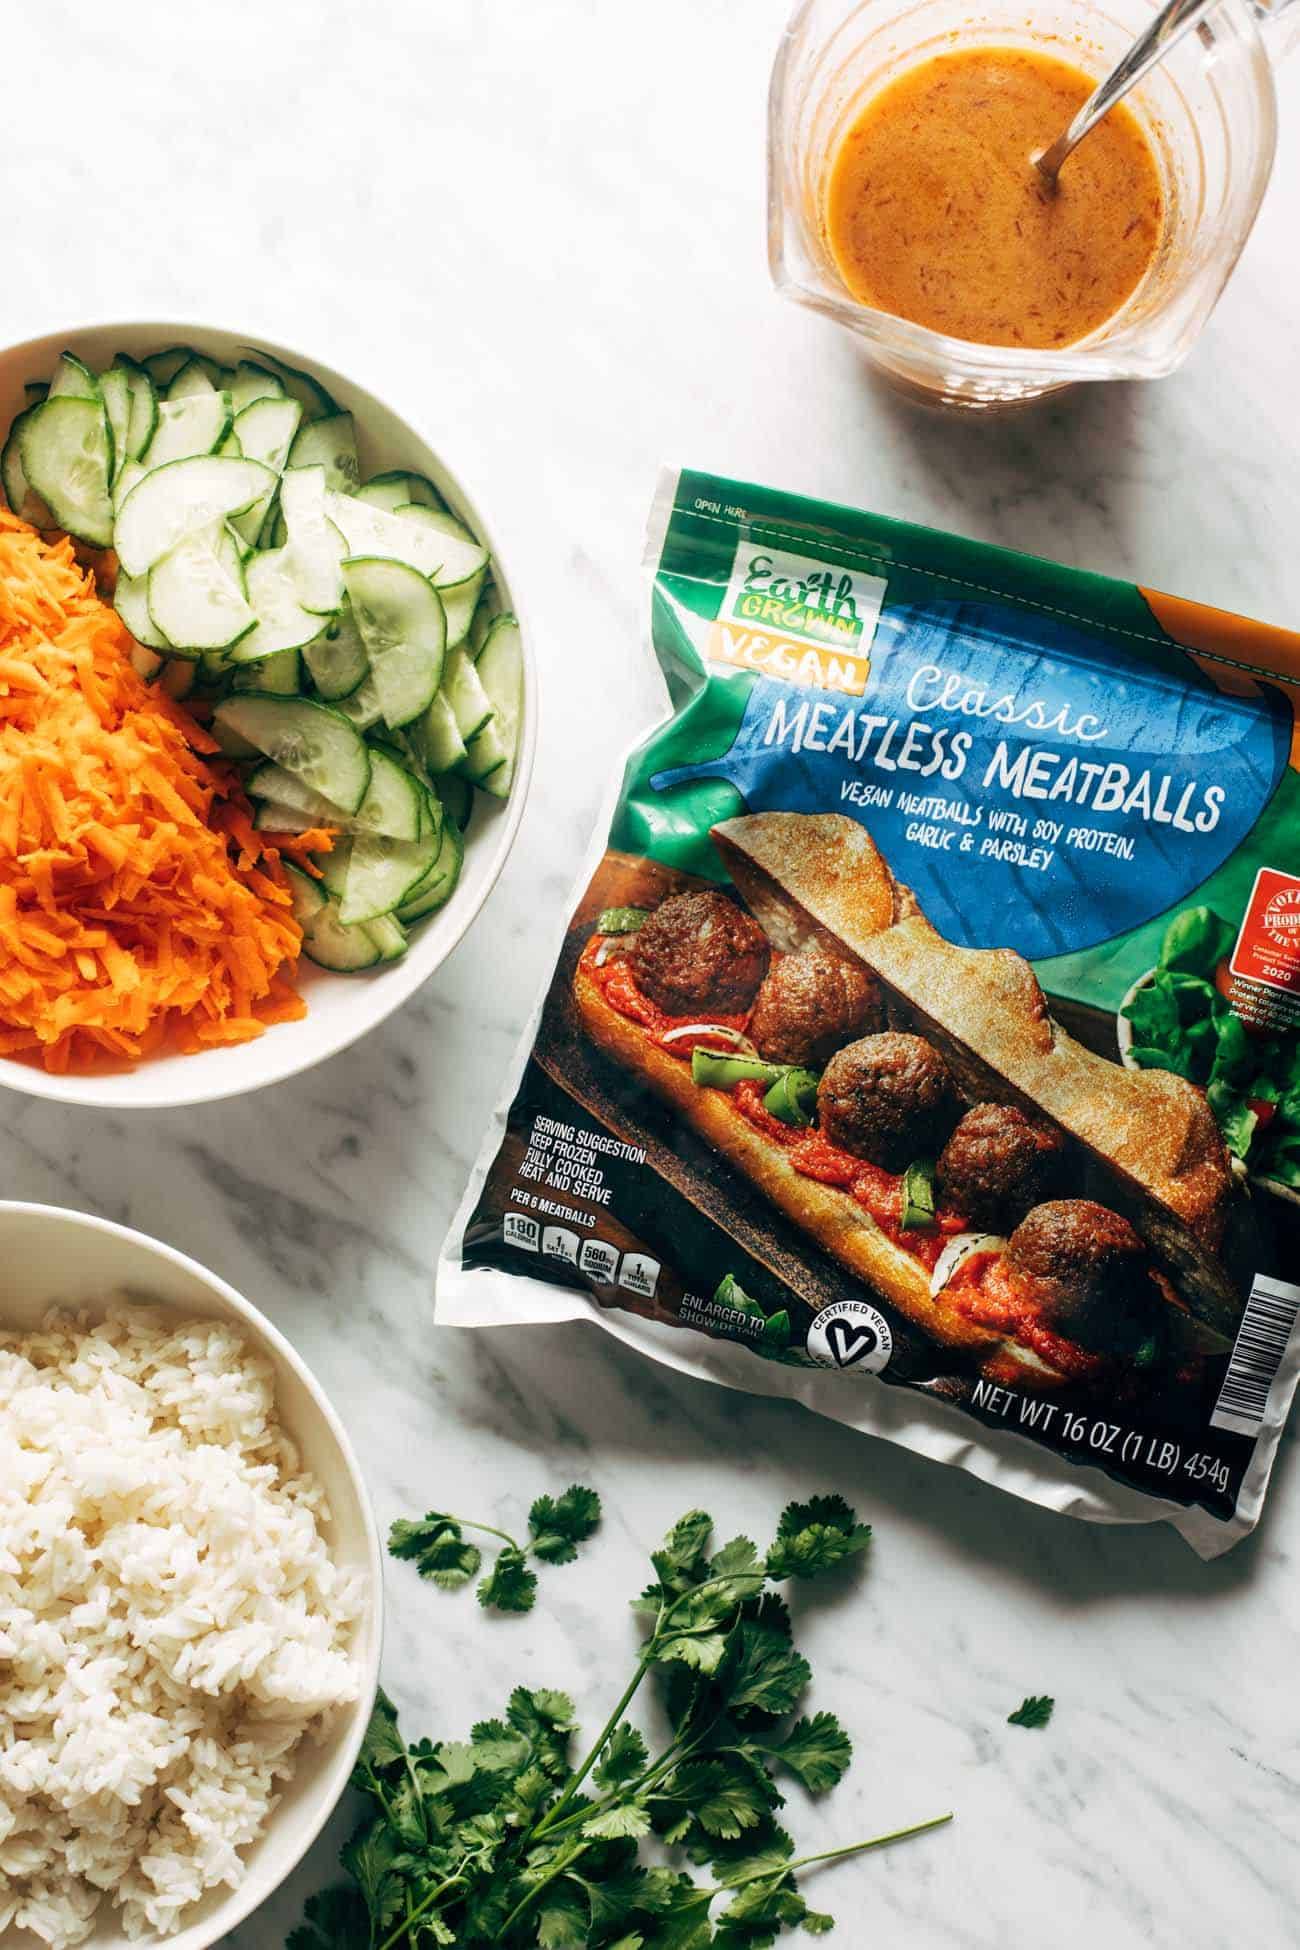
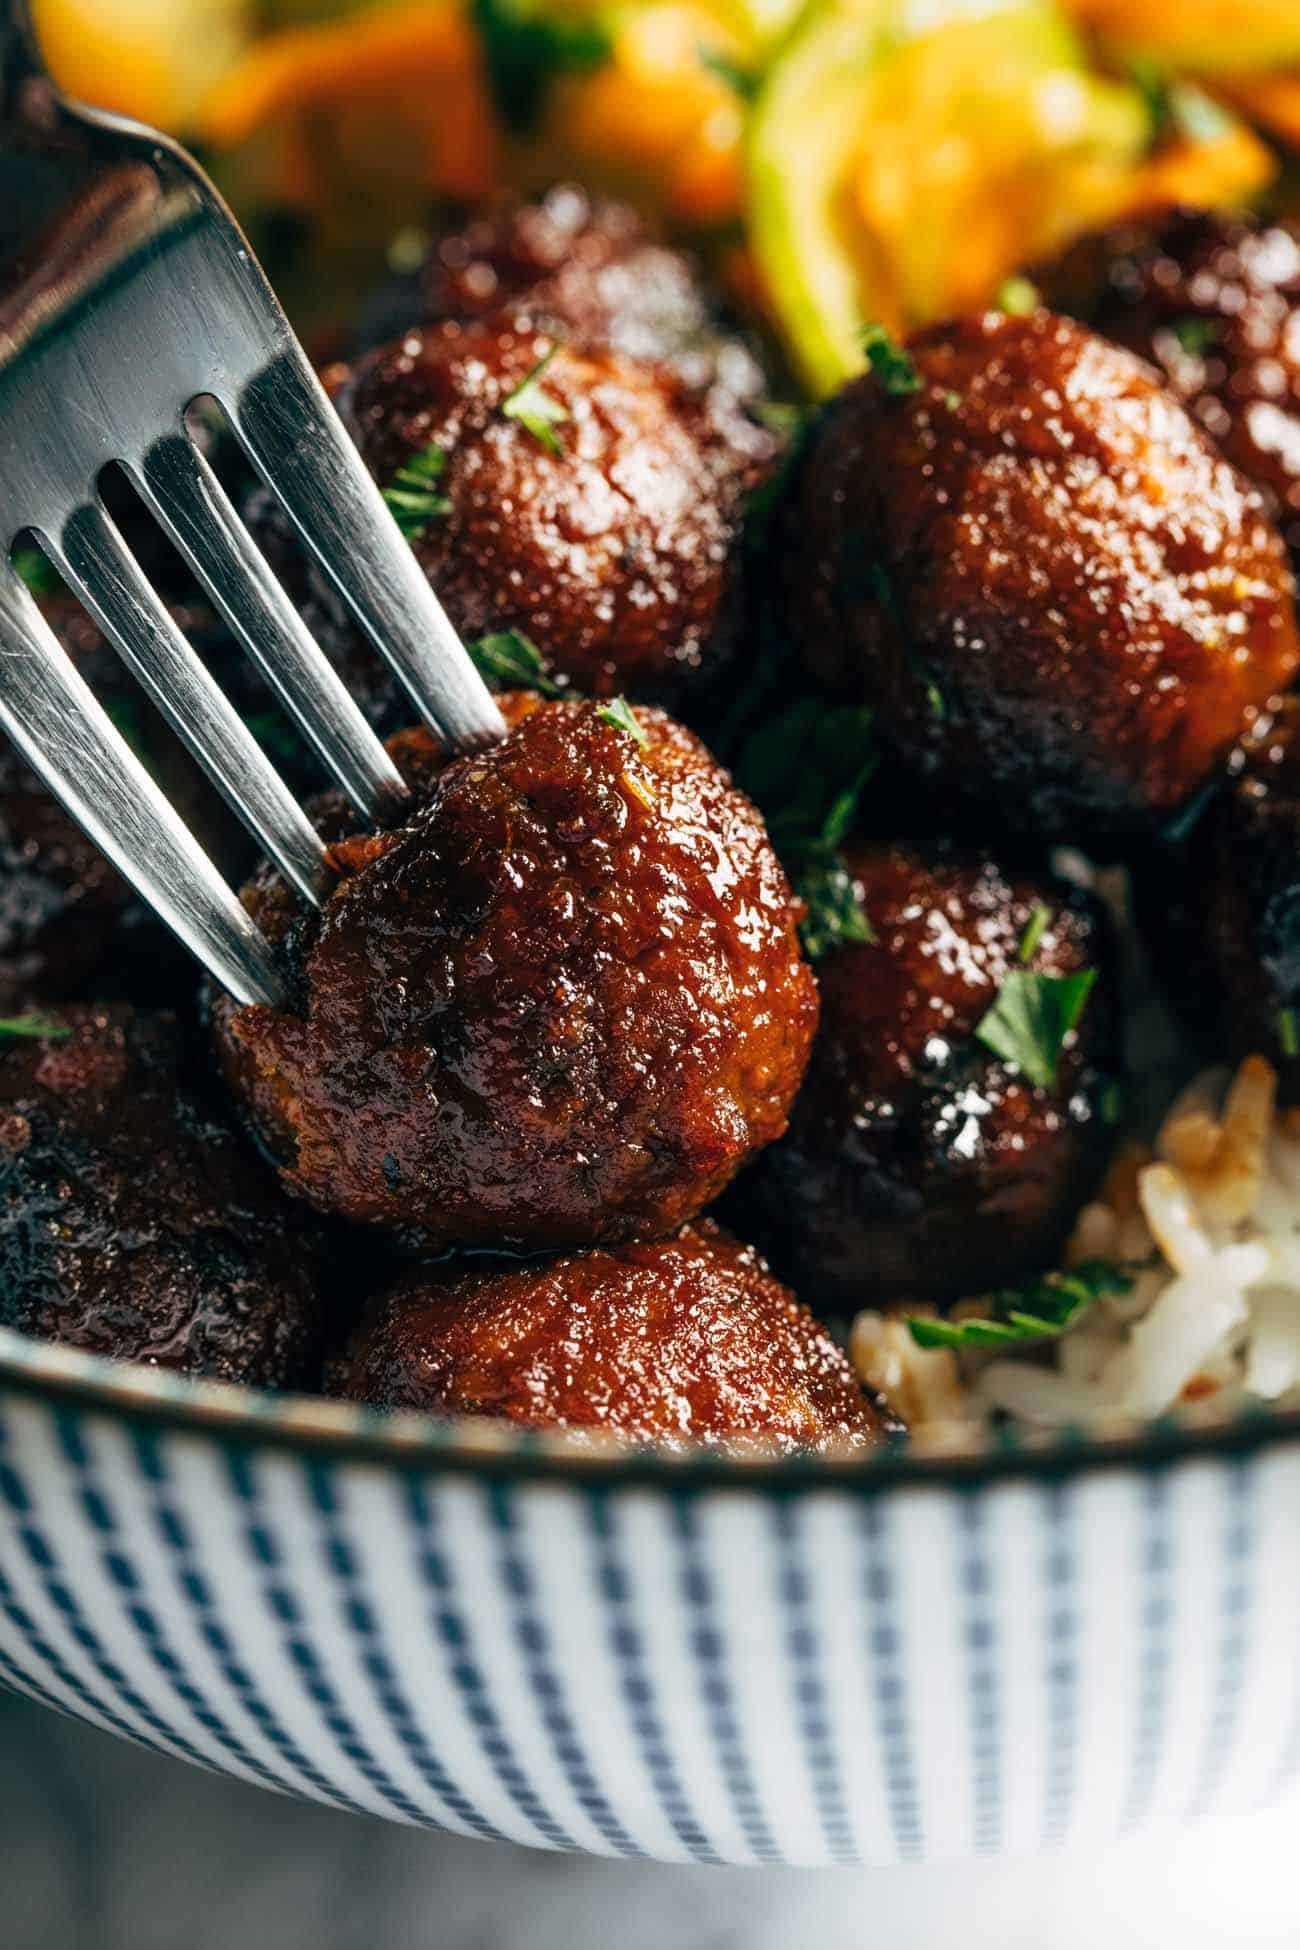
Speaking of protein, let’s chat for a moment about ALDI Earth Grown Vegan Meatless Meatballs.

When we did the shrimp and cauli rice recipe a few weeks ago, it sparked a conversation on Instagram stories about what you all love to buy from ALDI. Most of the things that you all said were things I already knew and loved: oat milk, cheeses, crackers, tofu, ground beef, seafood, etc.

But one thing that so many of you RAVED about that I had never tried were these meatless meatballs. So obviously, it was an add-to-cart moment for me.

AND OBVIOUSLY, THEY WERE AMAZING! You did not steer me wrong. And you are now responsible for my new obsession. This is on you right now.

Ingredients for Sticky Ginger Rice Bowls

Another good news item to report on the ALDI front: they are now carrying fresh ginger. Shout it from the rooftops! Fresh ginger at ALDI!

So we made this whole thing, totally vegan, including a sticky-sweet ginger-forward sauce using fresh ginger, all from ALDI. Boom. Affordable, practical, delicious. Couldn’t love it more.

Sticky ginger rice bowls with pickled veg and mango in a bowl

Completely Meatless and Vegan

The direct quote from Bjork after he took his first bite: “This is seriously vegan?”

Some of you POY readers are vegan all the time, and some are occasionally trying to eat less meat, and some are… curious? experimenting? with meatless options. Either way – if you are the kind of person who is not only proving to yourself that meatless really can taste awesome, but also working to get a spouse, partner, or child on that train with you, these meatballs (and this sweet-and-spicy sticky sauce, and those pickled veg, and that fresh juicy mango, omg omg omg) might just be your ticket to success.

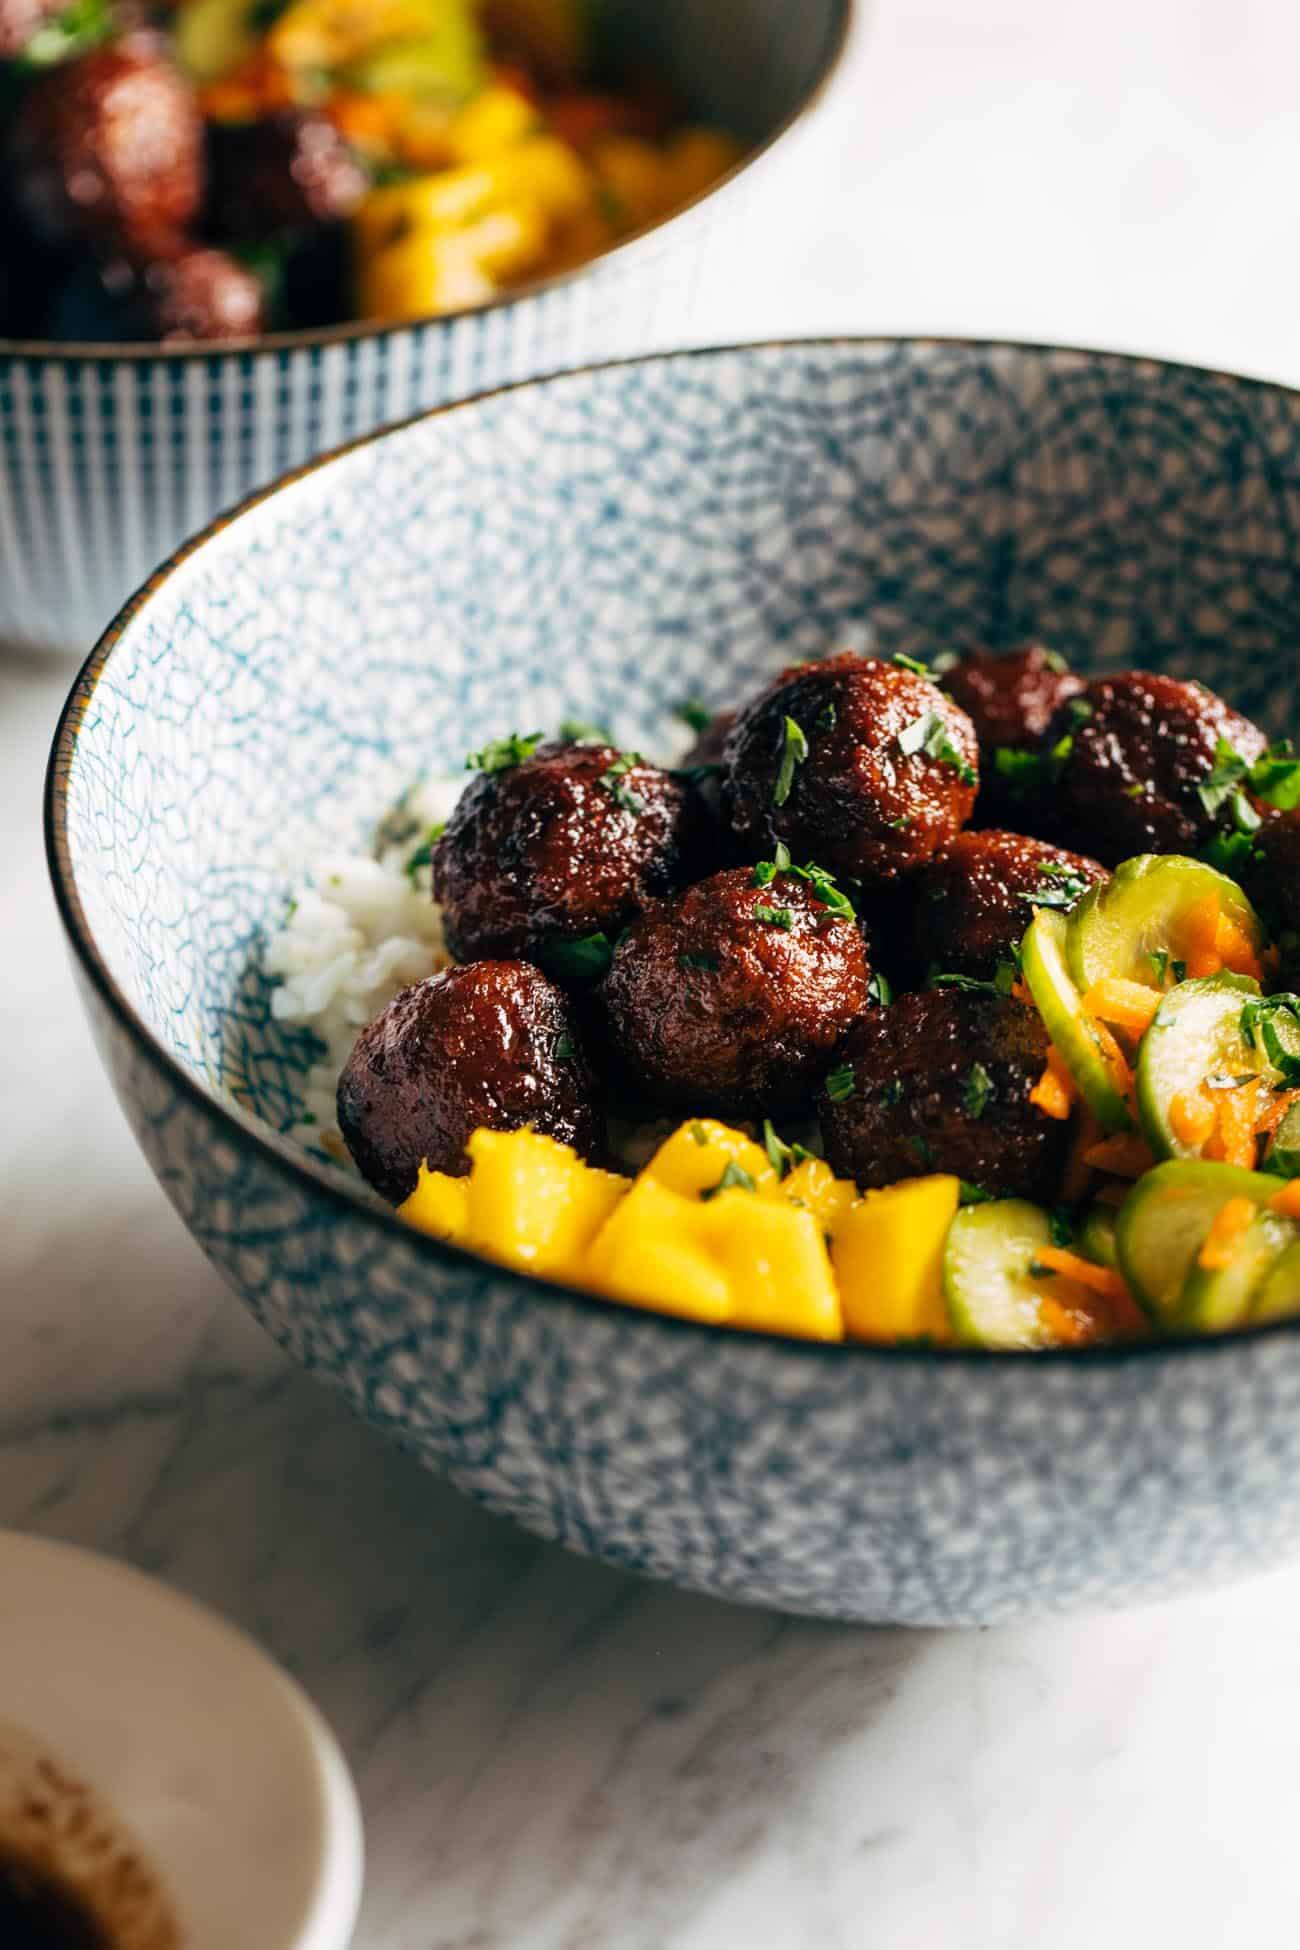
Sticky ginger rice bowls angle from the side

And if life seems a little SOS-y and you need to save this one for the weekend, should you then also buy the refrigerated tofu and vegetable dumplings from ALDI and pan-fry them and just straight dip them in a double batch of this sauce? Yes. You should. I can recommend.

Sticky ginger rice bowls with mango and pickled veg with a fork in a bowl

Sticky, delicious, meatless summery perfection.

I really love this recipe.

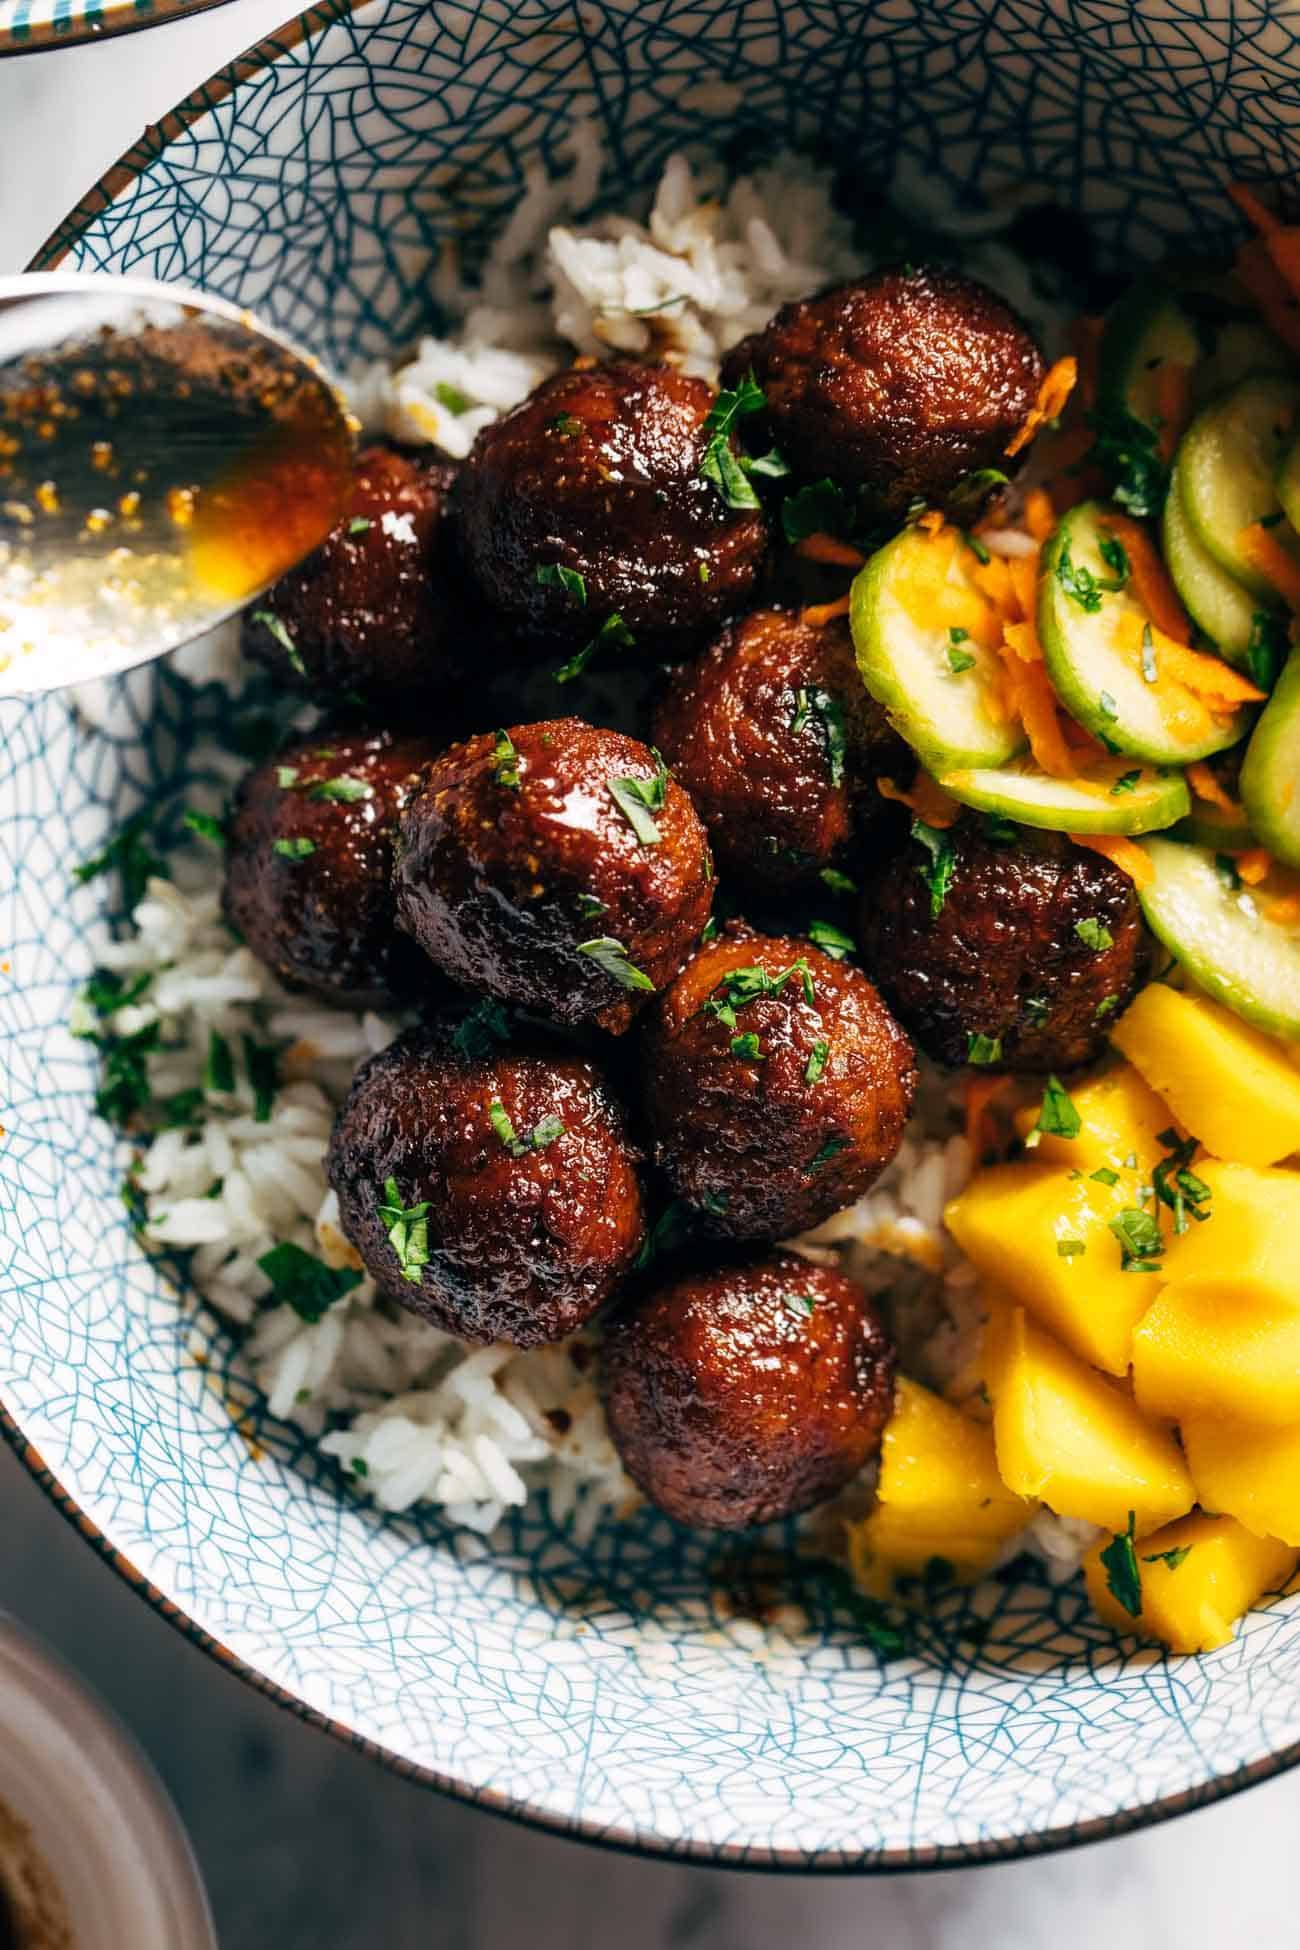
Close-up of meatless meatball

Sticky Ginger Rice Bowls: FAQs

This looks so good! Can this be made 100% vegan?

Totally! To make this 100% vegan, replace the honey with brown sugar, agave, or maple syrup.

How can I make my rice in the Instant Pot?

My standard rice method for the Instant Pot is 1 cup white rice combined with 1 1/4 cups water. Toss both in the Instant Pot on high pressure for 3 minutes. Allow for a natural pressure release (a.k.a. don’t let the steam out yet) for 15 minutes. Done!

Can I make these with regular meatballs?

Sure! This chicken meatballs recipe is SO GOOD. If you can’t find ground chicken, ground turkey will work. The Kirkwood Fresh Ground Turkey from ALDI is everything!

Print

Sticky Ginger Rice Bowls with Pickled Veg and Mango


  • Author: Lindsay
  • Prep Time: 20 minutes
  • Cook Time: 15 minutes
  • Total Time: 35 minutes
  • Yield: 4 servings

Description

You’re going to fall in LOVE with these Sticky Ginger Rice Bowls! It’s a sweet-meets-spicy sauce situation, flavorful meatballs, pickled veg, and mango on top. The perfect (vegan) summery meal! 


Ingredients

Sauce:

  • 1/4 cup Fusia Soy Sauce
  • 23 tablespoons Specially Selected Raw Honey
  • 2 tablespoons vinegar
  • 1 clove garlic
  • one 1-inch knob of fresh ginger
  • 1 tablespoon sambal oelek or Fusia Sriracha (more or less to taste for some heat)

Rice Bowls and Extras:

  • 1 1/2 cups uncooked white or jasmine rice
  • 2 carrots, shredded
  • 1 large cucumber, halved and sliced
  • just a lil bit of rice vinegar, oil, salt, and sugar
  • one 16-ounce bag Earth Grown Vegan Meatless Meatballs
  • 1 large mango, peeled and cubed
  • cilantro for topping

Instructions

  1. Make the rice: Cook rice according to package directions.
  2. Blend the sauce: Blend all sauce ingredients in a blender or food processor until smooth.
  3. Make the pickled veg: Toss your veggies with enough vinegar and oil to just barely coat. Season with salt and sugar. Voila – it’s a very low-key pickled vegetable salad.
  4. Cook the meatballs: Heat a large skillet over medium high heat. Add meatballs and most of the sauce. Sauté for 5-8 minutes, shaking the pan to move them around and coat them in sticky sauce until they are cooked through. (You can also cover the pan with a lid to speed up the cook time for the meatballs.)
  5. Assemble: Serve meatballs over rice with a scoop of the pickled veggies, mango, and a handful of cilantro. Spoon a little bit of extra sauce over the top. SO GOOD.
  • Category: Bowl
  • Method: Sauté
  • Cuisine: Asian-Inspired

Keywords: rice bowl, bowl recipe, vegetarian bowl recipe

Recipe Card powered by Tasty Recipes logo

Thank you to ALDI for sponsoring this post!

More Bowl Recipes We Love!

The post Sticky Ginger Rice Bowls with Pickled Veg and Mango appeared first on Pinch of Yum.


from Pinch of Yum https://ift.tt/3z6WREd